


Models
>
FMV145KB001
FMV145KB001 General Electric Range
Jump to:
Find Part by Name
Keep searches simple, eg. "belt" or "pump".
Keep searches simple, eg. "belt" or "pump".

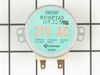
$19.90
This ceramic microwave fuse is just over an inch in length. It is white in the center, and metal on both ends. This is a 20-amp fuse, and is used to power your microwave. If the touch pad on the micro...
In Stock
Order now and your part arrives by Mar 23

In Stock
Order now and your part arrives by Mar 23

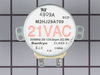
$39.09
This motor rotates the glass turntable in the microwave and accepts a D-shaped shaft.
In Stock
Order now and your part arrives by Mar 23

In Stock
Order now and your part arrives by Mar 23

This vent hood filter collects grease particles in the air from cooking. Sold individually.
No Longer Available

$76.95
This aluminum filter collects grease particles in the air from cooking. Sold individually.
In Stock
Order now and your part arrives by Mar 23


In Stock
Order now and your part arrives by Mar 23

In Stock
Order now and your part arrives by Mar 23

Questions and Answers
We're sorry, but our Q&A experts are temporarily unavailable.
Please check back later if you still haven't found the answer you need.
Common Problems and Symptoms for FMV145KB001
Viewing 6 of 6Won’t turn on
Fixed by these parts


How to fix it
No heat
Fixed by these parts

How to fix it
Tray won’t turn
Fixed by these parts
How to fix it
Touchpad does not respond
Fixed by these parts
How to fix it
Noisy
Fixed by these parts
How to fix it
Door not closing properly
Fixed by these parts

How to fix it


Keep searches simple. Use keywords, e.g. "leaking", "pump", "broken" or "fit".
- Customer:
- Kim from Cliffside Park, NJ
- Parts Used:
- WB27X10928
- Difficulty Level:
- Really Easy
- Total Repair Time:
- 15 - 30 mins
- Tools:
- Screw drivers
Microwave completely stopped working
Turned out the issue was easily solved by replacing a single, inexpensive fuse.
First off, UNPLUG THE MICROWAVE.
The fuse is located under the plastic grill at the top of the microwave. It's held on by two screws. Once you've removed the screws and taken off the plastic grill, you go to the right side of the mic ... Read more rowave and remove another screw that holds a small metal grill in place. Removing the small metal grill is probably the toughest part of this repair. You kind of have to rock it back and forth a bit to get it to release. Once that's off, you can get to the fuse. I removed the burnt out one with a pair of needle nose pliers. I also put a small piece of cardboard under the fuse when I did this so I didn't accidentally drop it into the innards of the microwave. I did the same thing when I replaced the new fuse. I then plugged the appliance back in and made sure it worked. Once that was confirmed, I replaced both grills.
Read less
Was this instruction helpful to you?
Thank you for voting!
- Customer:
- Jean-Christophe from Salisbury, MA
- Parts Used:
- WB2X9883, WB26X10038
- Difficulty Level:
- Easy
- Total Repair Time:
- 30 - 60 mins
- Tools:
- Screw drivers
turne table ot moving. Filter never changed
I had no idea what to expect. I was tired to see this turn table not moving. I removed the 7 screws at the bottom of the microwave that I thought was hiding the turn table mechanism. Bingo! I removed the 2 screws holding the motor and check if the power was coming to the motor and it was. The motor was cooked.
I decided to chang ... Read more e the filter since I was working on this. When I received it, and proceeded to change it, I found out that there was no filter. Finding the right position was a bit tricky. The most difficult part was to remove the front vent grille.
Don’t be shy, try it! Make sure, to disconnect the power when changing the filter.
Read less
Was this instruction helpful to you?
Thank you for voting!
- Customer:
- Kim from Centerville, GA
- Parts Used:
- WB26X10038
- Difficulty Level:
- Really Easy
- Total Repair Time:
- Less than 15 mins
- Tools:
- Screw drivers
The turntable motor went out and was making a horrible sound when I started the microwave
First I unplugged the microwave. :) Then, I removed the 6 screws found underneath the microwave, which allowed the bottom piece to hang down so I could see the turntable motor. I took the two screws out holding the motor in place and pulled the electric connectors off the motor terminals. Then I got the new part from PartSelect.com, repla
... Read more
ced the electrical commectors, fit the motor back into the slot it came from (cause the pin has to be seated up in the hole) and replaced the 2 screws holding in the motor. Then I put the bottom metal piece back up and put the 6 screws back in. It was really easy - and I'm a chick! ;)
Read less
Was this instruction helpful to you?
Thank you for voting!