



Models
>
JS760DP2WW
JS760DP2WW General Electric Range
Jump to:
Find Part by Name
Keep searches simple, eg. "belt" or "pump".
Diagrams for JS760DP2WW
Viewing 6 of 6


Keep searches simple, eg. "belt" or "pump".
$33.95
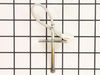
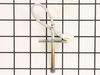
If your oven is running hot, not heating evenly, not coming up to temperature, or just not heating up at all, there may be an issue with the temperature sensor. This sensor is usually found in the bac...
In Stock
Order now and your part arrives by Sep 24
$21.95
This 40-Watt light bulb is sold individually.
It is specially designed to withstand extreme temperatures, so this bulb is compatible with a variety of appliance types including refrigerators, ranges,...
In Stock
Order now and your part arrives by Sep 24
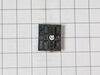
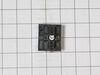
This control switch adjusts the heat level of your stove’s burner by cycling power based on your settings. It can help fix issues like overheating or burners not heating at all. Always disconnect powe...
Special Order
$178.85
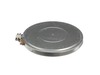
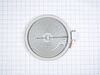
This is a replacement haliant element for your cooktop or range. It is used with flat top ranges, and is found under the glass top of the range. This element is approximately 12 inches in diameter and...
In Stock
Order now and your part arrives by Sep 24
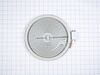
$120.02
If your stovetop isn’t heating evenly or has stopped working altogether, this dual ceramic burner might be the fix you need. It’s about 10 inches wide and includes two heating elements—one for larger ...
In Stock
Order now and your part arrives by Sep 24
On Order
$15.26
This part is the replacement light socket for your oven. The oven light socket provides power to the light, and at the same time holds the light bulb in place.
In Stock
Order now and your part arrives by Sep 24
In Stock
Order now and your part arrives by Sep 24
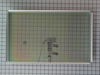
$355.32
This window pack assembly, also known as inner door glass, is supplied directly by the manufacturer for use in range ovens. It has measurements of approximately 22 inches by 14 inches. The inner door ...
In Stock
Order now and your part arrives by Sep 24
In Stock
Order now and your part arrives by Sep 24
$15.26
This part is a replacement screw for your oven. It is made of black metal and is sold individually. This screw is approximately 1/4 inch in diameter and about 1/2 inch in length. It is designed to con...
In Stock
Order now and your part arrives by Sep 24
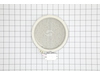
$115.09
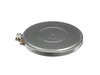
Designed for use with electric ranges, this surface element provides dependable heat to a specific burner area, helping you cook meals with precision and efficiency. Positioned under the cooktop surfa...
In Stock
Order now and your part arrives by Sep 24
Common Problems and Symptoms for JS760DP2WW
Viewing 6 of 6Element will not heat
Fixed by these parts
How to fix it
Little to no heat when baking
Fixed by these parts
How to fix it
Oven not heating evenly
Fixed by these parts
How to fix it
Oven is too hot
Fixed by these parts
How to fix it
Will Not Start
Fixed by these parts
How to fix it
Little to no heat when broiling
Fixed by these parts
How to fix it



Keep searches simple. Use keywords, e.g. "leaking", "pump", "broken" or "fit".
- Customer:
- Peter from stamford, CT
- Parts Used:
- WB21X22134
- Difficulty Level:
- Really Easy
- Total Repair Time:
- 15 - 30 mins
- Tools:
- Nutdriver
Oven would go in to a F2 Error
Removed six 1/4" hex nuts on rear of oven. Then through front/inside removed a single 1/4" hex nut to actually remove sensor. Unplug sensor connector, remove. Reversed steps, push oven back in place and plugged in. Tested oven function.
Was this instruction helpful to you?
Thank you for voting!
- Customer:
- Gerald from Cape Canaveral, FL
- Parts Used:
- WB21X22134
- Difficulty Level:
- Really Easy
- Total Repair Time:
- 15 - 30 mins
- Tools:
- Nutdriver
Oven wouldn't preheat above 300 degrees
Unplugged appliance and removed 5 screws on back of stove/oven and removed plate. Disconnected the sensor and unscrewed it on the inside of the oven. Pulled the cord through and replaced with new sensor. Replaced all parts and plugged in the appliance and tested. Worked great.
Was this instruction helpful to you?
Thank you for voting!
- Customer:
- Chad from Bloomington, IN
- Parts Used:
- WB21X22134
- Difficulty Level:
- Really Easy
- Total Repair Time:
- Less than 15 mins
- Tools:
- Screw drivers, Socket set, Wrench (Adjustable), Wrench set
I kept getting An F2 error and the temperature did not seem accurate
1) pull out the stove
2) remove the 7 sheet metal screws holding the back panel on. (the panel that also covers where the cord splits and connects to the oven.
3) Find the small plastic connector located in the middle of the back of the range and unplug it.
4) open the front of the oven and remove the one screw holding in ... Read more the oven temp sensor.
5) replace the sensor and make sure to "feed" the new cord through as best you can.
6) I had to dig through the insulation a little bit to find the new wiring harness
7) connect the wiring harness and put the back of the range back on
note: this was very simple to do if you think this might be the problem don't hesitate to handle this one yourself.
2) remove the 7 sheet metal screws holding the back panel on. (the panel that also covers where the cord splits and connects to the oven.
3) Find the small plastic connector located in the middle of the back of the range and unplug it.
4) open the front of the oven and remove the one screw holding in ... Read more the oven temp sensor.
5) replace the sensor and make sure to "feed" the new cord through as best you can.
6) I had to dig through the insulation a little bit to find the new wiring harness
7) connect the wiring harness and put the back of the range back on
note: this was very simple to do if you think this might be the problem don't hesitate to handle this one yourself.
Read less
Was this instruction helpful to you?
Thank you for voting!