


Models
>
JCBP84DPBB
JCBP84DPBB General Electric Range
Jump to:
Find Part by Name
Keep searches simple, eg. "belt" or "pump".
Diagrams for JCBP84DPBB
Viewing 6 of 6


Keep searches simple, eg. "belt" or "pump".

$51.97
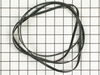
This 89.5-inch drive belt is for dryers. It has a 4-rib design on the inside for a better grip. If comparing the size of your current belt to the new one, keep in mind that a small amount of stretchin...
In Stock
Order now and your part arrives by Mar 26

$29.82
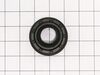
If your oven is running hot, not heating evenly, not coming up to temperature, or just not heating up at all, there may be an issue with the temperature sensor. This sensor is usually found in the bac...
In Stock
Order now and your part arrives by Mar 26

$31.88
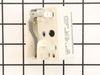
This push-to-start switch is a genuine OEM part and is used to activate your dryer. If your dryer will not start, or will only start if the switch is pushed down, or the timer knob is not engaging wit...
In Stock
Order now and your part arrives by Mar 26

$139.21
The electronic oven control board manages heating and temperature functions in wall ovens. Modified wiring may require professional installation. Unplug the oven or shut off the circuit breaker before replacing.
In Stock
Order now and your part arrives by Mar 26

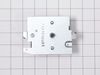
This infinite switch controls the heat level of a 6-inch, 1560-watt surface element by regulating power flow. It operates at 240 volts and helps maintain consistent temperatures. Replacing it can fix ...
In Stock
Order now and your part arrives by Mar 26

$71.35
This white plastic door handle is designed for use with dryers, offering a sturdy and reliable grip for opening and closing the appliance door. Measuring 9 inches in length and 2 inches in thickness, ...
In Stock
Order now and your part arrives by Mar 26

$14.65
TThe door strike for your dryer is mounted on the dryer frame that the door shuts onto. It fits into the door catch on the door and keeps the door closed. If the door strike is damaged or missing, the...
In Stock
Order now and your part arrives by Mar 26

$36.00
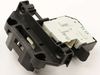
A door switch is a simple on/off mechanism that prohibits the dryer from operating when the door is open.
In Stock
Order now and your part arrives by Mar 26

$162.57
This is a replacement haliant element for your cooktop or range. It is used with flat top ranges, and is found under the glass top of the range. This element is approximately 12 inches in diameter and...
In Stock
Order now and your part arrives by Mar 26

$79.44
The door latch lid lock is to lock the door on your washer when the appliance is in use. Your washer will not start if your door is not locked. If your latch is broken, you may not be able to start a ...
In Stock
Order now and your part arrives by Mar 26

In Stock
Order now and your part arrives by Mar 26

$14.65
This part is the replacement light socket for your oven. The oven light socket provides power to the light, and at the same time holds the light bulb in place.
In Stock
Order now and your part arrives by Mar 26
Questions and Answers
We're sorry, but our Q&A experts are temporarily unavailable.
Please check back later if you still haven't found the answer you need.
Common Problems and Symptoms for JCBP84DPBB
Viewing 20 of 20Noisy
Fixed by these parts


How to fix it
Element will not heat
Fixed by these parts


How to fix it
Drum Not Spinning
Fixed by these parts
How to fix it
Little to no heat when baking
Fixed by these parts

How to fix it
Won’t Start
Fixed by these parts


How to fix it
Door won’t close
Fixed by these parts


How to fix it
Touchpad does not respond
Fixed by these parts
How to fix it
Will Not Start
Fixed by these parts
How to fix it
Oven not heating evenly
Fixed by these parts
How to fix it
Oven is too hot
Fixed by these parts
How to fix it
Leaking
Fixed by these parts


How to fix it
Will not drain
Fixed by these parts
How to fix it
Will not program
Fixed by these parts
How to fix it
Little to no heat when broiling
Fixed by these parts
How to fix it
Locking Issues
Fixed by these parts
How to fix it
Timer will not advance
Fixed by these parts
How to fix it
Timer Not Working
Fixed by these parts
How to fix it
Door Pops Open
Fixed by these parts
How to fix it
Lid or door won’t close
Fixed by these parts
How to fix it
Heat stays on after drum has stopped
Fixed by these parts
How to fix it


Keep searches simple. Use keywords, e.g. "leaking", "pump", "broken" or "fit".
- Customer:
- Adrian from Middletown, MD
- Parts Used:
- WE03X29897
- Difficulty Level:
- A Bit Difficult
- Total Repair Time:
- 30 - 60 mins
- Tools:
- Screw drivers
Drum belt broke
Removed the front Dryer panel. Left drum in place and lifted it up slightly to get access to motor drive. Slipped belt in place and put panel back on.
This was a first attempt ever at fixing an appliance and it was no big deal.
This was a first attempt ever at fixing an appliance and it was no big deal.
Was this instruction helpful to you?
Thank you for voting!
- Customer:
- Peter from stamford, CT
- Parts Used:
- WB21X22134
- Difficulty Level:
- Really Easy
- Total Repair Time:
- 15 - 30 mins
- Tools:
- Nutdriver
Oven would go in to a F2 Error
Removed six 1/4" hex nuts on rear of oven. Then through front/inside removed a single 1/4" hex nut to actually remove sensor. Unplug sensor connector, remove. Reversed steps, push oven back in place and plugged in. Tested oven function.
Was this instruction helpful to you?
Thank you for voting!
- Customer:
- Joshua from Dallas, TX
- Parts Used:
- WE4M415
- Difficulty Level:
- A Bit Difficult
- Total Repair Time:
- 1- 2 hours
- Tools:
- Pliers, Screw drivers, Socket set
Dryer would not start
The end repair was very simple and took minimal effort. The time and difficulty was all in the testing. I disassembled the dryer and removed the drum and then hard wired each thermo-fuse to determine where the fault was. After test all of those I was stumped. When I opened the door the light would not come on so I assumed it was a pow
... Read more
er fault closer to the source. However after all of my testing I couldn't find anything wrong. I then removed the light bulb and realized it was burned out which led me to the door switch being the fault. I removed the switch and soldered the three wire together and the dryer started right up! All I had to do was order a new $15 part, unsolder the wires and plug them in. Would have been so much simpler if that light bulb hadn't of been burned out causing me to over think my diagnosis. This was my first major appliance repair and I did it with only the help of the parts diagram provided on the website.
Read less
Was this instruction helpful to you?
Thank you for voting!