



Models
>
JGBP35GXH3WW
JGBP35GXH3WW General Electric Range
Jump to:
Find Part by Name
Keep searches simple, eg. "belt" or "pump".
Diagrams for JGBP35GXH3WW
Viewing 4 of 4


Manuals & Guides for JGBP35GXH3WW
Click to downloadKeep searches simple, eg. "belt" or "pump".
$21.95
This 40-Watt light bulb is sold individually.
It is specially designed to withstand extreme temperatures, so this bulb is compatible with a variety of appliance types including refrigerators, ranges,...
In Stock
Order now and your part arrives by Oct 10
$70.95
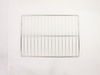
If the racks in your oven have become discolored, or if you need a spare, this is a genuine OEM replacement. The rack is used to hold cookware in the oven, and slides in and out of the oven for easy a...
In Stock
Order now and your part arrives by Oct 10
In Stock
Order now and your part arrives by Oct 10
$15.26
This part is the replacement light socket for your oven. The oven light socket provides power to the light, and at the same time holds the light bulb in place.
In Stock
Order now and your part arrives by Oct 10
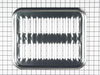
$43.92
This is a broiler pan for your range. It catches drippings from the cookware, when broiling in the oven. This assembly includes the grill/grate and the bottom pan. These parts are made of porcelain. T...
In Stock
Order now and your part arrives by Oct 10
Special Order
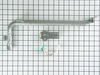
$186.90
The igniter does not come with wire nuts. *** Please NOTE: The igniter connector may need to be cut off and wires spliced to the range wiring with the porcelain wire nuts.
On Order
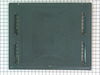
This bottom oven and deflector assembly is a durable metal panel designed to fit beneath the oven floor, protecting the bake element from spills while promoting even heat distribution for consistent c...
In Stock
Order now and your part arrives by Oct 10
In Stock
Order now and your part arrives by Oct 10
$16.45
This right-side drawer glider allows smooth and stable drawer movement. Designed for durability and precise alignment, it supports effortless opening and closing.
On Order

Special Order
In Stock
Order now and your part arrives by Oct 10
Common Problems and Symptoms for JGBP35GXH3WW
Viewing 4 of 4Little to no heat when baking
Fixed by these parts
How to fix it
Oven not heating evenly
Fixed by these parts
How to fix it
Door won’t close
Fixed by these parts
How to fix it
Gas igniter glows, but will not light
Fixed by these parts
How to fix it

Keep searches simple. Use keywords, e.g. "leaking", "pump", "broken" or "fit".
- Customer:
- Marjorie from Yucca Valley, CA
- Parts Used:
- WB35X37973
- Difficulty Level:
- Really Easy
- Total Repair Time:
- Less than 15 mins
- Tools:
- Screw drivers
Pies Boiled Over And Baked On Oven Bottom
Removed the two screws put the heat shield off the old one onto the new one put new bottom in and tightened two screws. Done #38. 69 Cost of part with shipping cost included.
Was this instruction helpful to you?
Thank you for voting!
- Customer:
- Matthew from Goshen, IN
- Parts Used:
- WB16K10035
- Difficulty Level:
- Easy
- Total Repair Time:
- 30 - 60 mins
- Tools:
- Pliers, Wrench set
Oven burner was burned out, wouldn't light
Pull plug and shut off gas! The lower oven burner is held in with two rear and one front screws. I removed the top floor of the oven (two hand tightened screws at the back), the bottom drawer, and the front door (just lift it off the hinges). This allowed me to access the burner, and I removed it by unscrewing the three screws, unhitching
... Read more
the igniter connector, and lifting the burner and igniter up and out. I connected the new igniter on the new burner before installing it in the oven, and found that the connector did not match (I was warned about this possibility on the PartSelect site), but instead of splicing the wires together, I cut off the connector on the new igniter and replaced it with the connector of the old igniter. Then I screwed the burner into the oven, recoupled the connector, replaced the floor, drawer, and door, and I was done! It took about 45 minutes.
Read less
Was this instruction helpful to you?
Thank you for voting!
- Customer:
- Patricia from Houston, TX
- Parts Used:
- WB48T10095
- Difficulty Level:
- Really Easy
- Total Repair Time:
- Less than 15 mins
Oven rack missing when I purchased the house
I was very pleased with how quickly the new oven rack arrived and it was a perfect fit. Thanks.
Was this instruction helpful to you?
Thank you for voting!