


Models
>
1J501-1N2
1J501-1N2 General Electric Range
Jump to:
Find Part by Name
Keep searches simple, eg. "belt" or "pump".
Keep searches simple, eg. "belt" or "pump".

In Stock
Order now and your part arrives by Jul 31

Special Order


Common Problems and Symptoms for 1J501-1N2
Viewing 5 of 5Little to no heat when baking
Fixed by these parts
How to fix it
Element will not heat
Fixed by these parts
How to fix it
Oven not heating evenly
Fixed by these parts
How to fix it
Will Not Start
Fixed by these parts
How to fix it
Oven is too hot
Fixed by these parts
How to fix it
Keep searches simple. Use keywords, e.g. "leaking", "pump", "broken" or "fit".
- Customer:
- Carlos from Southaven, MS
- Parts Used:
- WB44X5099
- Difficulty Level:
- Really Easy
- Total Repair Time:
- Less than 15 mins
- Tools:
- Nutdriver
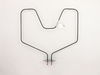
The lower bake element burned out.
First I removed the two screws that hold the element in place. I then pulled the element out about 3 inches and disconnected the two wires, reconnected the wires to the new element, reattached it to the oven and voila!
It worked. What was really cool, once I ordered the part, I received it in only two work days!
Goo ... Read more d job folks!
It worked. What was really cool, once I ordered the part, I received it in only two work days!
Goo ... Read more d job folks!
Read less
Was this instruction helpful to you?
Thank you for voting!
- Customer:
- Phillip from Greeneville, TN
- Parts Used:
- WB44X5099
- Difficulty Level:
- Really Easy
- Total Repair Time:
- Less than 15 mins
- Tools:
- Nutdriver
Replaced lower element in GE Spectra range.
Hardest part was getting the wrong element and having to send it back and reordering correct one....too many variables. Two screws inside the oven removed, pull out range and take off back and attach new element to plug ins!
Was this instruction helpful to you?
Thank you for voting!
- Customer:
- David from Baton Rouge, LA
- Parts Used:
- WB44X5099
- Difficulty Level:
- Really Easy
- Total Repair Time:
- Less than 15 mins
- Tools:
- Screw drivers
Old element burned through. Sparks were flying!
Turned off power at breaker panel. Removed 2 screws attaching element to stove. Pulled element out a couple of inches and removed 2 wires attached with screws. Installation is reverse order of removal.
Be careful not to twist the terminal ends when tightening screws.
shipping was very fast!
Be careful not to twist the terminal ends when tightening screws.
shipping was very fast!
Was this instruction helpful to you?
Thank you for voting!