



Models
>
J786Y1
J786Y1 General Electric Range
Jump to:
Find Part by Name
Keep searches simple, eg. "belt" or "pump".
Keep searches simple, eg. "belt" or "pump".
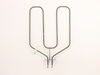
$45.00
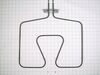
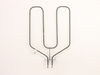
This is an OEM authorized screw-on broil element for a range. It is inside the oven on the top, where it supplies heating for broiling. A few reasons it might be replaced include: no heating coming fr...
In Stock
Order now and your part arrives by Oct 1
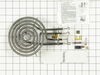
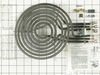
This genuine 6-inch surface heating element provides the heat needed for cooking on compatible electric ranges and cooktops. Designed with a tilt-lock hinge mounting system, it delivers consistent hea...
In Stock
Order now and your part arrives by Oct 1
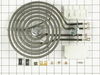
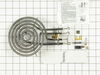
This tilt lock hinge mounted surface element kit includes an 8 inch element, three wire, 2450 watt surface element, and a terminal block with all three-wire units. These high rise elements do not come...
In Stock
Order now and your part arrives by Oct 1
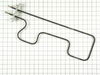
$99.66
The depth of the terminals is 2.5 inches, and the screw-in terminals are 1.5 inches apart.
Special Order
Special Order

Common Problems and Symptoms for J786Y1
Viewing 5 of 5Little to no heat when broiling
Fixed by these parts
How to fix it
Element will not heat
Fixed by these parts
How to fix it
Little to no heat when baking
Fixed by these parts
How to fix it
Oven not heating evenly
Fixed by these parts
How to fix it
Will Not Start
Fixed by these parts
How to fix it
Keep searches simple. Use keywords, e.g. "leaking", "pump", "broken" or "fit".
- Customer:
- Richard from Vestal, NY
- Parts Used:
- WB44X173
- Difficulty Level:
- Easy
- Total Repair Time:
- 30 - 60 mins
- Tools:
- Nutdriver, Screw drivers, Socket set, Wrench set
Broiler Element Burned Out
Successful repair to Our GE range, manufactured prior to 1965 (when installed in house). Pulled range from wall, unplugged, removed burned-out broiler element. Previous check with GE to make cross reference of range part number to Part-select part number for this nearly 50-year-old range. Obtained new part and installed. Works. Range has
... Read more
self-cleaning oven, accidentally destroyed thermal switch attached to element mounting bracket, difficulty with frozen mounting nut. Self-cleaning still works; thermal switch locks out a solenoid which defeats door latch; prevents premature opening of oven door when oven too hot to open safely. Internet search did not find GE part but there are generic devices of the same type available; will consider installation later.
Read less
Was this instruction helpful to you?
Thank you for voting!
- Customer:
- John D. from Thousand Oaks, CA
- Parts Used:
- WB44X195
- Difficulty Level:
- Easy
- Total Repair Time:
- 15 - 30 mins
- Tools:
- Nutdriver, Pliers
The lower bake element in the upper oven burnt out.
In order to determine what was wrong with the oven I used a voltage meter to determine if power was coming to the element in the first place. Be careful to set your meter at least 500 ACV, as the oven is operating at 240V. Remove the two screws that hold the element in place and carefully pull it out of the side of the oven. Turn on t
... Read more
he bake element in the upper oven and place your test leads to either side of the connection leads. If you get a reading of 240Volts plus or minus you will know for sure the element is bad.
Turn off the oven, or even better turn off the circuit breaker to your stove.
There are two leads to the element that are held in place by self taping screws. If you have the same luck I have they will be corroded together. Carefully use long nose pliers to hold steady while gently applying pressure. If necessary use liquid wrench. When separated put together in the reverse order as how you took it apart.
Turn off the oven, or even better turn off the circuit breaker to your stove.
There are two leads to the element that are held in place by self taping screws. If you have the same luck I have they will be corroded together. Carefully use long nose pliers to hold steady while gently applying pressure. If necessary use liquid wrench. When separated put together in the reverse order as how you took it apart.
Read less
Was this instruction helpful to you?
Thank you for voting!
- Customer:
- Parker from Blanchester, OH
- Parts Used:
- WB44X173
- Difficulty Level:
- A Bit Difficult
- Total Repair Time:
- 15 - 30 mins
- Tools:
- Screw drivers, Socket set
Broiler Element quit working
First I removed the two screws in the back. then I removed the two screws attached to the brace at the top. pulled the old element out. Removed the screws that attatced the wires to the element. Attached the wires to the new element. Pushed the wires back in. Pushed the element in and attached the screws. Reattached the support. Turned on
... Read more
the broiler. The element smoked for a few seconds before getting red hot. It is working fine.
Read less
Was this instruction helpful to you?
Thank you for voting!