



Models
>
JHP67G0V2AD
JHP67G0V2AD General Electric Range
Jump to:
Find Part by Name
Keep searches simple, eg. "belt" or "pump".
Keep searches simple, eg. "belt" or "pump".
$13.95
This trim ring is an authentic OEM replacement part for your range. It serves as a decorative trim to the drip bowls found under the burner elements. The part will need to be replaced if it has become...
In Stock
Order now and your part arrives by Sep 28
$17.44
This 8-inch trim ring is a genuine OEM replacement part for your range. It sits around the surface burner elements for the style of ranges with low rise tilt lock burners. You may need to replace the ...
In Stock
Order now and your part arrives by Sep 28
In Stock
Order now and your part arrives by Sep 28
This part fits most ranges where a ceramic terminal block is used.
In Stock
Order now and your part arrives by Sep 28
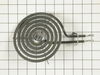
$49.29
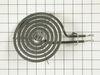
This 6-inch stove surface element features a durable coil design that delivers steady, reliable heat for everyday cooking. It’s an ideal replacement when a burner no longer heats properly or warms une...
On Order
$99.66
The depth of the terminals is 2.5 inches, and the screw-in terminals are 1.5 inches apart.
Special Order

On Order
Common Problems and Symptoms for JHP67G0V2AD
Viewing 2 of 2Element will not heat
Fixed by these parts
How to fix it
Little to no heat when baking
Fixed by these parts
How to fix it
Keep searches simple. Use keywords, e.g. "leaking", "pump", "broken" or "fit".
- Customer:
- John D. from Thousand Oaks, CA
- Parts Used:
- WB44X195
- Difficulty Level:
- Easy
- Total Repair Time:
- 15 - 30 mins
- Tools:
- Nutdriver, Pliers
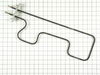
The lower bake element in the upper oven burnt out.
In order to determine what was wrong with the oven I used a voltage meter to determine if power was coming to the element in the first place. Be careful to set your meter at least 500 ACV, as the oven is operating at 240V. Remove the two screws that hold the element in place and carefully pull it out of the side of the oven. Turn on t
... Read more
he bake element in the upper oven and place your test leads to either side of the connection leads. If you get a reading of 240Volts plus or minus you will know for sure the element is bad.
Turn off the oven, or even better turn off the circuit breaker to your stove.
There are two leads to the element that are held in place by self taping screws. If you have the same luck I have they will be corroded together. Carefully use long nose pliers to hold steady while gently applying pressure. If necessary use liquid wrench. When separated put together in the reverse order as how you took it apart.
Turn off the oven, or even better turn off the circuit breaker to your stove.
There are two leads to the element that are held in place by self taping screws. If you have the same luck I have they will be corroded together. Carefully use long nose pliers to hold steady while gently applying pressure. If necessary use liquid wrench. When separated put together in the reverse order as how you took it apart.
Read less
Was this instruction helpful to you?
Thank you for voting!
- Customer:
- Rita from Buda, TX
- Parts Used:
- WB44X195
- Difficulty Level:
- Really Easy
- Total Repair Time:
- Less than 15 mins
- Tools:
- Screw drivers
The bake elment was over 25 years old when it cracked and burned out.
Turned off the electricity to the ovens. Unscrewed the two screws holding the old bake element. Removed the old one by disconnecting the two wires and replaced the new element in it's place.
Was this instruction helpful to you?
Thank you for voting!
- Customer:
- William from Murrysville, PA
- Parts Used:
- WB30X218
- Difficulty Level:
- Really Easy
- Total Repair Time:
- Less than 15 mins
Open circuit in the surface element
Plug-in new element
Was this instruction helpful to you?
Thank you for voting!