This 40-watt light bulb has a standard screw-in base and is used in many different appliances. If your current bulb is burnt out or broken you will need to replace it. This light bulb is a genuine OEM...
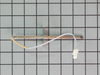
This is a temperature sensor for a range. The sensor is what detects the temperature inside the oven and is often replaced when the oven is having heating issues. Please note that the wire connector m...
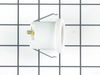
This is a light bulb lens, and it is made for your oven. This part protects the light bulb inside your oven by covering it. The lens is made of glass, and has a 3-inch diameter. Before making this rep...
This convection fan blade is designed for use with various makes and models of range and oven and is sold as an individual part. Made of metal and measuring approximately 4.75-inches in diameter, this...
Ask our experts a question about this part and we'll get back to you as soon as possible!
2 questions answered by our experts.
< Prev
1
Next >
Sort by:
Search filter:
Clear Filter
Your search term must have 3 or more characters.
Keep searches simple. Use keywords, e.g. "leaking", "pump", "broken" or "fit".
Sorry, we couldn't find any existing answers that matched. Try using some different or simpler keywords, or submit your new question by using the "Ask a Question" button above!
Mike
January 17, 2024
How can I fix my large element that does not recognize my cast iron pan when the rest of the elements do?
For model number EW30IS65JSA
Hi Mike, thank you for reaching out. Based on the description that you have provided, we would recommend replacing the surface element, part number FIX3501098, to fix the issue. Glad to be of help!
MY RANGE IS SHOWING AN ERROR E AND A NUMBER OF 15 ON TOP OF THE RANGE. IT WILL STOP BEEPING.
THANKS
DIANE
For model number EW30IS65JSA
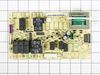
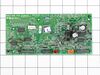
Hello Diane, Thank you for writing. The E15 indicates the Electronic Control Board is malfunctioning and may need to be replaced. Before replacing the part, we suggest checking the connections to make sure they are secure. We hope this helps!
Replaced clock control by removing surface burner control knobs and plastic nuts, and then the cover over the oven control. Two screw hold the clock in place, after removal and disconnecting the plug-in you can reinstall the new clock control. The Heat Sensor inside the oven will also need to be replaced. It is located inside the oven
... Read moreand attached with two screws; the back of the oven will need to be removed to unplug. Reverse removal procedure and turn the power back on to the stove.
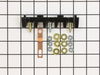
PF alarm appeared on display. Noticed clicking when cord was moved. Had arced for some time and melted original block. New part slightly different. Only has 3 lugs, old one had six. Stack using washers provided. Take note of colors before disassembly. Use caution while working through access opening. The edges are sharp. Only tools neede
... Read mored are phillips screwdriver, deep socket for lug nuts. Nut driver optional. Hope this is helpful.
Repair was quite easy, as long as you have the instructions for removing the door. The screws that hold the bottom of the door to the fixed hinge are placed into the side of the hinge assembly after removal; this holds the door at a 45 degree angle for easy removal. After that, just place the door on a flat surface and dismantle the door
... Read morefrom the inside. The inner glass is contained in a metal frame with another piece of glass; this frame comes apart easily using the clips in each side. The door assembles easily after the glass is replaced; just take your time and give yourself enough room to lay out the parts as you go. Good luck!