


Models
>
E30GF74HPS3
E30GF74HPS3 Electrolux Range
Jump to:
Find Part by Name
Keep searches simple, eg. "belt" or "pump".
Diagrams for E30GF74HPS3
Viewing 7 of 7


Manuals & Guides for E30GF74HPS3
Click to downloadInstall
Installation Instructions
(1.75MB)
Install
Installation Instructions
(4.84MB)
Manual
Owner's Manuals
(3.17MB)
Manual
Owner's Manuals
(7.92MB)
Specs
Product Specifications Sheet
(0.43MB)
Wiring
Wiring Diagram
(0.29MB)
Keep searches simple, eg. "belt" or "pump".

$47.25
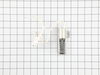
If your gas range will not heat up, is not coming up to temperature, the igniter is not glowing, or it glows but will not light, you may need to replace the igniter. This part is a genuine OEM flat st...
In Stock
Order now and your part arrives by Aug 3

In Stock
Order now and your part arrives by Aug 3

In Stock
Order now and your part arrives by Aug 3

$53.85
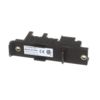
This is an authentic temperature sensor, which works with ranges, wall ovens, microwave oven combos, microwaves and warming drawers.
In Stock
Order now and your part arrives by Aug 3

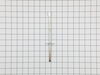
This part is the igniter/orifice mounting screw for your cooktop or range. It is approximately ½ an inch in length and is made of metal. The mounting screw connects the orifice to the cooktop. If the ...
In Stock
Order now and your part arrives by Aug 3

On Order

$36.92
This orifice is a replacement fuel-delivery component designed to regulate gas flow to a burner. It plays a critical role in maintaining proper flame size and efficiency and is commonly replaced when ...
In Stock
Order now and your part arrives by Aug 3

In Stock
Order now and your part arrives by Aug 3

In Stock
Order now and your part arrives by Aug 3

In Stock
Order now and your part arrives by Aug 3

In Stock
Order now and your part arrives by Aug 3

In Stock
Order now and your part arrives by Aug 3
Common Problems and Symptoms for E30GF74HPS3
Viewing 8 of 8Gas igniter glows, but will not light
Fixed by these parts
How to fix it
Little to no heat when baking
Fixed by these parts
How to fix it
Will Not Start
Fixed by these parts
How to fix it
Element will not heat
Fixed by these parts
How to fix it
Oven is too hot
Fixed by these parts
How to fix it
Oven not heating evenly
Fixed by these parts
How to fix it
Gas smell
Fixed by these parts
How to fix it
Little to no heat when broiling
Fixed by these parts
How to fix it


Keep searches simple. Use keywords, e.g. "leaking", "pump", "broken" or "fit".
- Customer:
- John from Darlington, SC
- Parts Used:
- 5303935066
- Difficulty Level:
- Easy
- Total Repair Time:
- 15 - 30 mins
- Tools:
- Nutdriver
Oven quit heating.
After reading up on the problem of the gas oven not lighting I decided I needed to install a new igniter. I had read where some people just pulled a panel off the back and installed a new one.. yeah, no such luck with this model so I had to crawl into the broiler drawer space [which I had to clean out first]. Note, if you wear trifocal g
... Read more
lasses you might as well close your eyes and replace it by feel because there is no way to tilt your head back enough to see what you are doing and still get both arms and your chest in a broiler. Also be sure to remove all cats and dogs from the area before starting. They seem to think they can help or it's a game of hide and seek and they want to hide with you.. they were no help at all.
Other than that, it was quite easy.
Other than that, it was quite easy.
Read less
Was this instruction helpful to you?
Thank you for voting!
- Customer:
- Ritchie from Ithaca, NY
- Parts Used:
- 5303935066
- Difficulty Level:
- A Bit Difficult
- Total Repair Time:
- 15 - 30 mins
- Tools:
- Nutdriver, Pliers, Screw drivers
Oven was difficult to light, then stopped lighting altogether
1. Turned off circuit breaker to stove
2. Removed the two screws holding down the floor of the oven (screws are at back.), and then lifted it out.
3. Removed the nut holding down the flame guard, and lifted it off.
4. Opened the bottom drawer.
5. Removed the protective cover in the back left of the oven at the bottom, ... Read more first removing the one screw at the bottom that holds it. This reveals a white plug, presumably going to a fuse.
6. Disconnected the white plastic connector, lifting its front tab to release it.
7. The igniter wires go to two lugs that attach at the floor of the oven at the back (one goes via the now free white connector). Slide back the plastic lug covers and use pliers to pull off the lugs. Note that the wider one (on the right) goes to the top of the igniter, while the narrower one (on the left) goes to the bottom of the igniter via the white plastic connector.
8. Removed the two bolts holding the igniter.
9. At this point, the igniter comes out. Nice, since it means you can work on the wires in comfort.
10. Slide the flame retardant sleeves away from the igniter. I found in-line connections about 1.5 inches from the igniter, and cut the wires next to these (on the side away from the igniter, of course.), and stripped the final 3/8 inch. Shorten the wires on the replacement igniter so that they are 3 or 4 inches long, slide on the flame retardant sleeves, then strip the final 3/8ths inch. Use the provided caps to connect the wires. Bottom wire goes to the plastic connector, top wire goes to the wide lug.
11. Install the new igniter by connecting the lugs, sliding on their protective plastic sleeves, reconnecting the white plastic connector, screwing in the two igniter mounting screws, and reinstalling the corner cover. Put back the flame shield and floor of the oven. Turn on the circuit breaker, and it works!
Read less
Was this instruction helpful to you?
Thank you for voting!
- Customer:
- Peter from Fife Lake, MI
- Parts Used:
- 5303935066
- Difficulty Level:
- Easy
- Total Repair Time:
- 15 - 30 mins
- Tools:
- Screw drivers
Oven Would Not Heat - Oven Ignitor Failure
I first looked up my Model Number on PartSelect.com and looked at the schematic as well as Trouble Shooted my problem.
Reading the posts by others how they Removed, Replaced, and Repaired their Oven Ignitors, I used their helpful info, and of course did mine.
1. Unplugged my Oven/Stove.
2. Removed botto ... Read more m storage door to get access to cover plate.
3. Removed oven racks inside oven to gain access to and removed Flame Cover.
4. Removed Screw holding Oven Ignitor in place.
5. Unplugged Ignitor Plug from feed wird in Oven from underneath.
6. Removed Oven Ignitor from the bottom area where storage drawer was.
7. Installed new Ignitor and replaced screw holding Ignitor assembly in place.
8. Replace Flame cover and racks.
9. Plugged in new ignitor underneath, and replaced cover plate.
10. Plugged in Stove/Oven and Oven began to heat! IGNITOR worked!
11. Replaced bottom drawer and slid Stove back into position.
All went easy and only difficulty was replacing cover plate below as it is awkward and having to line up screws/holes was a bit trying.
Using Work Light essential to see well, and, some screws may or can be hard to remove.
Both my neighbor and I ordered our Ignitors within a week of each other. My Oven was Amana his is a Tappan. His failed after a few weeks, but, PartSelect replaced promptly and we are all happy.
Read less
Was this instruction helpful to you?
Thank you for voting!