



Models
>
ERDE48LPH
ERDE48LPH Dacor Range
Jump to:
Find Part by Name
Keep searches simple, eg. "belt" or "pump".
Manuals & Guides for ERDE48LPH
Click to downloadKeep searches simple, eg. "belt" or "pump".
$44.36
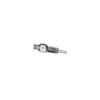
This genuine OEM halogen bulb provides bright, heat-resistant interior lighting for select wall ovens and ranges, making it easy to check cooking progress. Rated at 10 watts and 12 volts with a G4 bi-...
On Order
$53.21
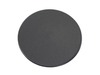
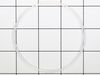
This is a burner head O-ring and is used in conjunction with your range cooktop. The purpose of the O-ring is to sit between the range cooktop and the burner head assembly. This part will create a sea...
In Stock
Order now and your part arrives by Sep 25
In Stock
Order now and your part arrives by Sep 25
Special Order

Keep searches simple. Use keywords, e.g. "leaking", "pump", "broken" or "fit".
- Customer:
- Keith from MIAMI, FL
- Parts Used:
- DE81-06694A
- Difficulty Level:
- Very Easy
- Total Repair Time:
- Less than 15 mins
Flame was not even all around.
Cleaned the brass ring and replaced the cap.
New brass rings may be an improvement too.
New brass rings may be an improvement too.
Was this instruction helpful to you?
Thank you for voting!
- Customer:
- David from CAMILLUS, NY
- Parts Used:
- DE81-08448A
- Difficulty Level:
- Easy
- Total Repair Time:
- 15 - 30 mins
- Tools:
- Screw drivers
F2 Alarm and oven beeping
Replaced relay board
Was this instruction helpful to you?
Thank you for voting!
- Customer:
- David from BUENA VISTA, CO
- Parts Used:
- DE81-04994A
- Difficulty Level:
- Really Easy
- Total Repair Time:
- 30 - 60 mins
- Tools:
- Screw drivers
Replaced bottom relay control panel
First disconnected power to the oven at circuit breaker box. Then, Removed top front control panel, held by four screws exposed when top oven door is opened. Was able to move control up and out of the way without disconnecting. The relay control panel is visible on the right. I was able to reach all connectors with needle nose plie
... Read more
rs and then remove the panel with needle nose to release clips and use screw driver to gentle pry up. Installed new unit by attaching back connectors and then setting panel down onto clips. Finished with attaching front connectors. Reattach front control panel.
Read less
Was this instruction helpful to you?
Thank you for voting!