


Models
>
CGA4D59TZK
CGA4D59TZK Crosley Range
Jump to:
Find Part by Name
Keep searches simple, eg. "belt" or "pump".
Diagrams for CGA4D59TZK
Viewing 8 of 8


Keep searches simple, eg. "belt" or "pump".

$19.75
This is a genuine OEM 40-Watt replacement light bulb that is compatible with various types of appliances. It has a frosted glass bulb with a standard metal socket base, making it easy to screw and uns...
In Stock
Order now and your part arrives by Jul 24

$51.43
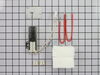
If your gas oven isn’t lighting properly, this flat-style igniter kit might be the fix. It helps open the gas valve and ignite the burner for baking or broiling. It works with many ovens and replaces ...
In Stock
Order now and your part arrives by Jul 24

$36.42
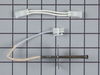
This temperature sensor detects the temperature within the oven cavity.
In Stock
Order now and your part arrives by Jul 24

$7.60
This is a multi-use screw mostly used in dryers. It has a diameter of #10, length of one inch, and thread size of 16. Remember to follow safety practices and instructions provided in the manufacturer ...
In Stock
Order now and your part arrives by Jul 24

$50.36
This broiler pan and roasting rack set features a two-piece design that allows fat to drain away for cleaner cooking and reduced splatter. Made with a durable, high-heat resistant porcelain finish, it...
In Stock
Order now and your part arrives by Jul 24

In Stock
Order now and your part arrives by Jul 24

In Stock
Order now and your part arrives by Jul 24

$17.44
This clock knob is less than an inch long. It is all black in color and is made of plastic. This knob will accept a 'D' shaped shaft.
In Stock
Order now and your part arrives by Jul 24

$7.60
This is a multi-use frame screw that fits a variety of power tools and equipment. Follow installation instructions and safety practices provided in the manual by the manufacturer.
In Stock
Order now and your part arrives by Jul 24

In Stock
Order now and your part arrives by Jul 24

On Order

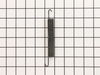
This square burner grate has sides measuring approximately nine inches. It is all black in color.
No Longer Available
Common Problems and Symptoms for CGA4D59TZK
Viewing 10 of 10Gas igniter glows, but will not light
Fixed by these parts
How to fix it
Little to no heat when baking
Fixed by these parts
How to fix it
Will Not Start
Fixed by these parts
How to fix it
Oven not heating evenly
Fixed by these parts
How to fix it
Element will not heat
Fixed by these parts
How to fix it
Oven is too hot
Fixed by these parts
How to fix it
Little to no heat when broiling
Fixed by these parts
How to fix it
Door won’t close
Fixed by these parts
How to fix it
Gas smell
Fixed by these parts
How to fix it
Touchpad does not respond
Fixed by these parts
How to fix it


Keep searches simple. Use keywords, e.g. "leaking", "pump", "broken" or "fit".
- Customer:
- James from Ferndale, MI
- Parts Used:
- 12400035
- Difficulty Level:
- A Bit Difficult
- Total Repair Time:
- 15 - 30 mins
- Tools:
- Nutdriver, Screw drivers, Socket set
Oven would not work but the Broiler did
The oven had been working intermittently for a while and after repeated threats of starvation from my spouse I finally took a look even though it was summer and the grill was working fine. The Igniter would glow red when the oven was turned on but the gas would not flow to it no matter what the temperature setting. I searched online and f
... Read more
ound this site that explained it was possible for the igniter to glow but if it was not drawing the correct amperage (because its resistance was too high) then the main brain would not allow the gas valve to open. So I took a look at the broiler and it had the same igniter. I measure the resistance of both of them and the oven igniters resistance was higher (don't rememeber the reading) then I moved the Igniter from the broiler to the oven and the oven worked from there it was just a matter of ordering the part. End of story except for I am still doing all the cooking on the barbecue outside.
Read less
Was this instruction helpful to you?
Thank you for voting!
- Customer:
- george from birmingham, AL
- Parts Used:
- 12001655
- Difficulty Level:
- Easy
- Total Repair Time:
- 15 - 30 mins
- Tools:
- Screw drivers
F1 code - gas over would not heat.
Repair tech checked oven and said the control panel was bad and needed to be replaced. The new control panel would cost over $450.00! I found that the oven sensor was bad and replaced it for $30.00. The old oven sensor had failed following a self cleaning cycle. I found that the wires coming out of it were burnt.
Replacing ... Read more the oven sensor was very easy. I removed the back panels 6 screws to gain access to the sensor's connection. I then removed the 2 screw that hold the sensor in place inside the oven and pulled the old sensor out through the oven. I reversed this process to place the new sensor in the oven.
Replacing ... Read more the oven sensor was very easy. I removed the back panels 6 screws to gain access to the sensor's connection. I then removed the 2 screw that hold the sensor in place inside the oven and pulled the old sensor out through the oven. I reversed this process to place the new sensor in the oven.
Read less
Was this instruction helpful to you?
Thank you for voting!
- Customer:
- Charles from Charlestown, RI
- Parts Used:
- 12400035
- Difficulty Level:
- Easy
- Total Repair Time:
- 30 - 60 mins
- Tools:
- Pliers, Screw drivers
Oven would'nt light
In most cases if your oven won't light or takes a long time to light you may have a bad igniter even if it glows. To check the igniter use a voltmeter to check for 120 A/C volts going to the igniter and3.5 A/C volts going between the ingniter and the gas valve. My bad ingniter glowed but had only only 3.0 A/C volts going to the gas valve
... Read more
for the oven. The new igniter took only 45 minutes to install and supply's 3.6 A/C volts to the gas valve and the oven works fine.
Read less
Was this instruction helpful to you?
Thank you for voting!