



Models
>
EHT-360
EHT-360 Caloric Range
Jump to:
Find Part by Name
Keep searches simple, eg. "belt" or "pump".
Diagrams for EHT-360
Viewing 6 of 6


Keep searches simple, eg. "belt" or "pump".
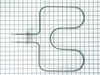
$31.05
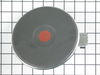
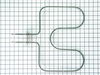
Please note: This is a substitute from the original part. It may physically look different, but will still function the same. This bake element is found on the bottom of the oven.
In Stock
Order now and your part arrives by Oct 13
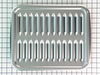
$50.36
This broiler pan and roasting rack set features a two-piece design that allows fat to drain away for cleaner cooking and reduced splatter. Made with a durable, high-heat resistant porcelain finish, it...
In Stock
Order now and your part arrives by Oct 13
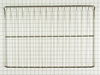
$54.95
This is an authentic OEM replacement part. This wire oven rack is used un ranges, microwave oven combs, and wall ovens. This wire rack is made of metal, and it is chrome in color. It is approximately ...
On Order
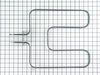
$78.48
This is an authentic OEM replacement part. This broil element is designed for use with ranges. It is found on the roof of your oven and provides the heat needed for the broil function. If the element ...
Special Order
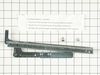
This OEM replacement part has been sourced from the manufacturer.?This hinge kit is designed for use with ranges and wall ovens. The hinges allow you to easily open and close the door on your applianc...
No Longer Available
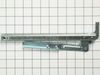
This is an authentic OEM replacement part. This hinge kit is commonly used with ranges. Working hinges allow you to easily open and close the door on your range. This kit comes with the hinge and the ...
No Longer Available
Special Order
Special Order

Special Order
Common Problems and Symptoms for EHT-360
Viewing 5 of 5Little to no heat when baking
Fixed by these parts
How to fix it
Element will not heat
Fixed by these parts
How to fix it
Little to no heat when broiling
Fixed by these parts
How to fix it
Door won’t close
Fixed by these parts
How to fix it
Oven not heating evenly
Fixed by these parts
How to fix it

Keep searches simple. Use keywords, e.g. "leaking", "pump", "broken" or "fit".
- Customer:
- Timothy from Salem, OR
- Parts Used:
- WP77001094
- Difficulty Level:
- Easy
- Total Repair Time:
- 15 - 30 mins
- Tools:
- Pliers
The Baking element in the bottom of the stove apparently shorted out and partially melted
First I turned off the circuit breaker on the house electricity panel. I removed the two screws that held the element in place in the oven. There were two wires connected to the element by spade plugs that were free floating in a fiberglass pad. I reconnected the spade plugs and put the element back in place and put back in the two sc
... Read more
rews. This procedure had I known what I was doing could have been done with the stove in place and would take no more than 5 to 10 minutes. Having no experience at this, I had pulled the stove out into the room and also removed the back cover which turned out to be unnecessary. I put everything back in place and held my breath and turned on the circuit breaker. Voila! It worked!
Read less
Was this instruction helpful to you?
Thank you for voting!
- Customer:
- edward from hamburg, NJ
- Parts Used:
- WP77001094
- Difficulty Level:
- Really Easy
- Total Repair Time:
- Less than 15 mins
- Tools:
- Screw drivers
Bake element broke/burned out
un-screwed 2 scrws and pulled out the old one and pulled off the 2 wires put the new one on the floor of the oven and hooked-up the 2 wires and pushed it in the back wall and replaced the 2 screws! done maybe 5 minutes
Was this instruction helpful to you?
Thank you for voting!
- Customer:
- David from Lewisburg, TN
- Parts Used:
- WPY0063532
- Difficulty Level:
- Easy
- Total Repair Time:
- Less than 15 mins
- Tools:
- Screw drivers, Socket set
Broiler burned out
The Job didn’t take very long at all. I pulled the unit out and unplug it before I started the repair. I had to remove the back two access cover plates to get to the two wire leads that connect the broiler. I don’t believe there was enough wire to be able to do it all from the front side. Next I disconnected the two wires that connected i
... Read more
t while remembering what color goes to the correct side (just incase this does matter). After removing the wires I moved on to remove the element with a Philips screwdriver. The new part already had the hangers on it so I reused the old screws and installed the new element. Next I reconnected the wires in the back and re-installed the back panels. I plugged it up and it works as good as new now. This was definitely a lot cheaper to fix this myself than hire a repairman.
Read less
Was this instruction helpful to you?
Thank you for voting!