



Models
>
RMS363UL
RMS363UL Caloric Range
Jump to:
Find Part by Name
Keep searches simple, eg. "belt" or "pump".
Keep searches simple, eg. "belt" or "pump".
In Stock
Order now and your part arrives by Oct 19
$50.36
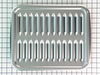
This broiler pan and roasting rack set features a two-piece design that allows fat to drain away for cleaner cooking and reduced splatter. Made with a durable, high-heat resistant porcelain finish, it...
In Stock
Order now and your part arrives by Oct 19
$7.60
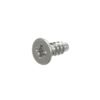
This is a multi-use frame screw that fits a variety of power tools and equipment. Follow installation instructions and safety practices provided in the manual by the manufacturer.
Special Order
In Stock
Order now and your part arrives by Oct 19
In Stock
Order now and your part arrives by Oct 19
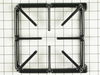
This gas burner grate is used for some gas ranges and cooktops. This is a black burner grate with each side measuring almost eight inches.
No Longer Available
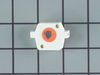
This is a genuine OEM replacement part. This surface burner ignition switch is commonly used on ranges, wall ovens, cooktops, and microwave oven combos. When the gas burner valve is pressed this is th...
Special Order
$17.44
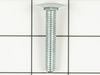
This is an OEM part sourced directly from the manufacturer. This leveling leg is commonly used with refrigerators, dryers, freezers, ranges, cooktops, and microwaves. This leveling leg ensure that you...
Special Order
$17.44
This is a genuine OEM replacement part. This drawer glide is commonly used in the assembly of ranges, and cooktops. This drawer glide is usually attached to the base of the drawer, or to the drawer sl...
In Stock
Order now and your part arrives by Oct 19
This piece of oven door seal has a metal hook on each end. This seal is compatible with the top and the bottom of the oven door window.
No Longer Available
This part sends enough current to the igniter to create a spark to the bottom of the burner cap.
No Longer Available
This top burner knob is a little over two inches in diameter. It has a chrome strip of trim around the perimeter of the knob, as well as white lettering denoting the off, light, and high positions.
No Longer Available
Common Problems and Symptoms for RMS363UL
Viewing 2 of 2Will Not Start
Fixed by these parts
How to fix it
Door latch failure
Fixed by these parts
How to fix it

Keep searches simple. Use keywords, e.g. "leaking", "pump", "broken" or "fit".
- Customer:
- nicholas from livermore, CA
- Parts Used:
- 1430322
- Difficulty Level:
- Really Easy
- Total Repair Time:
- 30 - 60 mins
- Tools:
- Screw drivers
gas burners and gas oven would not light
unplug the oven and pull it away from the wall. looking at the oven from the back, the spark module is at the bottom on the lower left. there is a two piece sheetmetal cover over the area of the spark module. use a phillips head screwdriver to remove five screws and the covers come off. the spark module is the blue cube with four push
... Read more
on wire connectors. all you have to do is hold the new one next to the old one and swap one wire at a time. both were clearly marked with identical numbers and letters. really nothing to it. it took me longer to clean the back of the oven than to replace the module. the old module was eaton part number Y-54052-3. the new one is eaton part number Y-054052-34.
Read less
Was this instruction helpful to you?
Thank you for voting!
- Customer:
- Diana from Jacksonville, FL
- Parts Used:
- 31829401
- Difficulty Level:
- Really Easy
- Total Repair Time:
- Less than 15 mins
- Tools:
- Screw drivers
electric ignite gas stove kept clicking the ignitor unless unplugged from electrical outlet
I removed the 2 screws that held the housing on at the back of the stove. Then I removed the 2 screws that held the module to the back of the stove. Since I am not an experienced electrical person (I am a female nurse in the operating room), I unplugged 1 wire at a time from the old module and plugged it into the new module. I repeated th
... Read more
is step with each wire to make sure I didn't put the wrong wire on a wrong spot until I had all the wires to the new module. Then reattached the screws, plugged in the oven and presto, it works just fine! Was amazed at how easy it was. A 50 dollar part instead of a new 1500 dollar stove. How easy is that?
Read less
Was this instruction helpful to you?
Thank you for voting!
- Customer:
- Richard from Lansing, MI
- Parts Used:
- WP4157180
- Difficulty Level:
- Easy
- Total Repair Time:
- 15 - 30 mins
- Tools:
- Screw drivers
Ignitor did not spark when turning the know
Had to remove the 4 range knobs, and the oven knob and then the facie. Two screws under the end caps and two on each side from the back on each end. Design defect: one of these screws which attaches through the frame to the facie also attaches the support which holds up the range top. Take that one off last. Remove the two wires that atta
... Read more
ch to the oven light switch. After detaching the power supply to the defective ignition unit, it just pulls right off. Push the new switch on over the knob shaft and reassemble.
Read less
Was this instruction helpful to you?
Thank you for voting!