



Models
>
RLN385UL
RLN385UL (P1142394N L) Amana Range
Jump to:
Find Part by Name
Keep searches simple, eg. "belt" or "pump".
Diagrams for RLN385UL
Viewing 6 of 6


Keep searches simple, eg. "belt" or "pump".
In Stock
Order now and your part arrives by Oct 27
$50.36
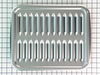
This broiler pan and roasting rack set features a two-piece design that allows fat to drain away for cleaner cooking and reduced splatter. Made with a durable, high-heat resistant porcelain finish, it...
In Stock
Order now and your part arrives by Oct 27
$7.60
This is a multi-use frame screw that fits a variety of power tools and equipment. Follow installation instructions and safety practices provided in the manual by the manufacturer.
Special Order
In Stock
Order now and your part arrives by Oct 27
In Stock
Order now and your part arrives by Oct 27
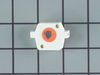
This is a genuine OEM replacement part. This surface burner ignition switch is commonly used on ranges, wall ovens, cooktops, and microwave oven combos. When the gas burner valve is pressed this is th...
Special Order
$17.44
This is an OEM part sourced directly from the manufacturer. This leveling leg is commonly used with refrigerators, dryers, freezers, ranges, cooktops, and microwaves. This leveling leg ensure that you...
Special Order
$17.44
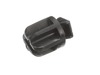
This is a genuine OEM replacement part. This drawer glide is commonly used in the assembly of ranges, and cooktops. This drawer glide is usually attached to the base of the drawer, or to the drawer sl...
In Stock
Order now and your part arrives by Oct 27
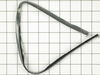
This piece of oven door seal has a metal hook on each end. This seal is compatible with the top and the bottom of the oven door window.
No Longer Available
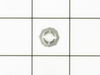
This clip is well under an inch in diameter. It is made of metal and it will help secure a range's electrode.
No Longer Available
Common Problems and Symptoms for RLN385UL
Viewing 4 of 4Will Not Start
Fixed by these parts
How to fix it
Door latch failure
Fixed by these parts
How to fix it
Gas igniter glows, but will not light
Fixed by these parts
How to fix it
Element will not heat
Fixed by these parts
How to fix it

Keep searches simple. Use keywords, e.g. "leaking", "pump", "broken" or "fit".
- Customer:
- Billy from Martinsville, IN
- Parts Used:
- WP3185804
- Difficulty Level:
- Really Easy
- Total Repair Time:
- Less than 15 mins
- Tools:
- Screw drivers
There was a crack in the porcelain not letting it spark
I used a screwdriver to pry the electrode assy. out of the burner. then disconnected the wire.
Then just connected the new electrode and place the assy, in the burner.
Then just connected the new electrode and place the assy, in the burner.
Was this instruction helpful to you?
Thank you for voting!
- Customer:
- Joe from San Bruno, CA
- Parts Used:
- WP3185804
- Difficulty Level:
- A Bit Difficult
- Total Repair Time:
- 30 - 60 mins
- Tools:
- Nutdriver, Screw drivers, Wrench (Adjustable)
broken ignitor insulation; repeated sparking after burner lit
Disconnected gas & electric connections; lifted unit out of countertop onto padded table upside down. Unscrewed ~16 sheet metal screws for access. Removed bad ignitor by driving off retaining clip. Had to remove burner (3 screws) for access to install retaining clip on new ignitor. Reassembled, reinstalled. Works like new!
Was this instruction helpful to you?
Thank you for voting!
- Customer:
- Richard from Lansing, MI
- Parts Used:
- WP4157180
- Difficulty Level:
- Easy
- Total Repair Time:
- 15 - 30 mins
- Tools:
- Screw drivers
Ignitor did not spark when turning the know
Had to remove the 4 range knobs, and the oven knob and then the facie. Two screws under the end caps and two on each side from the back on each end. Design defect: one of these screws which attaches through the frame to the facie also attaches the support which holds up the range top. Take that one off last. Remove the two wires that atta
... Read more
ch to the oven light switch. After detaching the power supply to the defective ignition unit, it just pulls right off. Push the new switch on over the knob shaft and reassemble.
Read less
Was this instruction helpful to you?
Thank you for voting!