



Models
>
AKS3050SS-P1142526NSS
AKS3050SS-P1142526NSS Amana Range
Jump to:
Find Part by Name
Keep searches simple, eg. "belt" or "pump".
Keep searches simple, eg. "belt" or "pump".
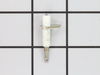
$51.43
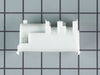
This is a genuine OEM replacement part. This spark ignition electrode is what lights the gas that starts the burner on your range or cooktop. This electrode is part of the burner assembly, it sits nex...
In Stock
Order now and your part arrives by Oct 16
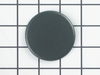
In Stock
Order now and your part arrives by Oct 16
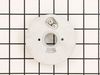
This is an OEM part sourced directly from the manufacturer. The burner head the is main part of the burner assembly in your gas range and cooktop. The gas flows through the burner head and is lit by t...
No Longer Available
$7.60
This is an authentic OEM replacement part. The screw is most often used in the assembly of ranges, cooktops, and wall ovens. A common use for this screw is to hold the burner head in place. However du...
In Stock
Order now and your part arrives by Oct 16
This is a genuine OEM replacement part. This bolt is commonly used in the assembly of ranges, cooktops, and washers. This part is most often used as an electrode mounting crew, however we recommend yo...
No Longer Available
This is an authentic OEM Amana replacement part. The spark module is commonly used on cooktops and ranges. If your burners are failing to light you might have an issue with your spark module. This mod...
No Longer Available
Part might differ in appearance, but functions same as original. Sold individually.
No Longer Available
Burner valves are attached to the main gas line. When the switch is turned the gas then flows into a tube that mixes with air, creating the appropriate mixture for combustion.
No Longer Available

Special Order
Common Problems and Symptoms for AKS3050SS-P1142526NSS
Viewing 3 of 3Will Not Start
Fixed by these parts
How to fix it
Gas igniter glows, but will not light
Fixed by these parts
How to fix it
Element will not heat
Fixed by these parts
How to fix it
Keep searches simple. Use keywords, e.g. "leaking", "pump", "broken" or "fit".
- Customer:
- HUY from ALISO VIEJO, CA
- Parts Used:
- WPY0316773
- Difficulty Level:
- Easy
- Total Repair Time:
- Less than 15 mins
- Tools:
- Pliers, Screw drivers
Broken Electrode, no spark
Remove 2 screws holding the top burner. Remove 1 screw holding the electrode. Remove electrode from wiring using plier. Install new electrode and top burner
Was this instruction helpful to you?
Thank you for voting!
- Customer:
- Michael from Friendswood, TX
- Parts Used:
- WPY0316773
- Difficulty Level:
- Really Easy
- Total Repair Time:
- Less than 15 mins
- Tools:
- Screw drivers
Burner would not ignite when control in "light" position
Remove the two screws from the burner assembly (on top of the burner). Lift burner assembly from the cook top. Disconnect the electrode wire from the electrode. Remove the screw holding the electrode to the burner assembly (on bottom of burner). Install the new electrode and attach the electrode to the burner assembly. Attach the elec
... Read more
trode wire to the electrode. drop the burner assembly back into position on the cooktop. Attach the burner assembly using two screws.
Read less
Was this instruction helpful to you?
Thank you for voting!
- Customer:
- Derek from Seattle, WA
- Parts Used:
- WP7504P109-60
- Difficulty Level:
- Really Easy
- Total Repair Time:
- Less than 15 mins
- Tools:
- Screw drivers
One of the burners would not autolight, had to be lit with match
This was VERY easy and I've never worked on this type of appliance before.
First, take off the grate, thermal plate, etc that are resting on top of the stove (this is all the stuff you take off to clean the stovetop).
Then, carefully unscrew the two screws holding the burner to the gas pipe. Grab the screws and set ... Read more them aside so they don't fall back into the stove, then pick the burner up off the stove.
once you have the burner a few inches above the stove surface, wiggle off the single wire by grabbing it on the metal part (not by the wire) and gently wiggling it off.
Grab new burner, push on wire and sit it on stove, use a finger in the gas pipe to align it and put the two screws in. you're done.
First, take off the grate, thermal plate, etc that are resting on top of the stove (this is all the stuff you take off to clean the stovetop).
Then, carefully unscrew the two screws holding the burner to the gas pipe. Grab the screws and set ... Read more them aside so they don't fall back into the stove, then pick the burner up off the stove.
once you have the burner a few inches above the stove surface, wiggle off the single wire by grabbing it on the metal part (not by the wire) and gently wiggling it off.
Grab new burner, push on wire and sit it on stove, use a finger in the gas pipe to align it and put the two screws in. you're done.
Read less
Was this instruction helpful to you?
Thank you for voting!