



Models
>
AGS746E-P1130746NE
AGS746E-P1130746NE Amana Range
Jump to:
Find Part by Name
Keep searches simple, eg. "belt" or "pump".
Diagrams for AGS746E-P1130746NE
Viewing 9 of 9


Keep searches simple, eg. "belt" or "pump".
$7.60
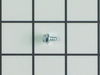
This is a multi-use screw and can be used on a variety of appliances. The measurements of the screw are: 8/18 x 3/8. *Please note: the screw is sold individually. Refer to the manual provided by the m...
In Stock
Order now and your part arrives by Oct 2
$57.30
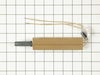
This is an authentic OEM replacement part.?This flat style over igniter is commonly used in ranges and wall ovens. This igniter is specifically used to ignite the broil element. The igniter pulls curr...
In Stock
Order now and your part arrives by Oct 2
$50.36
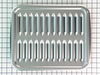
This broiler pan and roasting rack set features a two-piece design that allows fat to drain away for cleaner cooking and reduced splatter. Made with a durable, high-heat resistant porcelain finish, it...
In Stock
Order now and your part arrives by Oct 2
This set button knob is sold individually. It is all black in color and is made entirely of plastic.
No Longer Available
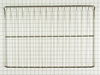
$54.95
This is an authentic OEM replacement part. This wire oven rack is used un ranges, microwave oven combs, and wall ovens. This wire rack is made of metal, and it is chrome in color. It is approximately ...
On Order
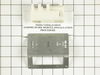
This OEM replacement part has been sourced from the manufacturer. This spark ignition module is designed for use with ranges and cooktops. The spark ignition module works to provide the spark require...
No Longer Available
In Stock
Order now and your part arrives by Oct 2
Special Order
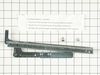
This OEM replacement part has been sourced from the manufacturer.?This hinge kit is designed for use with ranges and wall ovens. The hinges allow you to easily open and close the door on your applianc...
No Longer Available
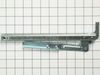
This is an authentic OEM replacement part. This hinge kit is commonly used with ranges. Working hinges allow you to easily open and close the door on your range. This kit comes with the hinge and the ...
No Longer Available
This clip is well under an inch in diameter. It is made of metal and it will help secure a range's electrode.
No Longer Available
Part might differ in appearance, but functions same as original. Sold individually.
No Longer Available
Common Problems and Symptoms for AGS746E-P1130746NE
Viewing 6 of 6Gas igniter glows, but will not light
Fixed by these parts
How to fix it
Will Not Start
Fixed by these parts
How to fix it
Little to no heat when baking
Fixed by these parts
How to fix it
Element will not heat
Fixed by these parts
How to fix it
Door won’t close
Fixed by these parts
How to fix it
Little to no heat when broiling
Fixed by these parts
How to fix it

Keep searches simple. Use keywords, e.g. "leaking", "pump", "broken" or "fit".
- Customer:
- John from Niles, MI
- Parts Used:
- 786324
- Difficulty Level:
- Easy
- Total Repair Time:
- 15 - 30 mins
- Tools:
- Screw drivers
Oven wouldn't heat. Glow ignitor was weak and wouldn't ignite flame.
After shutting off the gas and removing the oven door, which simply slid off of the hinges, I removed the oven plate. The ignitor was attached to the manifold. I removed that and noted the wires were attached back behind a hole in the back of the oven. I thought I would have to access them from the back but when I pulled on them I was
... Read more
able to reach them from the front. I was surprised to find plastic lugs covering the wire ends, rather than ceramic. I attached the new ignitor wires and reused the plastic lugs, as no ceramic ones came with the new ignitor. I carefully slid the new ignitor back into the cage/shield attached to the manifold and replaced the manifold. I then turned the gas back on and tested the ignitor (which worked perfectly) before replacing the oven plate. The repair took less than 30 minutes, but my wife and I thoroughly cleaned the door and interior while we had it apart. The hardest part was getting the door back on the hinges, but this too was accomplished after several attempts. The oven heats up beautifully now.
Read less
Was this instruction helpful to you?
Thank you for voting!
- Customer:
- John from Alexandria, VA
- Parts Used:
- 32020101
- Difficulty Level:
- Really Easy
- Total Repair Time:
- Less than 15 mins
- Tools:
- Screw drivers
2 of 4 burners wouldn't light
Unplugged the stove, removed all 4 burner discs from the stove top (2 screws each) and disconnecting electrode wires as I pulled them out, removed the stove top, unscrewed the old module, removed the 6 wires, connected wires to the new module, screwed it into place, reinstalled the top while poking the electrode wires through the top one
... Read more
by one, put the stove top in place, connected the wires to the burner discs. Done, and it works! It took longer to find and order the part than it did to change it out.
Read less
Was this instruction helpful to you?
Thank you for voting!
- Customer:
- Rick from Laguna HIlls, CA
- Parts Used:
- 786324
- Difficulty Level:
- Really Easy
- Total Repair Time:
- 15 - 30 mins
- Tools:
- Nutdriver, Screw drivers
Oven would not light
After the appliance store told me that the repair would cost about $500 to fix an oven that wouldn't light we didn't have the money to repair it or buy a new one so we went without an oven (only the oven) for almost 1 year. The igniter would glow but the oven would not light. my son found your site online and passed it on to me. It was so
... Read more
simple it's almost funny. I opened the oven door and removed the burner cover. Then reached in and removed the three screws that held the igniter in place. Turned off the gas, disconedted it so I could pull the stove out to get behind it. Found the wires to the igniter and undid the 2 wire nuts. Removed the igniter cover from the old one and slid it onto the new one. Be very careful because the igniter is very delicate and be sure to not toucjh the heating eliment. Slid the new part into place, reinstalled the screws, connected the new wires with the old wire nuts, reconnected the gas and turned on the oven. BAM it worked like a charm.
Read less
Was this instruction helpful to you?
Thank you for voting!