


Models
>
ACS3350AW0
ACS3350AW0 Amana Range
Jump to:
Find Part by Name
Keep searches simple, eg. "belt" or "pump".
Diagrams for ACS3350AW0
Viewing 6 of 6


Keep searches simple, eg. "belt" or "pump".

$57.30
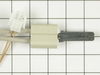
This is an authentic OEM replacement part.?This flat style over igniter is commonly used in ranges and wall ovens. This igniter is specifically used to ignite the broil element. The igniter pulls curr...
In Stock
Order now and your part arrives by Jul 31

$86.26
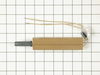
This is an OEM part sourced directly from Amana. This flat style oven igniter is used in ranges. As current flows through the ignition circuit the ignitor heads up and begins to glow, the warmer it ge...
In Stock
Order now and your part arrives by Jul 31

$50.36
This broiler pan and roasting rack set features a two-piece design that allows fat to drain away for cleaner cooking and reduced splatter. Made with a durable, high-heat resistant porcelain finish, it...
In Stock
Order now and your part arrives by Jul 31

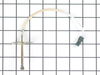
This is a genuine OEM replacement part. This double burner bowl is designed for used with cooktops and ranges. The burner bowl is found underneath the burner grate. This part is designed to fit around...
No Longer Available

$54.95
This is an authentic OEM replacement part. This wire oven rack is used un ranges, microwave oven combs, and wall ovens. This wire rack is made of metal, and it is chrome in color. It is approximately ...
In Stock
Order now and your part arrives by Jul 31

$7.60
This is a multi-use frame screw that fits a variety of power tools and equipment. Follow installation instructions and safety practices provided in the manual by the manufacturer.
In Stock
Order now and your part arrives by Jul 31

In Stock
Order now and your part arrives by Jul 31

Special Order

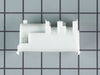
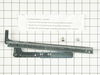
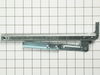
This OEM replacement part has been sourced from the manufacturer.?This hinge kit is designed for use with ranges and wall ovens. The hinges allow you to easily open and close the door on your applianc...
No Longer Available

This is an authentic OEM replacement part. This hinge kit is commonly used with ranges. Working hinges allow you to easily open and close the door on your range. This kit comes with the hinge and the ...
No Longer Available

This is a genuine OEM replacement part. This drawer wheel, also known as a drawer roller is commonly used with ranges. This is one of the rollers used in the drawer assembly; it ensures your opens and...
No Longer Available

$7.60
This is an authentic OEM replacement part. The screw is most often used in the assembly of ranges, cooktops, and wall ovens. A common use for this screw is to hold the burner head in place. However du...
In Stock
Order now and your part arrives by Jul 31
Common Problems and Symptoms for ACS3350AW0
Viewing 6 of 6Gas igniter glows, but will not light
Fixed by these parts
How to fix it
Little to no heat when baking
Fixed by these parts
How to fix it
Will Not Start
Fixed by these parts
How to fix it
Element will not heat
Fixed by these parts
How to fix it
Door won’t close
Fixed by these parts
How to fix it
Little to no heat when broiling
Fixed by these parts
How to fix it

Keep searches simple. Use keywords, e.g. "leaking", "pump", "broken" or "fit".
- Customer:
- John from Niles, MI
- Parts Used:
- 786324
- Difficulty Level:
- Easy
- Total Repair Time:
- 15 - 30 mins
- Tools:
- Screw drivers
Oven wouldn't heat. Glow ignitor was weak and wouldn't ignite flame.
After shutting off the gas and removing the oven door, which simply slid off of the hinges, I removed the oven plate. The ignitor was attached to the manifold. I removed that and noted the wires were attached back behind a hole in the back of the oven. I thought I would have to access them from the back but when I pulled on them I was
... Read more
able to reach them from the front. I was surprised to find plastic lugs covering the wire ends, rather than ceramic. I attached the new ignitor wires and reused the plastic lugs, as no ceramic ones came with the new ignitor. I carefully slid the new ignitor back into the cage/shield attached to the manifold and replaced the manifold. I then turned the gas back on and tested the ignitor (which worked perfectly) before replacing the oven plate. The repair took less than 30 minutes, but my wife and I thoroughly cleaned the door and interior while we had it apart. The hardest part was getting the door back on the hinges, but this too was accomplished after several attempts. The oven heats up beautifully now.
Read less
Was this instruction helpful to you?
Thank you for voting!
- Customer:
- mark from macomb, MI
- Parts Used:
- WP31940001
- Difficulty Level:
- A Bit Difficult
- Total Repair Time:
- 15 - 30 mins
- Tools:
- Nutdriver
Oven not working but broiler was working fine.
Checked lower oven burner for a problem. Oven Ignitor looked like it was glowing and working properly but the gas valve would not open to let the gas flow to burner. I had read on a forum that just because the oven ignitor looks good does not mean it is creating the proper resistance to open the gas valve. So I took my chances and replace
... Read more
d the ignitor (because it was cheaper than the gas valve) and now the oven works like new.
Read less
Was this instruction helpful to you?
Thank you for voting!
- Customer:
- David from Avon, IN
- Parts Used:
- WP31940001
- Difficulty Level:
- Easy
- Total Repair Time:
- 30 - 60 mins
- Tools:
- Socket set
Igniter glows, oven won't light
I removed the cover over the flame diffuser, then removed the single nut holding the diffuser to the burner assembly. After removing the three screws from the igniter assembly I found I couldn't reach the connector for the igniter.
I removed the storage tray underneath and found a cover towards the rear of the oven with two screws. A ... Read more fter removing this piece I could easily disconnect the igniter. It was a bit difficult replacing this shield as it had to fit between two other pieces on the side towards the front of the oven.
I slid the guard from the old igniter and put it on the new piece and just reversed the procedure. Relatively easy and saved me a bundle!
Read less
Was this instruction helpful to you?
Thank you for voting!