


Models
>
FDU-248-2D
FDU-248-2D (FDU-248-2 D) Amana Range
Jump to:
Find Part by Name
Keep searches simple, eg. "belt" or "pump".
Diagrams for FDU-248-2D
Viewing 5 of 5


Keep searches simple, eg. "belt" or "pump".

$8.35
This chrome drip bowl is an OEM approved replacement part designed for use with various models of electric ranges and cooktops. This drip bowl fits under 6-inch burner elements and has a diameter of a...
In Stock
Order now and your part arrives by Mar 21

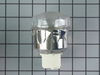
This is a genuine OEM replacement part. This surface burner plug-in block kit is designed for use with surface elements of your ranges and cooktops. This kit helps connect the wire harness to the surf...
In Stock
Order now and your part arrives by Mar 21

In Stock
Order now and your part arrives by Mar 21

$43.21
This is an authentic OEM replacement part. This wire oven rack is used un ranges, microwave oven combs, and wall ovens. This wire rack is made of metal, and it is chrome in color. It is approximately ...
On Order

In Stock
Order now and your part arrives by Mar 21

In Stock
Order now and your part arrives by Mar 21

In Stock
Order now and your part arrives by Mar 21

$77.42
This is an authentic OEM replacement part. This oven light assembly is used in a number of appliances, most often it can be found in ranges, wall ovens, microwaves, and microwave oven combos. This lig...
In Stock
Order now and your part arrives by Mar 21

In Stock
Order now and your part arrives by Mar 21

$36.00
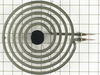
This is a genuine OEM Amana part. This outer bake element can be found at the bottom of your range or wall oven. It is this element the supplies the heat required to make things in your oven. If you ...
In Stock
Order now and your part arrives by Mar 21

In Stock
Order now and your part arrives by Mar 21

This OEM replacement part has been sourced from the manufacturer.?This hinge kit is designed for use with ranges and wall ovens. The hinges allow you to easily open and close the door on your applianc...
No Longer Available
Questions and Answers
We're sorry, but our Q&A experts are temporarily unavailable.
Please check back later if you still haven't found the answer you need.
Common Problems and Symptoms for FDU-248-2D
Viewing 5 of 5Element will not heat
Fixed by these parts


How to fix it
Little to no heat when baking
Fixed by these parts

How to fix it
Door won’t close
Fixed by these parts


How to fix it
Little to no heat when broiling
Fixed by these parts

How to fix it
Will Not Start
Fixed by these parts
How to fix it


Keep searches simple. Use keywords, e.g. "leaking", "pump", "broken" or "fit".
- Customer:
- Phillip from Pekin, IL
- Parts Used:
- 330031
- Difficulty Level:
- Really Easy
- Total Repair Time:
- 15 - 30 mins
- Tools:
- Screw drivers
One burner didn't work all the time the other would go red hot
I unplugged the stove from the outlet, then removed the two burners I was going to be working on and the drip pans. Then I raised the top part of the stove and removed the screws holding the plug-in blocks to the stove. Then I cut the two wires going to the old plug-in block and stripped the wires back to match the new wire parts. Then I
... Read more
placed the sleeves over the new wires, then I placed the new wire beside the wire I stripped on the stove and screw on the wire cap making sure it was tight. I repeated this three more times, once I had all four wires connected I then placed the sleeves over the connections and heated them up until they were formed around the connection. Once I had all the connections done I placed one wire at a time into the plug-in block until it locked into place ( I looked at my old plug-in blocks first to make sure I placed the new wires in the correct way ).I then used the metal mounting bracket that matched my old ones and snapped the correct one onto each plug-in block. Before mounting them onto the stove I compared them to my old ones to make sure they were correct. Then I used the new screws to mount them to the stove. I took a second look at everything I had done before closing the top cover of my stove. After lowering the cover back into place I put both the drip covers in place and then installed the burners.I then plugged the stove back into the outlet and tried the burners. This was very simple and the video on the web site shows this very well which made my job very simple.
Read less
Was this instruction helpful to you?
Thank you for voting!
- Customer:
- Philip from Severna Park, MD
- Parts Used:
- WP77001096
- Difficulty Level:
- Really Easy
- Total Repair Time:
- Less than 15 mins
- Tools:
- Screw drivers
Modern Maid Oven, Bake element barely warming
1. Locate range breaker and switch off.
2. Verify range has no power by switching fan or light on.
3. Have someone shine flashlight beam on inside back of oven.
4. Use screwdriver to remove two screws holding outer element to back of oven wall.
5. Carefully pull element out until wires attached to ends of element can b ... Read more e seen.
6. Pull connectors off ends of element, don't let them pull back into the insulation material.
7. Connect new element to wires.
8. Push element back into position and re-attach the screws.
9. Make sure that the element is resting nicely on the floor of the oven.
10. Reset the range breaker and test the oven.
Read less
Was this instruction helpful to you?
Thank you for voting!
- Customer:
- robert from chatham, VA
- Parts Used:
- WP74011278
- Difficulty Level:
- Really Easy
- Total Repair Time:
- 15 - 30 mins
- Tools:
- Nutdriver, Pliers, Screw drivers
hard to get old one out
easy to put in
Was this instruction helpful to you?
Thank you for voting!