



Models
>
ARTS6650EP1130667NE
ARTS6650EP1130667NE Amana Range
Jump to:
Find Part by Name
Keep searches simple, eg. "belt" or "pump".
Keep searches simple, eg. "belt" or "pump".
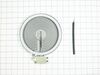
This surface element is made for under glass set-ups and supplies the heat to a cooking area on top of the range. It has an outside diameter of approximately 7 inches (1500 watts), and is a genuine OE...
In Stock
Order now and your part arrives by Sep 5
In Stock
Order now and your part arrives by Sep 5
$75.36
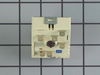
This is an OEM part sourced directly from Amana. This surface infinite element switch is commonly used in ranges and cooktops. This switch is designed to turn the surface element on and off, as well a...
In Stock
Order now and your part arrives by Sep 5
Sold individually. The size of this screw is 1/4" hex head and 10-12 x 1/2".
In Stock
Order now and your part arrives by Sep 5
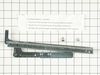
This OEM replacement part has been sourced from the manufacturer.?This hinge kit is designed for use with ranges and wall ovens. The hinges allow you to easily open and close the door on your applianc...
No Longer Available
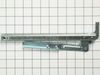
This is an authentic OEM replacement part. This hinge kit is commonly used with ranges. Working hinges allow you to easily open and close the door on your range. This kit comes with the hinge and the ...
No Longer Available
In Stock
Order now and your part arrives by Sep 5
$7.60
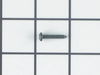
This is an authentic OEM replacement part. The screw is most often used in the assembly of ranges, cooktops, and wall ovens. A common use for this screw is to hold the burner head in place. However du...
In Stock
Order now and your part arrives by Sep 5
$9.79
This is an OEM part sourced directly from the manufacturer. This lock indicator light is used on a number of appliances. Most often it can be found in the assembly of ranges, dishwashers, washers, wal...
Special Order
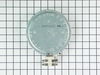
This is an authentic OEM replacement part. This is a radiant surface element used on ranges and cooktops. It is a 6-inch element designed for use with the small burners on your cooktop. This surface r...
No Longer Available
Common Problems and Symptoms for ARTS6650EP1130667NE
Viewing 2 of 2Element will not heat
Fixed by these parts
How to fix it
Door won’t close
Fixed by these parts
How to fix it
Keep searches simple. Use keywords, e.g. "leaking", "pump", "broken" or "fit".
- Customer:
- DALE from SURPRISE, AZ
- Parts Used:
- Y0315570
- Difficulty Level:
- Really Easy
- Total Repair Time:
- 30 - 60 mins
- Tools:
- Nutdriver, Screw drivers
Oven would not work at all. No display.
Pulled the power plug. Removed all the screws holding the back of the range in place. Checked all wiring to make sure there were no burns, cracks, or other problems. Removed the output wire from the thermocouple, reinserted the power cord and checked for voltage. Removed power cord, then removed the 4 screws holding the control in pla
... Read more
ce. Removed all electrical connections, making sure of where they went, then installed the new control. While still hanging loose, put the power plug back in and saw the time light up. Pulled power plug, put everything back together, put the power plug back in, shoved the range back in place and the owner proceded to bake an anglefood cake. All is well.
Read less
Was this instruction helpful to you?
Thank you for voting!
- Customer:
- Roger from Pleasanton, CA
- Parts Used:
- R0706011
- Difficulty Level:
- Easy
- Total Repair Time:
- Less than 15 mins
- Tools:
- Screw drivers
Rivet broke on the right side oven door hinge
Regarding my right side oven door hinge replacement, P/N PS2172201
After reading that other people had trouble threading the screws into the new hinge, I looked at the drilled mounting holes in the new hinge. Neither hole was threaded. The smaller hole used a self tapping sheet metal screw which works fine. The larger hole gets ... Read more a machine screw and will not self tap. Since the instructions say put the screw in "once" to tap the holes before installing the hinge, I tried this. It doesn't work, regardless of what the instructions say. The larger hole should come from the manufacture threaded. I do have a tap and die set so I tapped the hole myself. After that, the installation is a 5 min. ordeal.
Take the two screws, one on each side, out that hold the oven door on the hinges. The door will then pull straight off the hinges. Take the storage drawer below the oven out. Unscrew the top and bottom hinge screws and pull the old hinge out from inside at the bottom. Put the new "threaded" hinge into position and hold from the bottom, inside. Screw in the two screws, large one on the top end, and put the door back on. You can open both hinges about 30 degrees to allow the door to slide back on the hinges easily. Put the last two screws in that hold the door to the hinges and you are done.
Really very easy and saved several hundred dollars in repair bills. I might add that my hinge arrived on time 3 or 4 days after the order was placed.
After reading that other people had trouble threading the screws into the new hinge, I looked at the drilled mounting holes in the new hinge. Neither hole was threaded. The smaller hole used a self tapping sheet metal screw which works fine. The larger hole gets ... Read more a machine screw and will not self tap. Since the instructions say put the screw in "once" to tap the holes before installing the hinge, I tried this. It doesn't work, regardless of what the instructions say. The larger hole should come from the manufacture threaded. I do have a tap and die set so I tapped the hole myself. After that, the installation is a 5 min. ordeal.
Take the two screws, one on each side, out that hold the oven door on the hinges. The door will then pull straight off the hinges. Take the storage drawer below the oven out. Unscrew the top and bottom hinge screws and pull the old hinge out from inside at the bottom. Put the new "threaded" hinge into position and hold from the bottom, inside. Screw in the two screws, large one on the top end, and put the door back on. You can open both hinges about 30 degrees to allow the door to slide back on the hinges easily. Put the last two screws in that hold the door to the hinges and you are done.
Really very easy and saved several hundred dollars in repair bills. I might add that my hinge arrived on time 3 or 4 days after the order was placed.
Read less
Was this instruction helpful to you?
Thank you for voting!
One hinge was broken and the other was Sprung
Removed the door and old hinges and reinstalled the new hinges and added some screws to better support the door ( it was bending a little at the middle and the door would not shut all the way. Now it works fine.
Was this instruction helpful to you?
Thank you for voting!