



Models
>
ACF422GAC
ACF422GAC (PACF422GAC1) Amana Range
Jump to:
Find Part by Name
Keep searches simple, eg. "belt" or "pump".
Diagrams for ACF422GAC
Viewing 4 of 4


Keep searches simple, eg. "belt" or "pump".
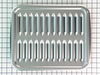
$50.36
This broiler pan and roasting rack set features a two-piece design that allows fat to drain away for cleaner cooking and reduced splatter. Made with a durable, high-heat resistant porcelain finish, it...
In Stock
Order now and your part arrives by Sep 17
This 10 oz bottle of cooktop cleaner is formulated to safely and effectively remove tough, baked-on residues from glass, ceramic, and porcelain surfaces. Its non-abrasive, creamy texture breaks down s...
No Longer Available
$11.98
Use this scraper for your ceramic/glass cooktop. It has a retractable blade and is an all-purpose tool for cooktops, mirrors, windows and tile. Use it to also remove paint, paper, dirt, stickers and more.
In Stock
Order now and your part arrives by Sep 17
$7.60
This is a multi-use frame screw that fits a variety of power tools and equipment. Follow installation instructions and safety practices provided in the manual by the manufacturer.
Special Order
In Stock
Order now and your part arrives by Sep 17
In Stock
Order now and your part arrives by Sep 17
This is a genuine OEM replacement part. This drawer wheel, also known as a drawer roller is commonly used with ranges. This is one of the rollers used in the drawer assembly; it ensures your opens and...
No Longer Available
In Stock
Order now and your part arrives by Sep 17
In Stock
Order now and your part arrives by Sep 17
$9.79
This is an OEM part sourced directly from the manufacturer. This lock indicator light is used on a number of appliances. Most often it can be found in the assembly of ranges, dishwashers, washers, wal...
Special Order
Common Problems and Symptoms for ACF422GAC
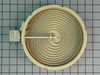
Viewing 2 of 2Element will not heat
Fixed by these parts
How to fix it
Will Not Start
Fixed by these parts
How to fix it


Keep searches simple. Use keywords, e.g. "leaking", "pump", "broken" or "fit".
- Customer:
- Julie from Newnan, GA
- Parts Used:
- W10355051
- Difficulty Level:
- A Bit Difficult
- Total Repair Time:
- More than 2 hours
Baked on sauce
Used cooktop creme, oven cleaner and Mr. Clean sponges. After many days of working on the surface, we were able to remove 99% of the sauce.
Was this instruction helpful to you?
Thank you for voting!
- Customer:
- Jeffrey from Miami Lakes, FL
- Parts Used:
- W10823710
- Difficulty Level:
- Really Easy
- Total Repair Time:
- Less than 15 mins
- Tools:
- Pliers, Screw drivers
The burner was not heating up
I removed only 3 screws that allowed me to lift the glass top on the stove. I removed the burner and I could see where it short circuited. I ordered the new burner element. After it arrived I replaced it by moving the wires from the old element to the new element, and put it back together.
I am sure that I saved at least $200 in "lab ... Read more or".
I am sure that I saved at least $200 in "lab ... Read more or".
Read less
Was this instruction helpful to you?
Thank you for voting!
- Customer:
- Joel from Andover, MN
- Parts Used:
- W10850495
- Difficulty Level:
- Really Easy
- Total Repair Time:
- Less than 15 mins
- Tools:
- Screw drivers
F2 code on display and temperature climbing
1. Flip "OFF" circuit breaker.
2. Pull out range unit from wall.
3. Unplug range unit.
4. On the back of the range unit, remove 4 screws holding lower rear cover using a phillips head screwdriver.
5. Remove lower rear cover.
6. Unplug temperature sensor connector (1 wire connector located upper right section behin ... Read more d oven).
7. From inside oven (upper left, back corner), remove 2 screws holding temperature sensor unit using a Phillips head screwdriver.
8. Remove old temperature sensor unit.
9. Insert new temperature sensor unit (wire connector end first) through opening and secure reusing old screws.
10. Re-connect temperature sensor connector.
11. Re-attach and secure lower rear cover reusing 4 old screws.
12. Plug in range unit.
13. Move range unit back to desired location.
14. Flip "ON" circuit breaker.
2. Pull out range unit from wall.
3. Unplug range unit.
4. On the back of the range unit, remove 4 screws holding lower rear cover using a phillips head screwdriver.
5. Remove lower rear cover.
6. Unplug temperature sensor connector (1 wire connector located upper right section behin ... Read more d oven).
7. From inside oven (upper left, back corner), remove 2 screws holding temperature sensor unit using a Phillips head screwdriver.
8. Remove old temperature sensor unit.
9. Insert new temperature sensor unit (wire connector end first) through opening and secure reusing old screws.
10. Re-connect temperature sensor connector.
11. Re-attach and secure lower rear cover reusing 4 old screws.
12. Plug in range unit.
13. Move range unit back to desired location.
14. Flip "ON" circuit breaker.
Read less
Was this instruction helpful to you?
Thank you for voting!