


Models
>
GH9184XLQ0
GH9184XLQ0 Whirlpool Microwave
Jump to:
Find Part by Name
Keep searches simple, eg. "belt" or "pump".
Diagrams for GH9184XLQ0
Viewing 6 of 6


Manuals & Guides for GH9184XLQ0
Click to downloadKeep searches simple, eg. "belt" or "pump".

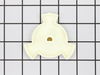
$8.70
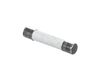
To access the exterior lightbulb, the bottom panel of the microwave will need to be removed. It is secured in place with screws, so will require a Philips screwdriver to remove it. Screw the new light...
In Stock
Order now and your part arrives by Jul 23

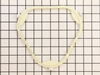
This glass cooking tray, also known as a turntable, is a genuine OEM replacement part for your microwave. The clear glass tray measures approximately 12 inches in diameter, and it is the surface that ...
No Longer Available

In Stock
Order now and your part arrives by Jul 23

In Stock
Order now and your part arrives by Jul 23

In Stock
Order now and your part arrives by Jul 23

In Stock
Order now and your part arrives by Jul 23

In Stock
Order now and your part arrives by Jul 23

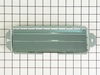
$37.49
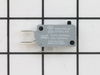
This part protects the microwave by shutting it off if there is an electrical surge.
In Stock
Order now and your part arrives by Jul 23

Special Order


In Stock
Order now and your part arrives by Jul 23

In Stock
Order now and your part arrives by Jul 23
Common Problems and Symptoms for GH9184XLQ0
Viewing 6 of 6Won’t turn on
Fixed by these parts
How to fix it
Tray won’t turn
Fixed by these parts

How to fix it
No heat
Fixed by these parts
How to fix it
Noisy
Fixed by these parts
How to fix it
Exhaust fan not working
Fixed by these parts
How to fix it
Door not closing properly
Fixed by these parts
How to fix it


Keep searches simple. Use keywords, e.g. "leaking", "pump", "broken" or "fit".
- Customer:
- Deborah from Baltimore, MD
- Parts Used:
- 4393799
- Difficulty Level:
- Really Easy
- Total Repair Time:
- Less than 15 mins
broken glass turntable
No repair- just replaced glass turntable.
Right part I needed with first try
Right part I needed with first try
Was this instruction helpful to you?
Thank you for voting!
- Customer:
- Deborah from Millersville, MD
- Parts Used:
- 8206232A
- Difficulty Level:
- Difficult
- Total Repair Time:
- Less than 15 mins
- Tools:
- Screw drivers
light bult needed to be replaced
The nightmare was that this microwave is installed under the cabinet....in order to get to the light bulb I had to pull out my stove then squeeze into the space between the stove and counter....my old microwave light bult was much easier to change.....Shame on Whirlpool for making this so difficult.....must be a better way to cover the li
... Read more
ght bulb so that we do not need a screwdriver to remove the door to get to the light bulb
Read less
Was this instruction helpful to you?
Thank you for voting!
- Customer:
- Joseph from Pembroke, MA
- Parts Used:
- 8206232A
- Difficulty Level:
- Really Easy
- Total Repair Time:
- Less than 15 mins
- Tools:
- Screw drivers
Bulb "burnt out"
Removed 1 screw, removed "burnt out" bulb and replaced it with new bulb.
Was this instruction helpful to you?
Thank you for voting!