


Models
>
WMH32519HB6
WMH32519HB6 Whirlpool Microwave
Jump to:
Find Part by Name
Keep searches simple, eg. "belt" or "pump".
Diagrams for WMH32519HB6
Viewing 6 of 6


Keep searches simple, eg. "belt" or "pump".

$8.35
To access the exterior lightbulb, the bottom panel of the microwave will need to be removed. It is secured in place with screws, so will require a Philips screwdriver to remove it. Screw the new light...
In Stock
Order now and your part arrives by Mar 26

$26.73
This is a single grease filter for a microwave. Most microwaves have two filters, the other one being the charcoal filter, which is a different filter, sold separately, and has different maintenance i...
In Stock
Order now and your part arrives by Mar 26

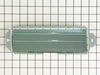
$23.05
This mounting plate is a genuine OEM part for your microwave. This metal bracket is approximately 30 inches in length and is used to support your microwave when installed under cabinets. Please note t...
In Stock
Order now and your part arrives by Mar 26

In Stock
Order now and your part arrives by Mar 26

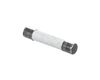
$36.00
This part protects the microwave by shutting it off if there is an electrical surge.
In Stock
Order now and your part arrives by Mar 26

$10.45
The light socket in your microwave houses the light bulb and connects it to the power source. The light bulb will screw into it, so the light bulb will be held in place. Be very careful when installin...
In Stock
Order now and your part arrives by Mar 26

In Stock
Order now and your part arrives by Mar 26

$19.90
This OEM top interlock support ensures the microwave only operates when the door is securely closed. It holds the interlock switch in place and helps prevent safety issues like radiation exposure or i...
In Stock
Order now and your part arrives by Mar 26

In Stock
Order now and your part arrives by Mar 26

$74.41
This is a manufacturer-approved mounting kit for your microwave. This kit is crucial for keeping your microwave securely wall-mounted. This kit does not include the mounting plate itself. This kit com...
In Stock
Order now and your part arrives by Mar 26

In Stock
Order now and your part arrives by Mar 26

In Stock
Order now and your part arrives by Mar 26
Questions and Answers
We're sorry, but our Q&A experts are temporarily unavailable.
Please check back later if you still haven't found the answer you need.
Common Problems and Symptoms for WMH32519HB6
Viewing 7 of 7Won’t turn on
Fixed by these parts


How to fix it
Door not closing properly
Fixed by these parts


How to fix it
Exhaust fan not working
Fixed by these parts

How to fix it
Tray won’t turn
Fixed by these parts


How to fix it
No heat
Fixed by these parts

How to fix it
Doesn’t shut off
Fixed by these parts
How to fix it
Noisy
Fixed by these parts
How to fix it


Keep searches simple. Use keywords, e.g. "leaking", "pump", "broken" or "fit".
- Customer:
- Deborah from Millersville, MD
- Parts Used:
- 8206232A
- Difficulty Level:
- Difficult
- Total Repair Time:
- Less than 15 mins
- Tools:
- Screw drivers
light bult needed to be replaced
The nightmare was that this microwave is installed under the cabinet....in order to get to the light bulb I had to pull out my stove then squeeze into the space between the stove and counter....my old microwave light bult was much easier to change.....Shame on Whirlpool for making this so difficult.....must be a better way to cover the li
... Read more
ght bulb so that we do not need a screwdriver to remove the door to get to the light bulb
Read less
Was this instruction helpful to you?
Thank you for voting!
- Customer:
- Joseph from Pembroke, MA
- Parts Used:
- 8206232A
- Difficulty Level:
- Really Easy
- Total Repair Time:
- Less than 15 mins
- Tools:
- Screw drivers
Bulb "burnt out"
Removed 1 screw, removed "burnt out" bulb and replaced it with new bulb.
Was this instruction helpful to you?
Thank you for voting!
- Customer:
- Todd from San Bernardino, CA
- Parts Used:
- W10642989
- Difficulty Level:
- A Bit Difficult
- Total Repair Time:
- More than 2 hours
- Tools:
- Pliers, Screw drivers
Microwave turntable does not work
My unit is a wall mount/cabinet/built-in model. The repair is actually fairly simple once you determine that the actual microwave is just a component of the entire unit, and that it (the microwave) can be easily removed from the unit. I did not figure this out until after I removed the entire unit (disconnect the power supply, lift the
... Read more
entire bulky, heavy unit out of the cramped space in the cabinet, etc). Once I got it out I figured out how easy it is to remove the actual oven - a couple of screws, literally. The unit is a bit bulky, but not particularly heavy and is quite manageable. I did this entire process alone.
I got the oven out, rolled it on it's side and found the plate to access the motor. The plate is located on the bottom/underside of the unit. The plate is nothing more than a section of the underside of the metal housing that has been cut-out as an access point. This "cut-out" is not complete - that is, not completely cut out so as to all the plate to stay in place without the need for screws, etc, until you actually have to use it. I used a pair of dykes to cut the couple of points still connecting this plate, removed the two phillips screws to remove the motor, disconnected the two wires connected, then reversed to complete the repair. You then flip the cut-out plate over/rotate it, and some screw holes line up. Find a couple of small screws, and re-attach the plate to cover the motor.
The actual fix is really easy, again, once you figure out the simple way to remove the oven. I am an idiot, so you will probably find this much easier. I could probably do this repair now, after my experience, in less than 30 minutes (probably less than 15 minutes). I probably save a couple hundred $ by doing it myself so was well worth the time to do it. Good luck.
Read less
Was this instruction helpful to you?
Thank you for voting!