This glass turntable tray is designed for use in microwaves, ensuring even cooking by rotating food throughout the heating process. It provides a stable surface for dishes and cookware while distribut...
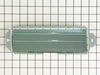
This is a manufacturer-approved mounting kit for your microwave. This kit is crucial for keeping your microwave securely wall-mounted. This kit does not include the mounting plate itself. This kit com...
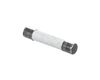
This replacement filter is designed to capture debris, odors, or contaminants during appliance operation. It helps maintain efficiency and protect internal components and is commonly replaced during r...
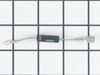
This mounting plate provides a secure foundation for attaching components within the appliance, ensuring proper alignment and structural stability. It is commonly replaced when wear, corrosion, or dam...
Need to replace a missing or worn-out brand label on your appliance? This nameplate is a simple peel-and-stick fix that restores the look of your fridge, stove, or dryer. It shows the brand and model ...
In Stock
Order now and your part arrives by Jul 11
Questions and Answers
Ask our experts a question about this part and we'll get back to you as soon as possible!
2 questions answered by our experts.
< Prev
1
Next >
Sort by:
Search filter:
Clear Filter
Your search term must have 3 or more characters.
Keep searches simple. Use keywords, e.g. "leaking", "pump", "broken" or "fit".
Sorry, we couldn't find any existing answers that matched. Try using some different or simpler keywords, or submit your new question by using the "Ask a Question" button above!
John
May 4, 2022
The door will not open with the button. You can hear as if the motpr is running but it will not open.
For model number WML75011HZ1
Hi John,
Thank you for your question. If the open button will not work, try using a hair dryer on low heat and massage the button to see if you can get it to work. If that does not help, you will need to order a new right side control panel. The part number listed under your model number for the white right side control panel is PS12578281. The part number listed for the stainless steel right side panel is PS12578280. The part number listed for the black stainless steel right side control panel is PS12578284. The part number listed for the sunset bronze right side control panel is PS12578282. The part number listed for the black right side control panel is PS12578283. If you need help placing an order for one of these parts, customer service is open 7 days a week and anyone will be happy to assist you. Please feel free to give us a call. We look forward to hearing from you!
When the door open button is pressed it makes a sound as if the motor is trying to open the latch. Then the only way to turn off the sound is to unplug the unit and plug it back.
For model number WML75011HZ1
Hello John, Thank you for the question. We suggest testing the Micro Switches in the Interlock to see if they are testing Normally Open or Normally Closed. Also check to make sure the are properly seated in the Interlock Bracket. If you need help placing an order, customer service is open 7 days a week. Please feel free to give us a call. We look forward to hearing from you!
Unless you have a very comfortable background with electronics and electricity, I don't necessarily recommend taking apart a microwave. If you are very handy and are going to be VERY cautious to follow the rules of discharging caps and testing voltages before moving forward, then go for it. That said, I took the microwave off and apart.
... Read more Not knowing where to find the parts, I was fortunate that the installer put the instruction book for the microwave inside the front vent slot above the touchpad for reference. it details the location of every part and it tells you very clearly what each part you test should show specific to this microwave on your multimeter. Find this guide online if you don't have it. Turn on the microwave for 20 seconds with a glass of water to make sure it's not heating - that with the noise means it's eeither the magnetron, cap, or diode. Read the notes on this site for all of the basic things to look for with the magnetron, diode, and capacitor. Once comfortable with the guide, locations of those devices, and how to test, then take it down and apart. Unfortunately, I didn't do all those things in that order, and it only wasted a lot of time trying to find the parts. Once I found the parts and put all the screws and covers back for all the areas that didn't need to be accessed for the repair, testing went quickly. The diode was bad. Ordered a new one and had it in 3 days or so. That means your microwave will be apart and sitting somewhere for a little while until you get the part and have time to repair it. Putting the diode back isn't too bad. Reassemble the microwave and put it back up again. If i had to do it again, it would take me 20 to 30 minutes once the microwave was down and on a table. Also, I used some bricks with towels over them or you could use some sawhorses to keep the microwave elevated so you can plug it in and run it after installing the new component. Again, make sure you discharge the cap before touching anything again even if you didn't run it, but just plugged it in.
I turn off the income electricity by shutting down the corresponding circuit breaker. Then, I removed the control panel from the microwave which gave me access to the capacitor and adjacent diode. After that i unscrewed the defective diode and replaced it with the new one and BINGO!
Read some instructions and easily found the fuse. Replaced it. Still didn't work. Took control panel off to check door switches. Nothing I read mentioned a second fuse. Tested and it to had blown. Ordered another one. Popped them in. Done.