



Models
>
GH7155XKQ
GH7155XKQ Whirlpool Microwave
Jump to:
Find Part by Name
Keep searches simple, eg. "belt" or "pump".
Keep searches simple, eg. "belt" or "pump".
$14.16
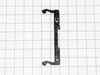
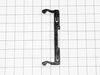
The locker, or door latch assembly fits to the inside of the microwave door, and keeps the door closed. If the door on your microwave oven doesn’t appear to close properly, you may have a problem with...
In Stock
Order now and your part arrives by Oct 26
In Stock
Order now and your part arrives by Oct 26
Special Order
In Stock
Order now and your part arrives by Oct 26
Special Order
In Stock
Order now and your part arrives by Oct 26
In Stock
Order now and your part arrives by Oct 26
In Stock
Order now and your part arrives by Oct 26
Special Order

Special Order
Common Problems and Symptoms for GH7155XKQ
Viewing 3 of 3Door not closing properly
Fixed by these parts
How to fix it
No heat
Fixed by these parts
How to fix it
Won’t turn on
Fixed by these parts
How to fix it
Keep searches simple. Use keywords, e.g. "leaking", "pump", "broken" or "fit".
- Customer:
- Eileen from DETROIT LAKES, MN
- Parts Used:
- 1B71961H
- Difficulty Level:
- Very Easy
- Total Repair Time:
- Less than 15 mins
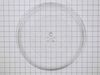
Broke the round glass tray
new glass tray
Was this instruction helpful to you?
Thank you for voting!
- Customer:
- Dave from FOREST, VA
- Parts Used:
- 4026W2A019A
- Difficulty Level:
- Easy
- Total Repair Time:
- 15 - 30 mins
Door locker snapped off
Unplugged the microwave. I opened the door. I used a butter knife to pop the bezel off the inside of the door. I pushed the locker up and to the left and used the butter knife to pry it loose. Disconnected the locker from the spring, and reversed for the installation.
Was this instruction helpful to you?
Thank you for voting!
- Customer:
- Roy from MILLINGTON, TN
- Parts Used:
- 3500W1A013R
- Difficulty Level:
- Really Easy
- Total Repair Time:
- 1- 2 hours
- Tools:
- Pliers, Screw drivers
Micro Wave no heat all else fine. Also at times door would not shut properly.
Replace (after testing w/ohm meter) diode and locker holder. My door often would not close properly. Microwave let know by saying not shut properly. When disassembled found the top screw mount was hollowed out resulting in it moving on occasion when you close door. First remove casing (special safety torx head) needed for rear screws.
... Read more
Onc e removed all parts available to view or work on. Diode is on the capacitor so caution is needed when removing. Serious shock hazard if touched. Use insulated pliers to remove from capacitor and a phillips on the ground. Test with ohm meter Should have resistance on way and non the opposite. Replaced mine bad. Next the holder 2 phillips screws and its yours. Unplug each switch and remove. Take note to what wires go to what switch and what switch mounts where. Mine had 3 switches. Removed from old holder and put in new. Screwed holder back in place and left scrws loose till re wired. Once wired set the holder by lightly tighting the screws. Try the door till it seats properly ensuring that all 3 switches are working properly. If so thighten screws. If all seems to work as advertised, safely plug in and test unit if heats up un plug and put cover back on micro. Your all set. Happy heating.
Read less
Was this instruction helpful to you?
Thank you for voting!