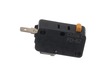
If you discover that the glass cooking tray in your microwave is damaged, you may have to replace it to operate the microwave properly. The glass cooking tray connects to the turntable of the microwav...
This part is the replacement flat bolt for your microwave. It is a Phillips-head screw, which is approximately 4 inches long. The main reason to replace this bolt is if your current bolt is stripped, ...
Ask our experts a question about this part and we'll get back to you as soon as possible!
3 questions answered by our experts.
< Prev
1
Next >
Sort by:
Search filter:
Clear Filter
Your search term must have 3 or more characters.
Keep searches simple. Use keywords, e.g. "leaking", "pump", "broken" or "fit".
Sorry, we couldn't find any existing answers that matched. Try using some different or simpler keywords, or submit your new question by using the "Ask a Question" button above!
Nathan
November 30, 2021
This one smoked! Turntable kept turning, internal light stayed on, control panel is ok, vent fan & under light still worked. Stopped heating. Strong smell of burnt polymers in thick blue smoke. Guessing power control pcb, xfmr, hv cap or magnetron? Or all of the above??
For model number SMH1816S
Hello Nathan, Thank you for the question. This normally indicates a faulty Magnetron. We suggest testing the Magnetron with a Multimeter. The magnetron can be tested with an multi meter set on the highest scale. Across the terminals, you should read 0 ohms (or .5 ohms). Test both terminals to ground with one lead and make sure it is not shorted. We hope this helps!
1 person found this helpful.
Was this helpful?
Thank you for voting!
Nathan
November 30, 2021
Ok. So, across the element terminals should be roughly 0- 0.5 ohms. But from either terminal to ground (or shell) should be open correct?
For model number SMH1816S
Hello Nathan, Thank you for contacting us. Yes, this should read closed. We hope this helps!
1 person found this helpful.
Was this helpful?
Thank you for voting!
Rita
February 4, 2025
Our kitchen was remodeled and when the microwave was reinstalled it worked for a few seconds and then quit. No lights, no power.
I have tried replacing the fuses and got lights. As soon as I powered it up, it quit. Should I replace the capacitor? If so, how would you recommend I do this. thanks so much!
For model number SMH1816S
Hello Rita, thank you for your question. If your microwave is completely dead, then unfortunately it means that one of your fuses is dead or your outlet isn't sending power to the microwave. This is a high limit thermostat PS4226431 designed for use within various models of microwaves. The purpose of a high limit thermostat is to open the circuit of the appliance when the internal temperature reaches a certain threshold, to avoid becoming a safety hazard. If this thermostat fails or is damaged, it will cause your microwave to stop operating entirely. We hope this helps.
Was this helpful?
Thank you for voting!
Ask a Question
Ask our experts a question on this part and we'll respond as soon as we can.
Removed control panel, discharged HV capacitor. Removed old diode, tested to confirm failure. Replaced part. Other than the removal of the panel swapping the part was almost as easy as replacing a light bulb.
I removed the outer cover and exposed the inner workings. I watched a video on partselect.com to show how to remove and replace the Diode. I followed the instructions and it was very easy to replace.
Unfortunately, the diode was only part of the issue. I ended up replacing the High Voltage capacitor and Magnetron also. Those w
... Read moreere a little more complicated but still easy to do.
Now the Microwave works just like new! Cost me less than $100 for all parts.
The high voltage tired was shorted. I replaced it with a new one, but that did not solve the problem.
You can test the high voltage tired with a voltmeter and a 9 V battery. Search Search for it on YouTube.
You can also test the high voltage capacitor, the high-voltage transformer, and the magnetron with a multi met
... Read moreer. Search for the procedures on YouTube.
I tested all these high-voltage components with a low-voltage multi meter, and they all checked out OK (after replacing the diode). However the microwave still did not heat food.
When working on a microwave it is important to unplug it and also discharge the high voltage capacitor. The capacitor has a 10 megaohm resister to automatically discharge itself, but it may have failed – – so discharge it manually.