



Models
>
CME400
CME400 Maytag Microwave
Jump to:
Find Part by Name
Keep searches simple, eg. "belt" or "pump".
Diagrams for CME400
Viewing 9 of 9


Keep searches simple, eg. "belt" or "pump".
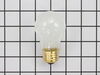
$19.75
This is a genuine OEM 40-Watt replacement light bulb that is compatible with various types of appliances. It has a frosted glass bulb with a standard metal socket base, making it easy to screw and uns...
In Stock
Order now and your part arrives by Oct 22
$21.82
This is a screw and it is made for multiple appliances in your home. This model is called a sheet metal screw because it has sharp points, and the threads are closer together. This screw is designed t...
In Stock
Order now and your part arrives by Oct 22

In Stock
Order now and your part arrives by Oct 22

Special Order
Common Problems and Symptoms for CME400
Viewing 2 of 2

Keep searches simple. Use keywords, e.g. "leaking", "pump", "broken" or "fit".
- Customer:
- Daniel from San Diego, CA
- Parts Used:
- 530106
- Difficulty Level:
- Really Easy
- Total Repair Time:
- 1- 2 hours
- Tools:
- Nutdriver, Pliers, Screw drivers
Noisy blower wheel
I first unplugged the unit, unlatched the top cover, removed the wires for the door switch, then removed the two screws securing the front panel. I "propped open" the top lid with a 2 by 4. I then lifted away the front panel, removed the blower housing screws to expose the blower. Then I removed the snap ring on the blower shaft, the c
... Read more
lamp holding the blower wheel in place, and slid the blower wheel off the motor shaft. Reassembly was in the reverse order. Was very easy.
Read less
Was this instruction helpful to you?
Thank you for voting!
- Customer:
- John from Inverness, FL
- Parts Used:
- WPY01050009
- Difficulty Level:
- Really Easy
- Total Repair Time:
- Less than 15 mins
- Tools:
- Screw drivers
Blown Fuse - Ps1750182
Unscrewed the cover of the microwave replaced the blown fuse with the new fuse, plugged in the microwave and tested all functions and everything worked fine. Thx for quick delivery.
Was this instruction helpful to you?
Thank you for voting!
- Customer:
- Lawrence from Clifton Forge, VA
- Parts Used:
- 530106
- Difficulty Level:
- Really Easy
- Total Repair Time:
- 15 - 30 mins
- Tools:
- Pliers, Screw drivers, Socket set
Blower wheel broke and makeing loud clunking noise
1st thing,,,,unplug dryer from electric,,,Raised the top of dryer, took 2 screws out that held front of dryer on, removed 3 wires and dropped front of dryer. exposed blower wheel,, removed all nuts holding front of blower wheel, removed clamp on front of wheel with pliers, removed old wheel, replaced everything in reverse.
Was this instruction helpful to you?
Thank you for voting!