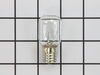
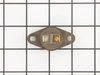
To access the exterior lightbulb, the bottom panel of the microwave will need to be removed. It is secured in place with screws, so will require a Philips screwdriver to remove it. Screw the new light...
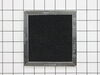
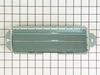
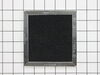
This is a charcoal filter for an over-the-range microwave. It is designed to absorb grease before making its way into the vent, which could cause damage or build-up. It also helps to reduce odors whil...
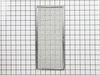
This is a single grease filter for a microwave. Most microwaves have two filters, the other one being the charcoal filter, which is a different filter, sold separately, and has different maintenance i...
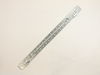
This mounting plate is a genuine OEM part for your microwave. This metal bracket is approximately 30 inches in length and is used to support your microwave when installed under cabinets. Please note t...
The light socket in your microwave houses the light bulb and connects it to the power source. The light bulb will screw into it, so the light bulb will be held in place. Be very careful when installin...
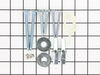
This is a manufacturer-approved mounting kit for your microwave. This kit is crucial for keeping your microwave securely wall-mounted. This kit does not include the mounting plate itself. This kit com...
Ask our experts a question about this part and we'll get back to you as soon as possible!
1 question answered by our experts.
< Prev
1
Next >
Sort by:
Search filter:
Clear Filter
Your search term must have 3 or more characters.
Keep searches simple. Use keywords, e.g. "leaking", "pump", "broken" or "fit".
Sorry, we couldn't find any existing answers that matched. Try using some different or simpler keywords, or submit your new question by using the "Ask a Question" button above!
Ann
July 4, 2022
I have purchased the part, took apart microwave as directed in a video with a similar model but I can’t find the part (diode) to replace it. Any chance you can send me a photo or diagram of my model and show me where it is? Please help
For model number MMV4206FZ5
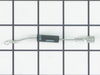
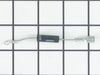
Hello Ann, Thank you for the question. NOTE: If you are not comfortable doing this yourself, please get an electrician to do this repair as the microwave can hold a charge even when unplugged. Before you begin any repair please unplug the appliance from the electrical outlet. Use a Phillips head screw driver to unthread the screws securing the grill. With the screws removed, open the microwave oven door then the slide the grill to the left and lift it up to remove. Next remove the control panel mounting screw then lift the control panel up to detach. Then remove the screw holding the inner access panel and then release the panel from the retaining clips. To avoid injury, you will need to release the potentially dangerous charge from the capacitor by using an insulated pair of needle nose pliers to touch both terminals simultaneously. Be careful not to touch the metal portion of the tool. Now remove the screw holding the diode to the frame. Use pliers to pull the diode free of the capacitor. You can now install the new diode. Connect it to the terminal on the capacitor and then secure it to the frame with the screw. Reinstall the inner access panel securing it with the screw. Now insert the control panel tabs to the slots in the frame and push the panel down. Secure it with the mounting screw. Insert the tabs of the grill into the frame and slide it to the right. Shut the oven door and then secure the grill with the screws. Plug the power cord back in and the microwave should now work. We hope this helps!
Was this helpful?
Thank you for voting!
Ask a Question
Ask our experts a question on this part and we'll respond as soon as we can.
The nightmare was that this microwave is installed under the cabinet....in order to get to the light bulb I had to pull out my stove then squeeze into the space between the stove and counter....my old microwave light bult was much easier to change.....Shame on Whirlpool for making this so difficult.....must be a better way to cover the li
... Read moreght bulb so that we do not need a screwdriver to remove the door to get to the light bulb
Unless you have a very comfortable background with electronics and electricity, I don't necessarily recommend taking apart a microwave. If you are very handy and are going to be VERY cautious to follow the rules of discharging caps and testing voltages before moving forward, then go for it. That said, I took the microwave off and apart.
... Read more Not knowing where to find the parts, I was fortunate that the installer put the instruction book for the microwave inside the front vent slot above the touchpad for reference. it details the location of every part and it tells you very clearly what each part you test should show specific to this microwave on your multimeter. Find this guide online if you don't have it. Turn on the microwave for 20 seconds with a glass of water to make sure it's not heating - that with the noise means it's eeither the magnetron, cap, or diode. Read the notes on this site for all of the basic things to look for with the magnetron, diode, and capacitor. Once comfortable with the guide, locations of those devices, and how to test, then take it down and apart. Unfortunately, I didn't do all those things in that order, and it only wasted a lot of time trying to find the parts. Once I found the parts and put all the screws and covers back for all the areas that didn't need to be accessed for the repair, testing went quickly. The diode was bad. Ordered a new one and had it in 3 days or so. That means your microwave will be apart and sitting somewhere for a little while until you get the part and have time to repair it. Putting the diode back isn't too bad. Reassemble the microwave and put it back up again. If i had to do it again, it would take me 20 to 30 minutes once the microwave was down and on a table. Also, I used some bricks with towels over them or you could use some sawhorses to keep the microwave elevated so you can plug it in and run it after installing the new component. Again, make sure you discharge the cap before touching anything again even if you didn't run it, but just plugged it in.