


Models
>
LMV2031ST
LMV2031ST ((00)) LG Microwave
Jump to:
Find Part by Name
Keep searches simple, eg. "belt" or "pump".
Diagrams for LMV2031ST
Viewing 7 of 7 LG Microwave")
 LG Microwave")
 LG Microwave")
 LG Microwave")
 LG Microwave")
 LG Microwave")
 LG Microwave")
Keep searches simple, eg. "belt" or "pump".

In Stock
Order within the next 40 mins and your part ships today!

In Stock
Order within the next 40 mins and your part ships today!

$54.65
If the vent grille for your microwave has become broken or damaged, this is a genuine OEM replacement part. The vent grille is made of black plastic and measures approximately 24 inches long and 3.5 i...
In Stock
Order within the next 40 mins and your part ships today!

$41.90
This is an authentic LG charcoal filter for your microwave, sourced directly from the manufacturer. It is designed to remove odors from the air that circulate through your microwave vent. It measures ...
In Stock
Order within the next 40 mins and your part ships today!

In Stock
Order within the next 40 mins and your part ships today!

In Stock
Order within the next 40 mins and your part ships today!

$21.24
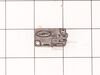
This bracket holds the metal or plastic flapper that closes off the exhaust duct when the fan is not running and opens when the fan turns on. If the exhaust fan on your microwave does not appear to be...
In Stock
Order within the next 40 mins and your part ships today!

$14.08
This metal vent damper door closes off the exhaust duct when the fan is not running to stop outside air from entering the microwave unit, and opens when the fan turns on to allow air to vent away from...
In Stock
Order within the next 40 mins and your part ships today!

$15.86
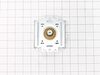
This mounting plate is a manufacturer-approved replacement part for your microwave. The mounting plate, or bracket, secures your above-range microwave in place against the wall. To conduct this repair...
In Stock
Order within the next 40 mins and your part ships today!

$21.58
This genuine OEM light socket provides power to the light bulb in your microwave while holding it in place. This light socket is two pronged and the bulb should screw easily into it. If your light bul...
In Stock
Order within the next 40 mins and your part ships today!

In Stock
Order within the next 40 mins and your part ships today!

$24.85
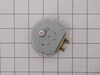
If the turntable on your microwave does not rotate, or you can hear a grinding noise, the problem may be with the motor. The motor is typically located below the floor of the oven, and is accessed thr...
In Stock
Order within the next 40 mins and your part ships today!
Questions and Answers
We're sorry, but our Q&A experts are temporarily unavailable.
Please check back later if you still haven't found the answer you need.
Common Problems and Symptoms for LMV2031ST
Viewing 10 of 10No heat
Fixed by these parts

How to fix it
Won’t turn on
Fixed by these parts

How to fix it
Tray won’t turn
Fixed by these parts
How to fix it
Doesn’t shut off
Fixed by these parts
How to fix it
Little to no heat when baking
Fixed by these parts
How to fix it
Door not closing properly
Fixed by these parts


How to fix it
Element will not heat
Fixed by these parts
How to fix it
Door won’t open after self cleaning cycle
Fixed by these parts
How to fix it
Oven not heating evenly
Fixed by these parts
How to fix it
Oven is too hot
Fixed by these parts
How to fix it
Keep searches simple. Use keywords, e.g. "leaking", "pump", "broken" or "fit".
- Customer:
- JAMES from BILLINGS, MT
- Parts Used:
- 3B73362F
- Difficulty Level:
- Very Easy
- Total Repair Time:
- 30 - 60 mins
- Tools:
- Screw drivers
Broken door micro switch. (unit does not start heating)
Unplug the unit before servicing. Need phillips screwdriver. Open door. Use step ladder to access and remove 2 small screws from top of the room air diffuser at top of unit. Slide diffuser slightly to the left to align the diffuser's plastic tab on the left side to rotate toward you. (The wires for the front control panel are at the far l
... Read more
eft side of this difuser, but difuser is slotted for easy removal). Once the difuser is removed you will see 1 screw at the top that secures the pannel cover on the left side of the unit. Remove screw and slide this panel slightly up and out. This exposes the plastic frame that holds the upper and lower door switches. To locate the door switches and observe how they work, close and open the door and watch the door (bayonets) open and close the micro switches. Do the (red) buttons on top of the switches move up and down when the door bayonets push and release? If the buttons do not "pop" up when opened the switch is defective. The switch frame is secured with 2 screws. Remove screws and rotate the unit out for easy access to the micro switch(s). The internal (spring?) on my unit that is suposed to allow the red (visible) button on top of the switch to "pop" up when the door is opened was broken. Carefully pry the switch outward while being careful to lift the plastic holder-piece that holds the switch in place. Be careful, there is a small pin on the frame, so rotate the switch OUT toward you while lifting (carefully) the plastic holder-piece (you will see it on top of the switch). You can use an ohm meter to test the continuity of the switches. But if the buttons don't "pop" they are defective. Replace switch and reassemble.
Read less
Was this instruction helpful to you?
Thank you for voting!
- Customer:
- tony from kewanna, IN
- Parts Used:
- 5230W1A012E
- Difficulty Level:
- Really Easy
- Total Repair Time:
- Less than 15 mins
needed grease filters for a used over range microwave
ordered on the part select web site, came quickly, order was correct
Was this instruction helpful to you?
Thank you for voting!
- Customer:
- Andy from PERRYSBURG, OH
- Parts Used:
- MDX61912701
- Difficulty Level:
- Really Easy
- Total Repair Time:
- 30 - 60 mins
- Tools:
- Screw drivers
Vent Grille tabs snapped off
Repair was easy but you have to remove the screw at the top of the microwave (top left) in order to secure the far left tab with the hole in the tab. Place the grille in place, push to the left and then secure the screw you removed. Just remember that the mounted screw will need to be removed the next time you need access in order to repl
... Read more
ace the charcoal filter.
Read less
Was this instruction helpful to you?
Thank you for voting!