


Models
>
KBMS1454SSS0
KBMS1454SSS0 KitchenAid Microwave
Jump to:
Find Part by Name
Keep searches simple, eg. "belt" or "pump".
Diagrams for KBMS1454SSS0
Viewing 6 of 6


Manuals & Guides for KBMS1454SSS0
Click to downloadInstall
Installation Instructions
(0.24MB)
Install
Installation Instructions
(0.51MB)
Manual
Owner's Manuals
(0.32MB)
Manual
Owner's Manuals
(1.64MB)
Specs
Product Specifications Sheet
(0.07MB)
Keep searches simple, eg. "belt" or "pump".

$73.24
This is a genuine OEM replacement turntable tray for your microwave. The tray rotates while the microwave is operating, to help your food heat evenly. If your tray has become chipped, cracked, or comp...
In Stock
Order now and your part arrives by Jul 31

In Stock
Order now and your part arrives by Jul 31

On Order

$48.21
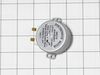
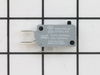
This door interlock switch ensures your microwave operates only when the door is securely closed. It communicates the door’s position to the control board, helping prevent accidental use. It’s often r...
In Stock
Order now and your part arrives by Jul 31

$54.12
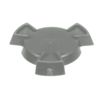
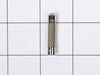
This roller is located underneath the glass turntable. With the help of the motor, this roller helps to rotate the glass tray. This part takes the place of the coupling.
In Stock
Order now and your part arrives by Jul 31

In Stock
Order now and your part arrives by Jul 31

Special Order

In Stock
Order now and your part arrives by Jul 31

$142.50
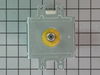
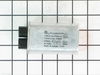
This electronic control board manages microwave functions like cooking time, power levels, and defrost cycles. It also powers the display and communicates with other components. Replace it if your mic...
In Stock
Order now and your part arrives by Jul 31

In Stock
Order now and your part arrives by Jul 31

In Stock
Order now and your part arrives by Jul 31

In Stock
Order now and your part arrives by Jul 31
Common Problems and Symptoms for KBMS1454SSS0
Viewing 5 of 5Tray won’t turn
Fixed by these parts

How to fix it
No heat
Fixed by these parts
How to fix it
Won’t turn on
Fixed by these parts
How to fix it
Noisy
Fixed by these parts
How to fix it
Door not closing properly
Fixed by these parts
How to fix it
Keep searches simple. Use keywords, e.g. "leaking", "pump", "broken" or "fit".
- Customer:
- Lindsay from Nampa, ID
- Parts Used:
- W10245183
- Difficulty Level:
- A Bit Difficult
- Total Repair Time:
- 1- 2 hours
- Tools:
- Nutdriver, Screw drivers
My microwave began suddenly making a loud humming noise while cooking food.
My microwave began suddenly making a loud harsh humming noise while cooking food. I did not let it go on long enough to know if it cooked the food or not. I did some Internet research and learned that it was likely the Magnetron. The test for this was to run the microwave for at least a minute on the lowest power setting and see if the no
... Read more
ise cycled on and off. It did, so I (actually, my wife) ordered the part from partselect.com using the model number. I was successful in replacing the part, and we are back to microwave popcorn and quick defrost for a price that was less than a service call, however, it was time consuming, required a large work area, and access to 5 out of 6 sides of the unit. So proceed at your own discretion
Caution:
The first thing in every set of repair instructions was to discharge (short-circuit) the capacitor, as it may store large (as in lethal) amounts of electricity even when it is not connected to a power source. I had never done this, but found these instructions:
“Discharging your microwave's capacitor is absolutely essential in preventing injury to your microwave, your tools, and yourself. A capacitor stores a large amount of electricity even when your microwave is unplugged, and it must be discharged before beginning any repair.
A capacitor is discharged by creating a short circuit between each of the two capacitor terminals, and between each terminal and the chassis. The chassis is the metal mounting (bare metal surface) of the capacitor. Read these directions thoroughly before you proceed.
With your microwave unit unplugged, touch the blade of a well insulated screwdriver to one terminal. Gently slide the screwdriver forward until it reaches the other terminal, holding it there for a few seconds. Be aware that this often results in a loud and startling 'POP'.
Repeat this procedure in order to create a short circuit between each capacitor terminal and the chassis (bare metal mounting plate surface). This same method can be applied to a capacitor having three, and not two, terminals.”
I had not run my microwave in over a week, and then while my part was shipping, left my microwave 'unplugged' for more than two days, and my capacitor apparently discharged itself, although I did go through the above procedure carefully and completely - just in case.
Step-By-Step:
1. You must remove your microwave from the cabinets - it is impossible to repair otherwise. This is best accomplished with 2 strong people - my wife and I made it work, but wished for another guy.
a. While supporting the microwave, remove the two screws coming down through the cabinet above.
b. Lift the rear of the microwave as much as possible, then tilt the front down - there is a clip high on the left side, as well as the hinge/clips on the bottom.
c. If you do not lift it off the wall all at once, you may have to lift the rear even farther to remove it from the hinge/clips on the bottom.
Important Note: Always beware of the microwave door, if it is bent or broken and cannot retain a seal, the microwave not function as a safety feature to keep from releasing microwaves.
2. Remove the vent cover on the top/front of the microwave - be careful, it's plastic.
3. Remove the vent cover and light panel on the bottom of the microwave - this is several screws and some simple wire clips.
4. Remove the "shell" (top and sides) of the microwave - this is several more screws on the back. Make sure to remove the plate that is holding the cord in place on the top.
5. Remove the interface panel by the screws on the top (which had been hidden by the vent cover) - the wires can remain attached, just slide it aside.
6. Remove the metal cover on the right side at the rear; this will expose the Magnetron and the Capacitor. Remember to immediately test and discharge the capacitor!
7. After you discharge the capacitor, remove the other cover plate and the support bracket - in case you haven't noticed, this is a time and space consuming operation.
8. You
Read less
Was this instruction helpful to you?
Thank you for voting!
- Customer:
- Liza from Monterey, CA
- Parts Used:
- W11373838
- Difficulty Level:
- Really Easy
- Total Repair Time:
- Less than 15 mins
Microwave glass turntable when pop
After popping the last few kernals of popcorn, we hear a different kind of pop sound come from our microwave oven. When we looking inside, we found that the glass turntable had broken unevenly in half. Although we didn't understand why it had happned, we did know we'd be without the use of the microwave without a new one. After less th
... Read more
an 10 minutes surfing online, I had found the correct part on PartSelect.com and had arranged to have it shipped to me by speedy delivery. Once it arrived, I just popped the new turntable into the microwave and used the box to dispose of the broken one. It could not have been easier and it saved me the cost of a service call and likely further delay.
Read less
Was this instruction helpful to you?
Thank you for voting!
- Customer:
- E G from SILVERDALE, WA
- Parts Used:
- W10211972
- Difficulty Level:
- A Bit Difficult
- Total Repair Time:
- 30 - 60 mins
- Tools:
- Pliers, Screw drivers
The display kept asking me to close the door, even though the door was closed. The interior light stayed on.
I used a Google search to show how to access the area behind the front panel. There was a folded paper copy with a schematic and wiring diagram in that space.Then I used a multi-meter to determine which of the THREE micro-switches was causing the problem. I called your help line and ordered a replacement switch. The switch was delayed
... Read more
in transit so your agent credited me with the cost of shipping.
When the part arrived, it had three terminals instead of two as shown in the on-line picture but that did not cause any difficulty in using it. It took about 20 minutes to remove and replace the old switch.
All seems to be working well now.
Finding which of the THREE switches was the problem was the most difficult part of the repair. All three "clicked" but the defective one did not click as easily. It needed to be depressed more than the door latch can would provide. Old age?
Read less
Was this instruction helpful to you?
Thank you for voting!