


Models
>
DVM1850SMC01
DVM1850SMC01 General Electric Microwave
Jump to:
Find Part by Name
Keep searches simple, eg. "belt" or "pump".
Diagrams for DVM1850SMC01
Viewing 1 of 1
Keep searches simple, eg. "belt" or "pump".

This halogen light bulb is a replacement part for the bulb behind the top grill in your microwave. It is sold individually.
In Stock
Order now and your part arrives by Jul 30

$24.00
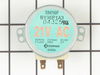
This 40-Watt 130-Volt lightbulb is a genuine OEM replacement for your microwave. The bulb is used either inside the microwave and turns on when the door is open, or the appliance is running. Or it can...
In Stock
Order now and your part arrives by Jul 30

In Stock
Order now and your part arrives by Jul 30

$40.71
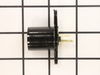
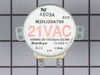
This motor rotates the glass turntable in the microwave and accepts a D-shaped shaft.
In Stock
Order now and your part arrives by Jul 30

In Stock
Order now and your part arrives by Jul 30

$82.55
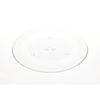
This tray rotates in your microwave ensuring more even temperatures and is approx.14-1/2 inches in diameter.
On Order

In Stock
Order now and your part arrives by Jul 30

$66.95
This metallic vent hood filter collects grease particles in the air from cooking. Sold individually.
In Stock
Order now and your part arrives by Jul 30

$18.54
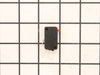
This part is the replacement flat cab mounting bolt for your microwave. The bolt is approximately 4 inches long. It is designed to hold the microwave in place in your cabinet. The main reason to repla...
In Stock
Order now and your part arrives by Jul 30


This vent grille mounts on the top of the microwave above the door.
No Longer Available

In Stock
Order now and your part arrives by Jul 30
Common Problems and Symptoms for DVM1850SMC01
Viewing 5 of 5Won’t turn on
Fixed by these parts
How to fix it
Tray won’t turn
Fixed by these parts
How to fix it
Noisy
Fixed by these parts
How to fix it
No heat
Fixed by these parts
How to fix it
Doesn’t shut off
Fixed by these parts
How to fix it


Keep searches simple. Use keywords, e.g. "leaking", "pump", "broken" or "fit".
- Customer:
- Gene from Urbana, IL
- Parts Used:
- WB36X10003, WB08X10016
- Difficulty Level:
- Really Easy
- Total Repair Time:
- Less than 15 mins
- Tools:
- Screw drivers
Light bulb out, tried to remove, lamp socket broke
Above the stove mounted microwave. I dropped the lens cover from under the bulb and tried to remove the bulb. The bulb separated from the base. I tried to remove the base with a pliers and the lamp socket broke. I ordered the parts and dropped the bottom cover of the unit down (5 screws). Removed 1 screww from the lamp socket, unplugged t
... Read more
he wires and took it out. Simply replaced socket, fastened bottom cover of microwave, installed new bulb and closed lens cover.
Read less
Was this instruction helpful to you?
Thank you for voting!
- Customer:
- Mark from GRAND BLANC, MI
- Parts Used:
- WB25X10019, WB36X10071
- Difficulty Level:
- Really Easy
- Total Repair Time:
- Less than 15 mins
Lens cracked and bulbs burned out
First I removed the single screw holding the lens assembly in place. Then I lowered the assembly and tilted it until it came out. To remove the existing cracked glass lens there were four tabs bent down on it. By hand I lifted each tab just enough to remove the broken lens. I then replaced the broken lens with the new one and re-bent
... Read more
the tabs down by hand to secure them to the new lens.
The lens assembly, now removed, revealed the cavity that contained the two halogen bulbs. Since they were both burned out for days, they weren't hot so I could pull each one out by hand. The bulbs are secured by two straight heavy gauge wire leads and provided a little resistance but come out fairly easily. Make a mental note of the angle they came out so it will be easier to replace them with new ones.
You're not supposed to touch halogen bulbs with your bare hands, so I used the bubble wrap they came in as a means to hold the bulb while installing it.
Be sure to insert the bulbs at the same angle they came out so the pins do not get bent.
Once both bulbs are in place, replace the lens cover assembly by putting the end opposite where the screw hole goes in first on the right, then swing it up until flush and screw it down.
Read less
Was this instruction helpful to you?
Thank you for voting!
- Customer:
- Kim from Centerville, GA
- Parts Used:
- WB26X10038
- Difficulty Level:
- Really Easy
- Total Repair Time:
- Less than 15 mins
- Tools:
- Screw drivers
The turntable motor went out and was making a horrible sound when I started the microwave
First I unplugged the microwave. :) Then, I removed the 6 screws found underneath the microwave, which allowed the bottom piece to hang down so I could see the turntable motor. I took the two screws out holding the motor in place and pulled the electric connectors off the motor terminals. Then I got the new part from PartSelect.com, repla
... Read more
ced the electrical commectors, fit the motor back into the slot it came from (cause the pin has to be seated up in the hole) and replaced the 2 screws holding in the motor. Then I put the bottom metal piece back up and put the 6 screws back in. It was really easy - and I'm a chick! ;)
Read less
Was this instruction helpful to you?
Thank you for voting!