This ceramic microwave fuse is just over an inch in length. It is white in the center, and metal on both ends. This is a 20-amp fuse, and is used to power your microwave. If the touch pad on the micro...
This is a single OEM light bulb that brightens the surface beneath the microwave or the inside part of the microwave. This 120 volt and 20 watt light bulb gives off a soft white light, and has a clear...
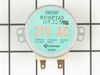
This secondary door switch is also known as a micro switch, and it is a genuine OEM replacement part for your microwave. The switch communicates with the electronic control board, to let it know if th...
This charcoal filter helps remove grease and odors from the air during microwave use. It fits into the microwave’s filter slot and installs easily without tools. A simple replacement that keeps your k...
Ask our experts a question about this part and we'll get back to you as soon as possible!
1 question answered by our experts.
< Prev
1
Next >
Sort by:
Search filter:
Clear Filter
Your search term must have 3 or more characters.
Keep searches simple. Use keywords, e.g. "leaking", "pump", "broken" or "fit".
Sorry, we couldn't find any existing answers that matched. Try using some different or simpler keywords, or submit your new question by using the "Ask a Question" button above!
Don
January 12, 2022
My microwave just started to make a humming noise when i close the door. There is no such noise with the door open. The inside of the oven was a little warm, so thinking that perhaps the unit was overheating, i closed the door and turned on the vent to see if it would resolve the humming noise. After about 3 minutes, the microwave went completely dark; nothing was illuminated on the control panel. I unplugged the unit, then waited a few minutes before plugging it back in. Then the panel told me to set the clock, which i did. But the unit continues to make the humming noise when the door is closed.
For model number JVM1870BF06
Hello Don, thank you for your question. A loud buzzing noise indicates that the magnetron is nearing the end of its life or might be defective. Part number FIX1019593. We hope this helps.
Turned out the issue was easily solved by replacing a single, inexpensive fuse.
First off, UNPLUG THE MICROWAVE.
The fuse is located under the plastic grill at the top of the microwave. It's held on by two screws. Once you've removed the screws and taken off the plastic grill, you go to the right side of the mic
... Read morerowave and remove another screw that holds a small metal grill in place. Removing the small metal grill is probably the toughest part of this repair. You kind of have to rock it back and forth a bit to get it to release. Once that's off, you can get to the fuse. I removed the burnt out one with a pair of needle nose pliers. I also put a small piece of cardboard under the fuse when I did this so I didn't accidentally drop it into the innards of the microwave. I did the same thing when I replaced the new fuse. I then plugged the appliance back in and made sure it worked. Once that was confirmed, I replaced both grills.
Noted on partselect.com that someone else with this problem, found it to be secondary door switch. There are three door switches in this model, but online info noted that one of the three might feel "soft" (in my case, one switch clicked in a rather "jiggly" way, the other two were strong decisive clicks.) To access the door switches on
... Read more this model was the only difficult part. First use a torx bit to remove the two torx screws below the latches inside the microwave. This frees the latching part inside, that holds the door switches, which you will remove after you take off the control panel. The top grill has to come off before you can remove the door panel. Remove the screws above the grill, on the microwave top cover, The grill on this model is covered with a panel that moves out when it vents. After removing the two top screws, the covered grill vent slides left to remove. Be careful, as the sliding tabs are plastic. Wiggle and jiggle it, to slip it off. Below the removed grill, is a small metal grill with one screw in lower center. Remove that screw, and wiggle that out. You'll then see the one screw that holds on the control panel. Remove this screw, and lift the control panel up to remove. Again, go slowly and gently, as the bottom tabs holding the control panel in, are also plastic and easily broken. Lay the control panel on something, (I used the coffee maker) and pull out the wire bundles tucked on the left, that are attached to the latching panel. Wiggle the latching panel gently to lift it up off of it's plastic tabs and pull it out towards you, so you can see the three door switches. Each switch (part number WB24X829) has a little black switch on it. Feel each switch with either your finger, or a screwdriver to see which one doesn't "click" strongly. The weak one is the one you will replace. The door switches are fitted into a tab, and plugged into their wires. Remove the defective switch, pull out the wires, and replace it with the new switch, plugging back the wires, and slipping it back into it's plastic tabs. Then put everything back together in reverse order. The entire job took me fifteen minutes EXCEPT for figuring out how to slide off the upper grill, which I have told you. A repairman would have cost $150, the part was $18. AND, there's a good chance, the other two switches will get "used up" in the next year or so as well, so I'll be ready next time. Thank you, Partselect, why work all day, to make money, only to give it to somebody else, for fifteen minutes of work. All I needed was the knowledge.
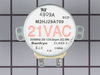
First I unplugged the microwave. :) Then, I removed the 6 screws found underneath the microwave, which allowed the bottom piece to hang down so I could see the turntable motor. I took the two screws out holding the motor in place and pulled the electric connectors off the motor terminals. Then I got the new part from PartSelect.com, repla
... Read moreced the electrical commectors, fit the motor back into the slot it came from (cause the pin has to be seated up in the hole) and replaced the 2 screws holding in the motor. Then I put the bottom metal piece back up and put the 6 screws back in. It was really easy - and I'm a chick! ;)