


Models
>
CFMV162LSA
CFMV162LSA Frigidaire Microwave
Jump to:
Find Part by Name
Keep searches simple, eg. "belt" or "pump".
Diagrams for CFMV162LSA
Viewing 4 of 4


Manuals & Guides for CFMV162LSA
Click to downloadKeep searches simple, eg. "belt" or "pump".

$35.15
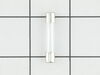
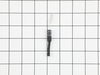
Need a new handle for your microwave? This sturdy stainless steel replacement in a sleek black finish is built to fit a wide range of models. Whether your old handle is broken or worn out, this part b...
In Stock
Order now and your part arrives by Aug 1

$39.55
Sold individually. This metallic vent hood filter collects grease particles in the air from cooking.
In Stock
Order now and your part arrives by Aug 1

In Stock
Order now and your part arrives by Aug 1

$41.75
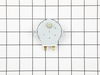
This light bulb is for microwaves.
Light bulb illuminates the surface below the microwave or the interior of the microwave.
Because high-voltage capacitors in a microwave can retain a lethal e...
In Stock
Order now and your part arrives by Aug 1

$45.00
Sold individually. Product Description Charcoal air filter works with some Frigidaire, Electrolux, White Westinghouse, and Tappan models of microwaves. This is a genuine OEM part that works for some m...
In Stock
Order now and your part arrives by Aug 1

$119.16
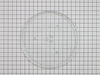
This tempered glass turntable tray measures approximately 13.5 inches in diameter and serves as the rotating platform inside your microwave. It ensures even heat distribution by allowing food to turn ...
In Stock
Order now and your part arrives by Aug 1

$24.15
This microwave waveguide cover protects key internal components by blocking food particles, grease, and moisture from entering the waveguide area. Located on the interior wall of the microwave, it hel...
In Stock
Order now and your part arrives by Aug 1

In Stock
Order now and your part arrives by Aug 1

$31.68
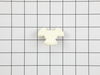
This coupler is a replacement mechanical component used to connect and transfer motion between internal assemblies. It is commonly replaced when wear causes slipping, noise, or loss of function.
In Stock
Order now and your part arrives by Aug 1

In Stock
Order now and your part arrives by Aug 1

In Stock
Order now and your part arrives by Aug 1

In Stock
Order now and your part arrives by Aug 1
Common Problems and Symptoms for CFMV162LSA
Viewing 7 of 7Won’t turn on
Fixed by these parts
How to fix it
Door not closing properly
Fixed by these parts
How to fix it
Tray won’t turn
Fixed by these parts
How to fix it
No heat
Fixed by these parts
How to fix it
Doesn’t shut off
Fixed by these parts
How to fix it
Door stuck closed
Fixed by these parts
How to fix it
Sparking
Fixed by these parts
How to fix it
Keep searches simple. Use keywords, e.g. "leaking", "pump", "broken" or "fit".
- Customer:
- Tommy from Spring Hill, TN
- Parts Used:
- 5304536387
- Difficulty Level:
- Easy
- Total Repair Time:
- 15 - 30 mins
- Tools:
- Screw drivers
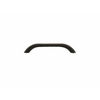
The plastice door handle broke off at the ends on the front of the microwave
Let me start by saying that this model microwave is nice, but there shouldn't be a plastic handle placed on it when it is mounted above a gas stove-top. The manufacturer should know this but I guess it was a poor decision on their part.
I popped the inside of the door off of the microwave. I then unscrewed the two screws that w ... Read more ere holding the next bracket on and popped it off the door. When you take the second piece of the door off, then the glass and front come apart. You can then unscrew the two screws the hold the handle on. Replace the old handle with the new one and work back in the steps you took. A small tipped screw driver is a must.
I popped the inside of the door off of the microwave. I then unscrewed the two screws that w ... Read more ere holding the next bracket on and popped it off the door. When you take the second piece of the door off, then the glass and front come apart. You can then unscrew the two screws the hold the handle on. Replace the old handle with the new one and work back in the steps you took. A small tipped screw driver is a must.
Read less
Was this instruction helpful to you?
Thank you for voting!
- Customer:
- Nova from Phoenix, AZ
- Parts Used:
- 5304536387
- Difficulty Level:
- Easy
- Total Repair Time:
- 15 - 30 mins
- Tools:
- Screw drivers
Microwave handle broke off
My repair worked out to be a cinch! My microwave looked very funny without it's handle. I did a little research on how to replace the handle and after popping the insert out of the inside of the microwave door, I was then able to remove the two screws that held the outside panel of the door (the part with the glass) to the part with the
... Read more
hinges. After removing the screws, I carefully used my trusty butter knife and screw driver to pry and pop the outside panel away. This was the most time consuming part of the job. However, once it was fully off, I unscrewed the screws that held the previous handle on and fastened the new handle with the new screws provided. Popping the door all back together was super easy. However, don't forget to put the screws back in that hold the outter panel on to the part with the hinges. :-) Good luck DIY'ers!!
Read less
Was this instruction helpful to you?
Thank you for voting!
- Customer:
- Arthur from LUTZ, FL
- Parts Used:
- 5304509460
- Difficulty Level:
- Easy
- Total Repair Time:
- 15 - 30 mins
- Tools:
- Screw drivers
Microwave tripped circuit breaker when turned on
Remove vent cover then remove touch screen control panel. When you remove control panel take photo of where everything is plugged in then unplug and remove control panel. 3 door switches located next to door in a plastic chassis. Test each switch with current tester. Remove the bad switch and replace with the new one. You tube DIY helped.
Was this instruction helpful to you?
Thank you for voting!