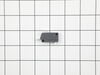
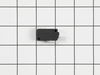
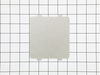
This microwave waveguide cover protects key internal components by blocking food particles, grease, and moisture from entering the waveguide area. Located on the interior wall of the microwave, it hel...
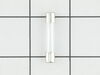
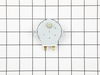
This adapter is a replacement connection component designed to join or transition between different system elements. It supports proper flow or connection stability and is commonly replaced when crack...
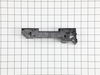
If your microwave door isn’t closing securely or the appliance isn’t starting, this latch hook might be the fix you need. It holds the door switches in place, helping your microwave operate safely and...
This glass microwave turntable tray rotates inside the appliance to help ensure even heating and cooking. Made from durable, heat-resistant glass, it provides stable support for dishes during operatio...
Ask our experts a question about this part and we'll get back to you as soon as possible!
2 questions answered by our experts.
< Prev
1
Next >
Sort by:
Search filter:
Clear Filter
Your search term must have 3 or more characters.
Keep searches simple. Use keywords, e.g. "leaking", "pump", "broken" or "fit".
Sorry, we couldn't find any existing answers that matched. Try using some different or simpler keywords, or submit your new question by using the "Ask a Question" button above!
Lynn
March 18, 2022
Why did the glass tray break while i was cooking? What is the maximum weight i can put in the microwave?
For model number EI30BM60MSB
Hi Lynn,
Thank you for your question. If there are any stress points in the glass tray while the microwave is heating the food, it may break. The maximum weight to place on a glass tray is 16 pounds. The part number listed under your model number for the glass tray is PS12365459. If you need help placing an order for it, customer service is open 7 days a week and anyone will be happy to assist you. Please feel free to give us a call. We look forward to hearing from you!
When i open the door and then close it. It loses the power, clock, timer, light and fan. I have to restarted every time i close the door.
For model number EI30BM60MSB
Hello Ray, thank you for your question. You can test your door switches with a multimeter. First, unplug your microwave. Some door switches have only two metal prongs extending from the body, while others have three. Those with three terminals will have a common (COM) terminal, a normally closed (N.C.) terminal, and a normally open (N.O.) terminal. Those switches with only two terminals will have either a common terminal and a normally open terminal, or a common terminal and a normally closed terminal. We are providing directions for testing a door switch with three terminals. If you are dealing with a door switch that has only two terminals, ignore the part of this test that does not apply to you. Using caution, remove all wiring harness leads from the switch's terminals. Use your ohmmeter to test your switch for continuity. Begin by setting your ohmmeter to measure resistance at a scale of Rx1. If you are using an analog meter, touch the metal tips of the test leads together and zero your ohmmeter by adjusting the thumbwheel in the front of the meter until the needle reads '0' on the scale. Touch one meter lead to the COM terminal and the other lead to the N.O. terminal. Do not push in on the actuator. Your meter should give a reading of infinity, meaning the circuit is open, and there is no continuity. Without moving the meter's leads, press down on the actuator until you hear a 'click'. With the 'click' of the actuator, the meter should produce a resistance reading of zero ohms. This means the circuit is closed and continuity is present. (Switches with only two terminals do not 'click' when actuated) Keep the meter lead that is touching the COM terminal in place but move the other meter lead from the N.O. terminal to the N.C. terminal. You should receive a reading of infinity when you push in on the switch's actuator. When the actuator is released, you should receive a resistance reading of zero ohms. Now, set your ohmmeter to its highest resistance scale and touch one meter lead to the N.O. terminal and the other meter lead to the N.C. terminal. The resistance reading between these two leads should be infinite. Finally, take a resistance reading from both the N.C. terminal and the N.O. terminal to any metal mounting hardware that is a part of the switch assembly. You should receive a normal reading of infinity. Any readings that differ from the ones presented here are indicative of a defective door switch that will need to be replaced. Door switch part number FIX12071303 and Switch part number FIX12071302. We hope this helps.
Remove vent cover then remove touch screen control panel. When you remove control panel take photo of where everything is plugged in then unplug and remove control panel. 3 door switches located next to door in a plastic chassis. Test each switch with current tester. Remove the bad switch and replace with the new one. You tube DIY helped.
First thing I dir was search YouTube for any related videos and found this one https://www.youtube.com/watch?v=uHj4H9Fdxrc, it was the exact problem my microwave was exhibiting. Once I verified the problem by troubleshooting, I removed the part and verified that the switches were working fine, the door latch assembly showed signs of wear
... Read morewhich was the cause of the problem. After receiving the replacement part I installed it, verified that power was restored to the unit and reassembled the microwave, works fine, hope it lasts a long time!
The diagnosis is about an hour. Coz, I need to open the control panel, got a tester, and trsted all critical parts inside the panel. Also, replaced the fuse just to make sure its a new one. Found out it was a switch (bottom part) that control the open/close of the microwave door.
When found out the problem, the rest of t
... Read morehe work is easy.