



Models
>
HMB57152UC/05
HMB57152UC/05 Bosch Microwave
Jump to:
Find Part by Name
Keep searches simple, eg. "belt" or "pump".
Keep searches simple, eg. "belt" or "pump".
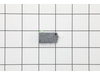
$12.38
This door interlock switch prevents the microwave from operating when the door is open, ensuring safe use. If your microwave won’t start or shows safety issues, replacing the switch can restore proper...
In Stock
Order now and your part arrives by Sep 17
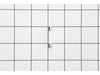
$6.52
This microwave line fuse is a genuine replacement part designed to protect your appliance from power surges and overheating. It helps restore power when a blown fuse prevents the microwave from turnin...
In Stock
Order now and your part arrives by Sep 17
In Stock
Order now and your part arrives by Sep 17
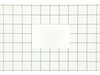
$6.51
This waveguide cover protects the interior of the microwave by shielding key components from food splatter and moisture. Made from durable mica material, it helps prevent sparking and keeps the applia...
In Stock
Order now and your part arrives by Sep 17
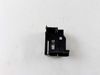
$8.75
This support is a replacement structural component designed to hold or stabilize internal assemblies during operation. It helps maintain alignment and durability and is commonly replaced when bent, cr...
In Stock
Order now and your part arrives by Sep 17
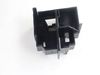
$8.75
The left door interlock support keeps the microwave’s door switch properly aligned so the appliance can detect when the door is fully closed and operate safely. If the switch becomes loose or misalign...
In Stock
Order now and your part arrives by Sep 17
In Stock
Order now and your part arrives by Sep 17
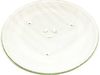
$57.30
This turntable supports smooth rotation during operation to promote even performance. Designed for stability and durability, it helps ensure consistent results and reliable movement.
In Stock
Order now and your part arrives by Sep 17
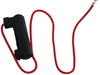
In Stock
Order now and your part arrives by Sep 17
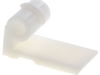
In Stock
Order now and your part arrives by Sep 17
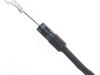
In Stock
Order now and your part arrives by Sep 17
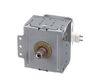
$241.67
This magnetron generates the microwaves that heat food inside the appliance. It’s a genuine OEM part designed to restore proper cooking performance and efficiency. Because it involves high-voltage com...
In Stock
Order now and your part arrives by Sep 17
Common Problems and Symptoms for HMB57152UC/05
Viewing 4 of 4Won’t turn on
Fixed by these parts
How to fix it
Sparking
Fixed by these parts
How to fix it
No heat
Fixed by these parts
How to fix it
Noisy
Fixed by these parts
How to fix it
Keep searches simple. Use keywords, e.g. "leaking", "pump", "broken" or "fit".
- Customer:
- Nancy from ST AUGUSTINE, FL
- Parts Used:
- 00617090
- Difficulty Level:
- Very Easy
- Total Repair Time:
- Less than 15 mins
- Tools:
- Screw drivers
Microwave was sparking
Replaced the wave cover. Unscrewed existing cover that is at the top inside the microwave. Screwed in the new cover.
Took about 30 seconds to do. Bosch service wanted over $100 for a service call plus parts and labor. Did it myself in seconds for under $10.
Took about 30 seconds to do. Bosch service wanted over $100 for a service call plus parts and labor. Did it myself in seconds for under $10.
Was this instruction helpful to you?
Thank you for voting!
Fuse blows on powering up, one door secondary switch was short
Replaced switch abdcsupports
Was this instruction helpful to you?
Thank you for voting!
20A Fuse burns every few days
I replaced the microswitches on both sides of the oven door. The procedure is very easy:
- Unplug from power
- Remove the top cover - there are two parts (screws are on the top)
- Remove the support on the right side (the microswitch is inside this part) - by removing the two screws screws on top of the part.
- Remove ... Read more the two electrical wires from the switch by pulling the cable shoes. Note that the cable shoes can be snug - don't pull on the wires.
- Insert the microswitch (the one with red micro button) into the new support - in an identical position. Use the old part as a reference. Note that there is a tiny latch inside that should be moved gently aside to allow the switch to get in place.
- Connect the electrical wires and install the new support in place.
-Repeat the procedure on the left side - note the left side has two switches - one with green micro button and the bottom one identical to the one on the right.
- Make sure to install a new fuse before closing the top covers.
- Unplug from power
- Remove the top cover - there are two parts (screws are on the top)
- Remove the support on the right side (the microswitch is inside this part) - by removing the two screws screws on top of the part.
- Remove ... Read more the two electrical wires from the switch by pulling the cable shoes. Note that the cable shoes can be snug - don't pull on the wires.
- Insert the microswitch (the one with red micro button) into the new support - in an identical position. Use the old part as a reference. Note that there is a tiny latch inside that should be moved gently aside to allow the switch to get in place.
- Connect the electrical wires and install the new support in place.
-Repeat the procedure on the left side - note the left side has two switches - one with green micro button and the bottom one identical to the one on the right.
- Make sure to install a new fuse before closing the top covers.
Read less
Was this instruction helpful to you?
Thank you for voting!