


Models
>
RFS511SW2A-P1330223M
RFS511SW2A-P1330223M Amana Microwave
Jump to:
Find Part by Name
Keep searches simple, eg. "belt" or "pump".
Keep searches simple, eg. "belt" or "pump".


$20.95
This is an authentic OEM replacement part. This screw is commonly used in the assembly of refrigerators, microwaves, ice makers, ranges, and smokers. Due to varied uses we recommend you refer to model...
In Stock
Order now and your part arrives by Mar 26

In Stock
Order now and your part arrives by Mar 26


In Stock
Order now and your part arrives by Mar 26
Special Order
Questions and Answers
We're sorry, but our Q&A experts are temporarily unavailable.
Please check back later if you still haven't found the answer you need.
Common Problems and Symptoms for RFS511SW2A-P1330223M
Viewing 1 of 1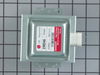
Keep searches simple. Use keywords, e.g. "leaking", "pump", "broken" or "fit".
- Customer:
- Sandra from coto de caza, CA
- Parts Used:
- W10859575
- Difficulty Level:
- Really Easy
- Total Repair Time:
- 15 - 30 mins
- Tools:
- Screw drivers
loud buzzing noise
The repair went well...I am so glad that I read this info before buying a new microwave....it saved me lots of money. I did have a repair man come and look at it and he told me to buy a new one but it cost alot of money when it wasn't necessary. I did the repair and I was very proud of myself.
Three men watched a woman fix this and ... Read more it was no problem...they were impressed also....
Three men watched a woman fix this and ... Read more it was no problem...they were impressed also....
Read less
Was this instruction helpful to you?
Thank you for voting!
- Customer:
- Theodore from SPOKANE, WA
- Parts Used:
- W10859575
- Difficulty Level:
- Very Easy
- Total Repair Time:
- Less than 15 mins
- Tools:
- Screw drivers, Socket set, Wrench set
Microwave slowly stopped heating food
Initially we started looking to buy a replacement microwave to replace our 13+ year old built-in microwave. It was a real pain finding a replacement to fit the exact dimensions. So I thought I'd try to find an old KitchenAid microwave. However, I was pleasantly surprised when this site came up on my search. Their website allows me to inpu
... Read more
t the problems and then it showed two possible parts that needed to be replaced. I emailed tech support and asked them which part I needed. They responded very quickly and said I needed to replace the magnetron. I watched a couple YouTube videos and then pulled my microwave apart. It was incredibly easy to pull the outer cover off. The magnetron had 5 screws that needed to be removed and one electrical plug. Took me maybe 10 min to complete the entire repair. It was one of the easiest repairs I've done and so thankful for this site They saved me a ton of money from not buying a new microwave and we now have our microwave working again. In hindsight, I wouldn't hesitate. I'd order the Part now and get it fixed.
Read less
Was this instruction helpful to you?
Thank you for voting!
- Customer:
- Stuart from STUART, FL
- Parts Used:
- W10859575
- Difficulty Level:
- Really Easy
- Total Repair Time:
- 30 - 60 mins
- Tools:
- Pliers, Screw drivers
No heat when the microwave was in use
The instructions on the website were incredibly easy and I saved myself a lot of headache by using this site.
-it was built in unit - so I needed to pull the decorative grill from around the outside to remove it from the wall
- removing the back of the case involved removing phillips head screws from along the side and bac ... Read more k of the unit. the only issue I encountered on removing screws was the fact that the "torx / star" screws could not be fit with the wrench that I had (they had a pin in the center that would not allow the wrench to fit into the star). However, a pair of pliers was handy and they were removed just easily.
- I had ordered both the high voltage diode and magnetron because I didn't know which item was the problem. I grounded the diode with two screwdrivers while wearing rubber gloves to be safe. the warnings on this did the trick as it was the only scary part of the operation.
- the diode was a little hard to spot looking at the schematics, but is is found on the lower right corner of the right side of the panel and easily pulled out and replaced. I tried the microwave again to see if it worked...and it did not. So I confirmed that the magnetron was the issue.
- removing the screws for the magnetron and putting in the replacement was a dead easy and I tried the microwave again before putting cover back on. Worked like a charm. Super easy!
Read less
Was this instruction helpful to you?
Thank you for voting!