To access the exterior lightbulb, the bottom panel of the microwave will need to be removed. It is secured in place with screws, so will require a Philips screwdriver to remove it. Screw the new light...
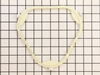
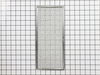
This is a single grease filter for a microwave. Most microwaves have two filters, the other one being the charcoal filter, which is a different filter, sold separately, and has different maintenance i...
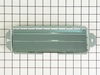
This mounting plate is a genuine OEM part for your microwave. This metal bracket is approximately 30 inches in length and is used to support your microwave when installed under cabinets. Please note t...
This glass turntable tray is designed for use in microwaves, ensuring even cooking by rotating food throughout the heating process. It provides a stable surface for dishes and cookware while distribut...
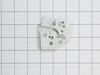
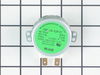
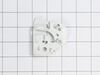
The light socket in your microwave houses the light bulb and connects it to the power source. The light bulb will screw into it, so the light bulb will be held in place. Be very careful when installin...
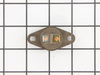
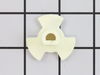
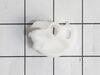
This glass tray drive coupling, also known as a tray support, is a genuine OEM replacement part. It can help solve the issue of your microwave tray not turning properly. This motor couple connects the...
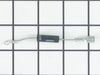
This OEM top interlock support ensures the microwave only operates when the door is securely closed. It holds the interlock switch in place and helps prevent safety issues like radiation exposure or i...
In Stock
Order now and your part arrives by Jul 18
Questions and Answers
Ask our experts a question about this part and we'll get back to you as soon as possible!
1 question answered by our experts.
< Prev
1
Next >
Sort by:
Search filter:
Clear Filter
Your search term must have 3 or more characters.
Keep searches simple. Use keywords, e.g. "leaking", "pump", "broken" or "fit".
Sorry, we couldn't find any existing answers that matched. Try using some different or simpler keywords, or submit your new question by using the "Ask a Question" button above!
Dee
November 29, 2021
Whirlpool otc microwave oven. Vent fan won't turn on. Rotated motor for attic ventilation.
For model number WMH32519HZ0
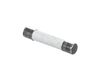
Hello Dee, thank you for your question. We would suggest testing your fan motor. Begin by unplugging your microwave and removing it from the wall. Remove the fan motor cover and try rotating the motor manually. If the fan does turn, remove it from the appliance to test it using a multi-meter. With your multimeter set to Rx1, touch the motor’s terminals with the probes to test for continuity. You should receive a reading of 0, indicating that there is continuity. If you get any other reading, replace the fan motor. Part number FIX11765761. We hope this helps.
The nightmare was that this microwave is installed under the cabinet....in order to get to the light bulb I had to pull out my stove then squeeze into the space between the stove and counter....my old microwave light bult was much easier to change.....Shame on Whirlpool for making this so difficult.....must be a better way to cover the li
... Read moreght bulb so that we do not need a screwdriver to remove the door to get to the light bulb
Unless you have a very comfortable background with electronics and electricity, I don't necessarily recommend taking apart a microwave. If you are very handy and are going to be VERY cautious to follow the rules of discharging caps and testing voltages before moving forward, then go for it. That said, I took the microwave off and apart.
... Read more Not knowing where to find the parts, I was fortunate that the installer put the instruction book for the microwave inside the front vent slot above the touchpad for reference. it details the location of every part and it tells you very clearly what each part you test should show specific to this microwave on your multimeter. Find this guide online if you don't have it. Turn on the microwave for 20 seconds with a glass of water to make sure it's not heating - that with the noise means it's eeither the magnetron, cap, or diode. Read the notes on this site for all of the basic things to look for with the magnetron, diode, and capacitor. Once comfortable with the guide, locations of those devices, and how to test, then take it down and apart. Unfortunately, I didn't do all those things in that order, and it only wasted a lot of time trying to find the parts. Once I found the parts and put all the screws and covers back for all the areas that didn't need to be accessed for the repair, testing went quickly. The diode was bad. Ordered a new one and had it in 3 days or so. That means your microwave will be apart and sitting somewhere for a little while until you get the part and have time to repair it. Putting the diode back isn't too bad. Reassemble the microwave and put it back up again. If i had to do it again, it would take me 20 to 30 minutes once the microwave was down and on a table. Also, I used some bricks with towels over them or you could use some sawhorses to keep the microwave elevated so you can plug it in and run it after installing the new component. Again, make sure you discharge the cap before touching anything again even if you didn't run it, but just plugged it in.