This is a screw and it is made for multiple appliances in your home. This model is called a sheet metal screw because it has sharp points, and the threads are closer together. This screw is designed t...
This is a multi-use screw and can be used on a variety of appliances. The measurements of the screw are: 8/18 x 3/8. *Please note: the screw is sold individually. Refer to the manual provided by the m...
This 18 ml bottle of white appliance touch-up paint is used to cover scratches or marks on your appliance. The white touch-up paint can be used on refrigerators, microwaves, ranges, clothes dryers, an...
This door interlock switch ensures your microwave operates only when the door is securely closed. It communicates the door’s position to the control board, helping prevent accidental use. It’s often r...
This part is the replacement halogen light bulb for your range. The bulb is 10 watts and 12 volts. The halogen lamp lights up the inside of the oven you can see the cooktop more effectively in darknes...
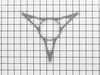
This roller is located underneath the glass turntable. With the help of the motor, this roller helps to rotate the glass tray. This part takes the place of the coupling.
Ask our experts a question about this part and we'll get back to you as soon as possible!
1 question answered by our experts.
< Prev
1
Next >
Sort by:
Search filter:
Clear Filter
Your search term must have 3 or more characters.
Keep searches simple. Use keywords, e.g. "leaking", "pump", "broken" or "fit".
Sorry, we couldn't find any existing answers that matched. Try using some different or simpler keywords, or submit your new question by using the "Ask a Question" button above!
Marciano
February 2, 2024
How to change my bulb i. My microwave
For model number WOC75EC0HS20
Hi Marciano, thank you for reaching out. We have found the instructions to remove the microwave bulb. These instructions may not be of the same model but will help you in removal. You may need to follow these steps:
1. Pull the microwave out, use the screwdriver to take out screws on each side of the control panel.
2. Pull the panel off.
3. Disconnect the plug at the control board and lift it up to provide the access to the lamp grill.
4. Take out the screws and remove the upper vent grill.
5. Use the screwdriver to take screws out and then remove the vent grill.
6. Take the screws out that hold the microwave at the bottom.
7. Pull the microwave out of the mounting frame for a few inches.
8. Remove the installation plate and continue to pull the microwave until you can reach the light bulb socket.
9. Squeeze the spring to one side and release it.
10. Remove the light bulb from the reflector and put it out of the socket.
11. Follow the same procedure backward to complete the installation.
We hope this information helps!
Was this helpful?
Thank you for voting!
Ask a Question
Ask our experts a question on this part and we'll respond as soon as we can.
This product comes in a bottle with a brush like Liquid Paper. It goes on incredibly easy. A second coat might be needed. I wanted to prevent rust from setting in so I covered the scratches and dings. The paint is a little brighter since my washer is 10 years old but it still looks great.
I used a Google search to show how to access the area behind the front panel. There was a folded paper copy with a schematic and wiring diagram in that space.Then I used a multi-meter to determine which of the THREE micro-switches was causing the problem. I called your help line and ordered a replacement switch. The switch was delayed
... Read morein transit so your agent credited me with the cost of shipping.
When the part arrived, it had three terminals instead of two as shown in the on-line picture but that did not cause any difficulty in using it. It took about 20 minutes to remove and replace the old switch.
All seems to be working well now.
Finding which of the THREE switches was the problem was the most difficult part of the repair. All three "clicked" but the defective one did not click as easily. It needed to be depressed more than the door latch can would provide. Old age?


 Diagram and Parts List for Whirlpool Microwave Oven Combo")