



Models
>
975000
975000 Maytag Microwave Oven Combo
Jump to:
Find Part by Name
Keep searches simple, eg. "belt" or "pump".
Diagrams for 975000
Viewing 5 of 5


Keep searches simple, eg. "belt" or "pump".
$19.75
This is a genuine OEM 40-Watt replacement light bulb that is compatible with various types of appliances. It has a frosted glass bulb with a standard metal socket base, making it easy to screw and uns...
In Stock
Order now and your part arrives by Sep 24
$13.95
This 25-watt light bulb is a genuine OEM replacement part for a variety of appliances. The 120-volt incandescent bulb has a screw-in base and is used to light up the appliance when the door is opened....
In Stock
Order now and your part arrives by Sep 24
$18.54
This is an OEM part sourced directly from the manufacturer. This white silicone adhesive caulk is commonly used on ranges, microwaves, and cooktops. This adhesive sealant works to form a bond between ...
In Stock
Order now and your part arrives by Sep 24
Special Order
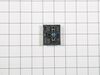
$89.83
Proper control of an electric burner depends on the infinite switch working correctly. A failed switch may keep the element from heating, prevent it from shutting off, or hold it at one temperature. C...
In Stock
Order now and your part arrives by Sep 24
Special Order

Common Problems and Symptoms for 975000
Viewing 2 of 2

Keep searches simple. Use keywords, e.g. "leaking", "pump", "broken" or "fit".
- Customer:
- THOMAS from STOW, OH
- Parts Used:
- WPA3073101
- Difficulty Level:
- Really Easy
- Total Repair Time:
- Less than 15 mins
burnt out bulb
took cover off, installed bulb.
lost the owners manual,
part select's schematics were very helpful
thanks
lost the owners manual,
part select's schematics were very helpful
thanks
Was this instruction helpful to you?
Thank you for voting!
- Customer:
- erik from chester springs, PA
- Parts Used:
- W11121639
- Difficulty Level:
- Easy
- Total Repair Time:
- 15 - 30 mins
- Tools:
- Screw drivers
The infinite switch controlling one of the range top burners failed.
1 - Turned off electricity to the cook top.
2 - Removed the range top from the cutout in the counter.
3 - Removed the smooth top by removing the screws around the perimiter of the smooth top.
4 - Removed the screws securing the corner closest to the dead switch.
5 - Removed the screws holding the channel, onto which th ... Read more e infinite switched were attached, to the frame of the cooktop base.
6 - Removed the dead switch by removing the screws that hold it to the channel.
7 - One by one move the wires from the old switch to the new one.
8 - Reversed the process, 6 - 5 - 4 - 3 - 2 - 1, to put the cook top back together.
All in all the part was an exact replacement and the repair went really well.
2 - Removed the range top from the cutout in the counter.
3 - Removed the smooth top by removing the screws around the perimiter of the smooth top.
4 - Removed the screws securing the corner closest to the dead switch.
5 - Removed the screws holding the channel, onto which th ... Read more e infinite switched were attached, to the frame of the cooktop base.
6 - Removed the dead switch by removing the screws that hold it to the channel.
7 - One by one move the wires from the old switch to the new one.
8 - Reversed the process, 6 - 5 - 4 - 3 - 2 - 1, to put the cook top back together.
All in all the part was an exact replacement and the repair went really well.
Read less
Was this instruction helpful to you?
Thank you for voting!
- Customer:
- KELVIN from SOUTHFIELD, MI
- Parts Used:
- WPA3073101
- Difficulty Level:
- Very Easy
- Total Repair Time:
- Less than 15 mins
light blew out
change light bulbs
Was this instruction helpful to you?
Thank you for voting!