



Models
>
LMV1825SB
LMV1825SB (ABKELGA) LG Microwave Oven Combo
Jump to:
Find Part by Name
Keep searches simple, eg. "belt" or "pump".
Diagrams for LMV1825SB
Viewing 7 of 7


Keep searches simple, eg. "belt" or "pump".

$13.97
This replacement incandescent lamp restores visibility in the microwave cavity or over the cooktop. The 30 watt bulb uses a screw base to connect to the light socket and provides illumination when the...
In Stock
Order now and your part arrives by Nov 21

$26.22
Help the microwave detect whether its door is closed with this interlock switch. The latch operates a small actuator that changes the electrical contact as the door opens and shuts, supporting the saf...
In Stock
Order now and your part arrives by Nov 21

$17.55
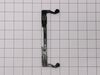
This bracket holds the metal or plastic flapper that closes off the exhaust duct when the fan is not running and opens when the fan turns on. If the exhaust fan on your microwave does not appear to be...
In Stock
Order now and your part arrives by Nov 21

$21.95
Exhaust air passes through this microwave vent damper when the ventilation fan runs. The metal flap opens with outgoing airflow to let steam and cooking odors enter the exhaust duct, then closes when ...
In Stock
Order now and your part arrives by Nov 21

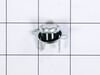
This light bulb lens cover is made of high quality clear plastic, and fits over the bulb inside the microwave. This part has been redesigned with 3 mounting holes to improve quality. Please note that ...
No Longer Available

$11.98
Rated at 20 amps and 250 volts, this microwave time delay fuse protects against electrical overload. It accommodates the brief current surge at startup but opens the circuit during a sustained overloa...
In Stock
Order now and your part arrives by Nov 21

In Stock
Order now and your part arrives by Nov 21

On Order

$134.28
Convert power from the microwave?s high-voltage circuit into the microwave energy used to cook and warm food with this magnetron. A failed unit may stop heating even though the fan, turntable, and dis...
In Stock
Order now and your part arrives by Nov 21

$17.44
This microwave high voltage diode and cable assembly is used to allow current to flow in one direction, working with the transformer and capacitor to supply power to the magnetron. That power enables ...
In Stock
Order now and your part arrives by Nov 21

$17.44
Current flows in one direction through this microwave high voltage diode and cable assembly, which works with the capacitor and transformer to supply the magnetron. This electrical process supports th...
In Stock
Order now and your part arrives by Nov 21

$16.45
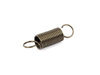
This spring provides tension or controlled movement within the appliance mechanism. Engineered for durability, it supports smooth operation and helps maintain proper alignment of connected components.
In Stock
Order now and your part arrives by Nov 21
Common Problems and Symptoms for LMV1825SB
Viewing 5 of 5No heat
Fixed by these parts
How to fix it
Won’t turn on
Fixed by these parts
How to fix it
Door not closing properly
Fixed by these parts
How to fix it
Tray won’t turn
Fixed by these parts

How to fix it
Doesn’t shut off
Fixed by these parts
How to fix it
Keep searches simple. Use keywords, e.g. "leaking", "pump", "broken" or "fit".
- Customer:
- JAMES from BILLINGS, MT
- Parts Used:
- 6600W1K001D
- Difficulty Level:
- Very Easy
- Total Repair Time:
- 30 - 60 mins
- Tools:
- Screw drivers
Broken door micro switch. (unit does not start heating)
Unplug the unit before servicing. Need phillips screwdriver. Open door. Use step ladder to access and remove 2 small screws from top of the room air diffuser at top of unit. Slide diffuser slightly to the left to align the diffuser's plastic tab on the left side to rotate toward you. (The wires for the front control panel are at the far l
... Read more
eft side of this difuser, but difuser is slotted for easy removal). Once the difuser is removed you will see 1 screw at the top that secures the pannel cover on the left side of the unit. Remove screw and slide this panel slightly up and out. This exposes the plastic frame that holds the upper and lower door switches. To locate the door switches and observe how they work, close and open the door and watch the door (bayonets) open and close the micro switches. Do the (red) buttons on top of the switches move up and down when the door bayonets push and release? If the buttons do not "pop" up when opened the switch is defective. The switch frame is secured with 2 screws. Remove screws and rotate the unit out for easy access to the micro switch(s). The internal (spring?) on my unit that is suposed to allow the red (visible) button on top of the switch to "pop" up when the door is opened was broken. Carefully pry the switch outward while being careful to lift the plastic holder-piece that holds the switch in place. Be careful, there is a small pin on the frame, so rotate the switch OUT toward you while lifting (carefully) the plastic holder-piece (you will see it on top of the switch). You can use an ohm meter to test the continuity of the switches. But if the buttons don't "pop" they are defective. Replace switch and reassemble.
Read less
Was this instruction helpful to you?
Thank you for voting!
- Customer:
- Randall from ARCADIA, CA
- Parts Used:
- 6600W1K001D
- Difficulty Level:
- A Bit Difficult
- Total Repair Time:
- 1- 2 hours
- Tools:
- Pliers, Screw drivers
Door sensor switch went bad. Microwave would not operate.
Watched a couple of repair videos on Youtube by searching for the model number. Found out what to do in order not to get shocked by the powerful capacitor.
Ordered the two switches (To be sure, I could have ordered a third switch as suggested in the videos.)
Bought a tamper-proof star bit to get the cover off. Followed the dir ... Read more ections to replace the switches. - I broke the harness and had to use some super glue, but it's all good. I should have removed the harness instead of trying to get a switch out while it was still in place.
It's all back together, and the wife is happy!!
Ordered the two switches (To be sure, I could have ordered a third switch as suggested in the videos.)
Bought a tamper-proof star bit to get the cover off. Followed the dir ... Read more ections to replace the switches. - I broke the harness and had to use some super glue, but it's all good. I should have removed the harness instead of trying to get a switch out while it was still in place.
It's all back together, and the wife is happy!!
Read less
Was this instruction helpful to you?
Thank you for voting!
- Customer:
- Joseph from N VERSAILLES, PA
- Parts Used:
- 6600W1K001D
- Difficulty Level:
- Very Easy
- Total Repair Time:
- 30 - 60 mins
- Tools:
- Screw drivers
everything worked except it wouldnt cook
tested all 3 of the door switche for continuity, the top switch was faulty, replaced it,for approx $4.00 and saved a $350 dollar microwave.
Was this instruction helpful to you?
Thank you for voting!