



Models
>
KBMC147HSS05
KBMC147HSS05 KitchenAid Microwave Oven Combo
Jump to:
Find Part by Name
Keep searches simple, eg. "belt" or "pump".
Diagrams for KBMC147HSS05
Viewing 6 of 6


Manuals & Guides for KBMC147HSS05
Click to downloadKeep searches simple, eg. "belt" or "pump".

$73.24
This is a genuine OEM replacement turntable tray for your microwave. The tray rotates while the microwave is operating, to help your food heat evenly. If your tray has become chipped, cracked, or comp...
In Stock
Order now and your part arrives by Oct 22
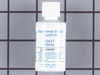
This 18 ml bottle of white appliance touch-up paint is used to cover scratches or marks on your appliance. The white touch-up paint can be used on refrigerators, microwaves, ranges, clothes dryers, an...
No Longer Available
In Stock
Order now and your part arrives by Oct 22
In Stock
Order now and your part arrives by Oct 22
$48.21
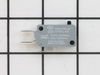
This door interlock switch ensures your microwave operates only when the door is securely closed. It communicates the door’s position to the control board, helping prevent accidental use. It’s often r...
In Stock
Order now and your part arrives by Oct 22
In Stock
Order now and your part arrives by Oct 22
In Stock
Order now and your part arrives by Oct 22
$7.60
Follow appropriate safety practices when installing your range screw. Sold individually.
In Stock
Order now and your part arrives by Oct 22
In Stock
Order now and your part arrives by Oct 22
Common Problems and Symptoms for KBMC147HSS05
Viewing 6 of 6Won’t turn on
Fixed by these parts
How to fix it
Tray won’t turn
Fixed by these parts

How to fix it
Door not closing properly
Fixed by these parts
How to fix it
No heat
Fixed by these parts
How to fix it
Will Not Start
Fixed by these parts
How to fix it
Element will not heat
Fixed by these parts
How to fix it

Keep searches simple. Use keywords, e.g. "leaking", "pump", "broken" or "fit".
- Customer:
- Liza from Monterey, CA
- Parts Used:
- W11373838
- Difficulty Level:
- Really Easy
- Total Repair Time:
- Less than 15 mins
Microwave glass turntable when pop
After popping the last few kernals of popcorn, we hear a different kind of pop sound come from our microwave oven. When we looking inside, we found that the glass turntable had broken unevenly in half. Although we didn't understand why it had happned, we did know we'd be without the use of the microwave without a new one. After less th
... Read more
an 10 minutes surfing online, I had found the correct part on PartSelect.com and had arranged to have it shipped to me by speedy delivery. Once it arrived, I just popped the new turntable into the microwave and used the box to dispose of the broken one. It could not have been easier and it saved me the cost of a service call and likely further delay.
Read less
Was this instruction helpful to you?
Thank you for voting!
- Customer:
- Michael from Alpharetta, GA
- Parts Used:
- WP4452398
- Difficulty Level:
- Easy
- Total Repair Time:
- 15 - 30 mins
- Tools:
- Screw drivers
Spring for Door Broke
Remove 4 screws holding plastic vent between microwave and oven. Take off plastic vent. Remove two metal clamps at bottom of stainless panel (one screw on each clamp). Open door, remove two screws (recessed) at top of door that hold stainless panel (careful as panel is only connected by these screws and is heavy and door will spring sh
... Read more
ut without the weight of the panel...even with only one good spring) and put stainless door panel aside.
From bottom of door, remove two screws holding black plastic panel and put plastic panel aside. You should see the broken spring- remove it and replace with new spring. Note - hook the "lower" half of spring (the end with the U hook) first, then wedge/slide the other end until it hooks into slot.
Put parts back together in reverse order.
From bottom of door, remove two screws holding black plastic panel and put plastic panel aside. You should see the broken spring- remove it and replace with new spring. Note - hook the "lower" half of spring (the end with the U hook) first, then wedge/slide the other end until it hooks into slot.
Put parts back together in reverse order.
Read less
Was this instruction helpful to you?
Thank you for voting!
- Customer:
- E G from SILVERDALE, WA
- Parts Used:
- W10211972
- Difficulty Level:
- A Bit Difficult
- Total Repair Time:
- 30 - 60 mins
- Tools:
- Pliers, Screw drivers
The display kept asking me to close the door, even though the door was closed. The interior light stayed on.
I used a Google search to show how to access the area behind the front panel. There was a folded paper copy with a schematic and wiring diagram in that space.Then I used a multi-meter to determine which of the THREE micro-switches was causing the problem. I called your help line and ordered a replacement switch. The switch was delayed
... Read more
in transit so your agent credited me with the cost of shipping.
When the part arrived, it had three terminals instead of two as shown in the on-line picture but that did not cause any difficulty in using it. It took about 20 minutes to remove and replace the old switch.
All seems to be working well now.
Finding which of the THREE switches was the problem was the most difficult part of the repair. All three "clicked" but the defective one did not click as easily. It needed to be depressed more than the door latch can would provide. Old age?
When the part arrived, it had three terminals instead of two as shown in the on-line picture but that did not cause any difficulty in using it. It took about 20 minutes to remove and replace the old switch.
All seems to be working well now.
Finding which of the THREE switches was the problem was the most difficult part of the repair. All three "clicked" but the defective one did not click as easily. It needed to be depressed more than the door latch can would provide. Old age?
Read less
Was this instruction helpful to you?
Thank you for voting!