


Models
>
GS2182NKGQ
GS2182NKGQ Maytag Refrigerator
Jump to:
Find Part by Name
Keep searches simple, eg. "belt" or "pump".
Diagrams for GS2182NKGQ
Viewing 9 of 9


Keep searches simple, eg. "belt" or "pump".

In Stock
Order now and your part arrives by Apr 26

$21.82
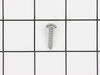
This is a screw and it is made for multiple appliances in your home. This model is called a sheet metal screw because it has sharp points, and the threads are closer together. This screw is designed t...
In Stock
Order now and your part arrives by Apr 26

This lower hinge pin is almost two inches long. It is made entirely of plastic and it is all black in color.
No Longer Available

In Stock
Order now and your part arrives by Apr 26

$16.35
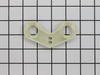
This part is the replacement natural door closer for your refrigerator. It is black in color and is approximately 3 inches by 2 inches in size. The natural door closer allows your refrigerator door to...
In Stock
Order now and your part arrives by Apr 26

In Stock
Order now and your part arrives by Apr 26

$40.65
This fourteen cube ice cube tray is eleven inches long. It is all white in color and is made entirely of plastic.
In Stock
Order now and your part arrives by Apr 26

$7.60
This is a multi-use frame screw that fits a variety of power tools and equipment. Follow installation instructions and safety practices provided in the manual by the manufacturer.
Special Order

Sold individually. The size of this screw is 1/4" hex head and 10-12 x 1/2".
In Stock
Order now and your part arrives by Apr 26

$7.60
This screw is less than an inch long, and is made entirely of metal. Sold individually.
In Stock
Order now and your part arrives by Apr 26

Special Order

Special Order
Questions and Answers
We're sorry, but our Q&A experts are temporarily unavailable.
Please check back later if you still haven't found the answer you need.
Common Problems and Symptoms for GS2182NKGQ
Viewing 7 of 7Light not working
Fixed by these parts
How to fix it
Door won’t open or close
Fixed by these parts

How to fix it
Fridge too warm
Fixed by these parts

How to fix it
Door Sweating
Fixed by these parts
How to fix it
Fridge too cold
Fixed by these parts

How to fix it
Door latch failure
Fixed by these parts
How to fix it
Noisy
Fixed by these parts

How to fix it


Keep searches simple. Use keywords, e.g. "leaking", "pump", "broken" or "fit".
- Customer:
- Clint from Rayville, MO
- Parts Used:
- W11384469
- Difficulty Level:
- Really Easy
- Total Repair Time:
- Less than 15 mins
- Tools:
- Screw drivers
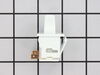
Lights inside refrigerator not working
I used a flat-head screwdriver to pop out the old light rocker switch. Then, I unplugged the wires, plugged them into the new light rocker switch, and then popped the new switch into the hole. That's it! Lights began working again.
Was this instruction helpful to you?
Thank you for voting!
- Customer:
- James Richard from St. Cloud, MN
- Parts Used:
- W11384469
- Difficulty Level:
- Easy
- Total Repair Time:
- Less than 15 mins
- Tools:
- Socket set
Light Switch broke
An easy job for smaller hands. Removed the two bolts holding the light cover. Removed two electrical connections from the old switch by pinching the retaining clip,removed the switch, snapped in the new one and re-attached the connectors. Your online illustrations helped me to know that the plastic housing for the light switch would only
... Read more
swing down so far and was not intended to be removed. Saved me from breaking that plastic cover's tabs. This home repair saved me more than 5 times the cost of hiring a professional to do it. Very happy homeowner.
Read less
Was this instruction helpful to you?
Thank you for voting!
- Customer:
- David from Albany, OR
- Parts Used:
- W11384469
- Difficulty Level:
- Really Easy
- Total Repair Time:
- Less than 15 mins
- Tools:
- Screw drivers
The light switch on the refridgerator broke - no light.
Once I saw the replacement part I understood how to pry out the switch with a small screwdriver. Then just unplug the old one, plug in the new one and pop it into place.
The PartSelect site made it easy to correctly identify the correct part, it was inexpensive, and the shipping was fast.
I'm very pleased!
The PartSelect site made it easy to correctly identify the correct part, it was inexpensive, and the shipping was fast.
I'm very pleased!
Was this instruction helpful to you?
Thank you for voting!