


Models
>
MEDB955FC2
MEDB955FC2 Maytag Dryer
Jump to:
Find Part by Name
Keep searches simple, eg. "belt" or "pump".
Diagrams for MEDB955FC2
Viewing 5 of 5


 Diagram and Parts List for Maytag Dryer")

Keep searches simple, eg. "belt" or "pump".

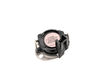
$19.63
This drum support roller is sold individually. Most dryers require two. The tri-rings are included. This is a drum support roller for a dryer. It is a genuine replacement part. This part is sold separ...
In Stock
Order now and your part arrives by Apr 26

$27.28
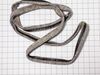
Often referred to as a dryer belt tension pulley wheel, this idler pulley is an OEM approved replacement part for a variety of dryer models. The idler pulley puts tension on the drive belt, and if the...
In Stock
Order now and your part arrives by Apr 26

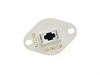
The internal-bias thermostat, also know as a thermistor, is used to prevent the dryer from overheating. It does this by monitoring and controlling the temperature of the inside of the dryer drum. If ...
In Stock
Order now and your part arrives by Apr 26

$11.98
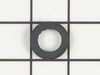
This small but mighty OEM piece is called a tri-ring and is used to support the drum roller shaft and the idler pulley shaft in your dryer. It helps to provide a tight seal between components by evenl...
In Stock
Order now and your part arrives by Apr 26

$6.51
It is important for your dryer to be properly leveled, as an unleveled one can cause excessive vibration and noise when operating, may not drain properly, and can cause excessive wear on various parts...
In Stock
Order now and your part arrives by Apr 26

$27.83
If your dryer is not tumbling, will not start, or is excessively noisy while operating, there may be an issue with your idler pulley. The idler pulley works by maintaining a constant tension on the dr...
In Stock
Order now and your part arrives by Apr 26

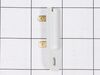
This heating element connection wire kit is a genuine OEM replacement for your electric dryer. The kit is used to connect the thermostat to the heater element. The kit comes with a yellow wire nut and...
In Stock
Order now and your part arrives by Apr 26

$7.60
This is a multi-use screw and can be used on a variety of appliances. The measurements of the screw are: 8/18 x 3/8. *Please note: the screw is sold individually. Refer to the manual provided by the m...
In Stock
Order now and your part arrives by Apr 26

$11.98
This 18 ml bottle of white appliance touch-up paint is used to cover scratches or marks on your appliance. The white touch-up paint can be used on refrigerators, microwaves, ranges, clothes dryers, an...
In Stock
Order now and your part arrives by Apr 26

$7.60
This is a multi-use screw mostly used in dryers. It has a diameter of #10, length of one inch, and thread size of 16. Remember to follow safety practices and instructions provided in the manufacturer ...
In Stock
Order now and your part arrives by Apr 26

This is a multi-use cover screw. It fits appliances such as dryers, ranges, washers, dishwashers, refrigerators, air conditioners, washer dryer combos, freezers, wall ovens, microwaves, dehumidifiers,...
In Stock
Order now and your part arrives by Apr 26

This insert is sold individually. Knob not included. Knob is sold separately.
In Stock
Order now and your part arrives by Apr 26
Questions and Answers
We're sorry, but our Q&A experts are temporarily unavailable.
Please check back later if you still haven't found the answer you need.
Common Problems and Symptoms for MEDB955FC2
Viewing 9 of 9Noisy
Fixed by these parts


How to fix it
Not Heating
Fixed by these parts


How to fix it
Too hot
Fixed by these parts
How to fix it
Won’t Start
Fixed by these parts
How to fix it
Drum Not Spinning
Fixed by these parts
How to fix it
Touchpad does not respond
Fixed by these parts
How to fix it
Leaking
Fixed by these parts
How to fix it
Marks left on clothes
Fixed by these parts
How to fix it
Timer Not Working
Fixed by these parts
How to fix it


Keep searches simple. Use keywords, e.g. "leaking", "pump", "broken" or "fit".
- Customer:
- GREGORY from Wilsonville, OR
- Parts Used:
- 279640
- Difficulty Level:
- Easy
- Total Repair Time:
- 15 - 30 mins
- Tools:
- Nutdriver, Pliers, Screw drivers
Very Loud Squeaking Noise
1) Disconnected power cord from wall. 2) Disconnected vent hose from back of dryer. 3)Removed dryer rear panel. 4)Disengaged tension spring on idle wheel arm. 5) Removed worn idle wheel. 6)Installed new Idler wheel assembly. 7) Vacuumed dust from rear of dryer (optional, recommended). 8) Reinstalled rear cover, vent hose and power cord. E
... Read more
asy repair 15-30
Read less
Was this instruction helpful to you?
Thank you for voting!
- Customer:
- Robert from Princeton, WV
- Parts Used:
- 279640
- Difficulty Level:
- Really Easy
- Total Repair Time:
- Less than 15 mins
- Tools:
- Nutdriver, Screw drivers
TOb stopped turning after a week or so of high pitched "squeals" coming from inside the dryer.
I recommend you order the idler pulley as soon as you start to hear the unusual noise indicating metal against metal. Replace the idler pulley before it fails and possibly causes more damage to the drive system. Simply removed the power cord at the back of the dryer and then the multiple screws holding the back panel in place as well as
... Read more
the clip holding the exhaust vent in place. You may need to remove the top panel to access a few of these screws. A diagram of the belt routing is in the paperwork I found behind the front lower panel of the dryer. This too is easily removed with just a few screws.
Read less
Was this instruction helpful to you?
Thank you for voting!
- Customer:
- Robert from GOODRICH, TX
- Parts Used:
- WPW10314173
- Difficulty Level:
- Easy
- Total Repair Time:
- 30 - 60 mins
- Tools:
- Nutdriver, Pliers, Screw drivers, Socket set
A high pitched squeal when drum was rolling.
First my son and I moved the dryer to the garage as we believed there would be a lot of lint possible during disassembly. Used a flat head screwdriver to pop the top from dryer housing. Then removing 2 nuts to facilitate the removal of the front of the dryer. The drum was able to be removed to diagnose the offending drum roller wheel.
... Read more
The drum roller wheel has experienced a failure as it had melted off of the metal spacer. Removing it and replacing with the new one was pretty easy. We then used a shop vac and an air hose to clean out all the lint, coins, paper clips and lost jewelry. Surprisingly there was not a single sock in there. Put it all back together in reverse order and plugged it in and now spins like a dream.
Read less
Was this instruction helpful to you?
Thank you for voting!