



Models
>
GR-L28AKQQ
GR-L28AKQQ LG Refrigerator
Jump to:
Find Part by Name
Keep searches simple, eg. "belt" or "pump".
Keep searches simple, eg. "belt" or "pump".

In Stock
Order now and your part arrives by Aug 7
$262.85
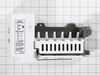
This ice maker assembly kit includes the ice maker, housing, and control device for full functionality. It automatically receives water, freezes it, and dispenses ice into the bin. Designed for easy i...
Special Order
$112.72
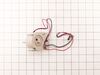
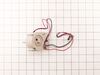
This 13-volt evaporator fan motor helps circulate air over the refrigerator coils. These coils will then convert the heat into cool air, which is then circulated from the freezer section to the fresh ...
In Stock
Order now and your part arrives by Aug 7
This ice bin is for refrigerators.
Ice bin stores ice cubes in the freezer section of the refrigerator.
Follow the instructions in the owner's manual when installing this part.
No Longer Available
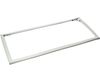
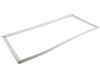
This door gasket is used to make an air-tight seal for the cabinet when the door is closed.
No Longer Available
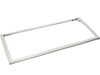
This door gasket is used to make an air-tight seal for the cabinet when the door is closed.
No Longer Available
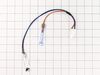
$35.34
If your fridge is frosting up too much or not cooling like it should, this defrost sensor and thermistor assembly could be the fix. It keeps an eye on the coil temperature and tells the system when to...
In Stock
Order now and your part arrives by Aug 7
In Stock
Order now and your part arrives by Aug 7
Special Order
Common Problems and Symptoms for GR-L28AKQQ
Viewing 8 of 8Leaking
Fixed by these parts

How to fix it
Ice maker not making ice
Fixed by these parts
How to fix it
Door won’t open or close
Fixed by these parts
How to fix it
Noisy
Fixed by these parts
How to fix it
Ice maker won’t dispense ice
Fixed by these parts
How to fix it
Fridge too warm
Fixed by these parts
How to fix it
Not dispensing water
Fixed by these parts
How to fix it
Freezer not defrosting
Fixed by these parts
How to fix it
Keep searches simple. Use keywords, e.g. "leaking", "pump", "broken" or "fit".
- Customer:
- Scott from JUPITER, FL
- Parts Used:
- 6615JB2005H
- Difficulty Level:
- Easy
- Total Repair Time:
- 1- 2 hours
- Tools:
- Pliers, Screw drivers
Replace Thermistor in back of freezer
Turn off power, remove upper and lower drawers (may need to open upper refrigerator doors to remove large freezer bin,) remove drawer supports (upper and lower), remove rear freezer panel (trick is to loosen 4 screws on fan bumpout to get the panel to come free from the freezer side wall), test thermistor with multimeter (should have cont
... Read more
inuity or near zero resistance across 2 orange fuse wires) before cutting zip ties, cut zip ties holding Thermistor in place, remove old Thermistor, install new Thermistor, install new zip ties, replace rear freezer panel, install upper and lower drawer supports, install drawers, turn on power, should be fixed if error code doesn't return after 6 hours.
Read less
Was this instruction helpful to you?
Thank you for voting!
- Customer:
- Tom from EASTON, PA
- Parts Used:
- MJU62070602
- Difficulty Level:
- Easy
- Total Repair Time:
- 30 - 60 mins
- Tools:
- Screw drivers, Wrench (Adjustable)
Water feed line running from water valve to filter housing was leaking
Shut off water supply. Disconnect main supply line. Remove rear lower panel on back of refrigerator. Remove all tubing clamps on back. Disconnect leaking tubing from water supply valve. Remove water filter and unscrew/remove water filter housing. Replace tubing - connect to water filter housing then to water supply valve. Reconnect filter
... Read more
housing and filter. Reinstall lower panel, then main water supply line, then all tubing clamps. Turn water back on and check for leaks after discarding several glasses of water to fill filter. Job complete!
Read less
Was this instruction helpful to you?
Thank you for voting!
- Customer:
- John from HILLSBORO, OR
- Parts Used:
- AEQ36756901
- Difficulty Level:
- Easy
- Total Repair Time:
- 30 - 60 mins
- Tools:
- Pliers, Screw drivers
Ice maker bail frozen. Chose to replace the entire assembly
Examined old ice maker. It is held by some Philips screws. There are many screws you don't need to unscrew so look carefully. Then disconnected th dual in line connector. There is a little push tab to squeeze to release. Then the ground is connected with a screw. It's a little hard to see but unscrew that. My replacement came with no
... Read more
instructions or screws so try not to drop the screws down in the netherlands of the fridge. The hardest part was maneuvering the icemaker to reattach the power and ground. Even with that pretty straight forward replacement.
Read less
Was this instruction helpful to you?
Thank you for voting!