


Models
>
LMH2016ST
LMH2016ST (CSBELGA) LG Microwave
Jump to:
Find Part by Name
Keep searches simple, eg. "belt" or "pump".
Diagrams for LMH2016ST
Viewing 7 of 7


Keep searches simple, eg. "belt" or "pump".

On Order

$62.61
If the vent grille for your microwave has become broken or damaged, this is a genuine OEM replacement part. The vent grille is made of black plastic and measures approximately 24 inches long and 3.5 i...
In Stock
Order now and your part arrives by Apr 11

In Stock
Order now and your part arrives by Apr 11

On Order

Special Order

In Stock
Order now and your part arrives by Apr 11

This charcoal filter in manufactured to fit a microwave. It removes food odors from the air circulating through your appliance vent. Youi may need to replace this part if you notice odor when cooking ...
No Longer Available

In Stock
Order now and your part arrives by Apr 11

$17.44
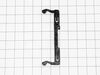
This bracket holds the metal or plastic flapper that closes off the exhaust duct when the fan is not running and opens when the fan turns on. If the exhaust fan on your microwave does not appear to be...
On Order

$14.16
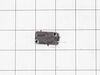
The locker, or door latch assembly fits to the inside of the microwave door, and keeps the door closed. If the door on your microwave oven doesn’t appear to close properly, you may have a problem with...
In Stock
Order now and your part arrives by Apr 11

$14.16
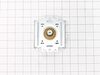
This metal vent damper door closes off the exhaust duct when the fan is not running to stop outside air from entering the microwave unit, and opens when the fan turns on to allow air to vent away from...
In Stock
Order now and your part arrives by Apr 11

$107.20
This part is the replacement base plate trim, also known as the front décor for your microwave. It is gray in color and is approximately 30 inches long and 1 ½ inches wide. The base plate trim forms a...
In Stock
Order now and your part arrives by Apr 11
Questions and Answers
We're sorry, but our Q&A experts are temporarily unavailable.
Please check back later if you still haven't found the answer you need.
Common Problems and Symptoms for LMH2016ST
Viewing 6 of 6Door not closing properly
Fixed by these parts


How to fix it
No heat
Fixed by these parts

How to fix it
Won’t turn on
Fixed by these parts
How to fix it
Tray won’t turn
Fixed by these parts
How to fix it
Doesn’t shut off
Fixed by these parts
How to fix it
Noisy
Fixed by these parts
How to fix it
Keep searches simple. Use keywords, e.g. "leaking", "pump", "broken" or "fit".
- Customer:
- Joshua from WHITE LAKE, MI
- Parts Used:
- 6600W1K001D, 6600W1K001C
- Difficulty Level:
- Very Easy
- Total Repair Time:
- 15 - 30 mins
- Tools:
- Screw drivers
Microwave would not rotate or heat up food.
After watching a few youtube videos, I used a phillips SD to take controll pannel off to access the switches that sense when microwave door is closed. Swapped out all 3 switched and mocrowave works like new. $20 fix (shipping included)
Was this instruction helpful to you?
Thank you for voting!
- Customer:
- Edward from ESCONDIDO, CA
- Parts Used:
- MCR62347202
- Difficulty Level:
- Easy
- Total Repair Time:
- 30 - 60 mins
- Tools:
- Screw drivers
Bezel on the fan drawer scratched. Wanted to replace
Leave the unit installed. Remove 8 screws, 4 on each side of the bottom of the drawer. It is hinged on the back but front will drop down. Remove screws attached to the white slide rails but hold bezel assembly so the spring metal on each side do no break. Look in assembly from the back to front. With a long Phillips remove the screws hold
... Read more
ing the bezel on. 3 screws. Remove old Bezel. Put new on and reassemble using the reverse.
Read less
Was this instruction helpful to you?
Thank you for voting!
- Customer:
- Andy from PERRYSBURG, OH
- Parts Used:
- MDX61912701
- Difficulty Level:
- Really Easy
- Total Repair Time:
- 30 - 60 mins
- Tools:
- Screw drivers
Vent Grille tabs snapped off
Repair was easy but you have to remove the screw at the top of the microwave (top left) in order to secure the far left tab with the hole in the tab. Place the grille in place, push to the left and then secure the screw you removed. Just remember that the mounted screw will need to be removed the next time you need access in order to repl
... Read more
ace the charcoal filter.
Read less
Was this instruction helpful to you?
Thank you for voting!