



Models
>
LSSC243ST
LSSC243ST (ASTCNA0) LG Refrigerator
Jump to:
Find Part by Name
Keep searches simple, eg. "belt" or "pump".
Diagrams for LSSC243ST
Viewing 6 of 6


Keep searches simple, eg. "belt" or "pump".
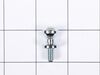
$15.26
This part includes a single mounting bolt needed to secure the door handle to your refrigerator. This part is commonly replaced because the handle has started to loosen. Try tightening the screw first...
In Stock
Order now and your part arrives by Aug 6
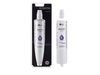
Enjoy cleaner, better-tasting water and ice with this refrigerator water filter. It uses activated carbon to reduce things like chlorine, lead, and other impurities—though it doesn’t remove fluoride. ...
In Stock
Order now and your part arrives by Aug 6
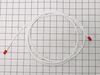
$32.12
This part is the replacement water line or tube for your refrigerator. It is made of white plastic and is sold individually. This tube supplies water to the ice maker and water dispenser If your refri...
In Stock
Order now and your part arrives by Aug 6

$32.12
This part is the replacement water line for your refrigerator. It is a long plastic tube, which is 5/16 of an inch in diameter. If your refrigerator is leaking, or if it will not dispense water or ice...
In Stock
Order now and your part arrives by Aug 6
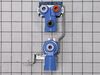
$136.67
This water inlet valve has three solenoid valves and push in fittings. When energized this part releases water from the supply line into the ice mold.
In Stock
Order now and your part arrives by Aug 6
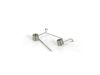
$15.26
This genuine OEM lever spring exerts tension between the ice maker door plunger and the ice maker itself on your refrigerator. If there is little to no tension holding your ice door seal in place, the...
In Stock
Order now and your part arrives by Aug 6
In Stock
Order now and your part arrives by Aug 6
Special Order
In Stock
Order now and your part arrives by Aug 6
In Stock
Order now and your part arrives by Aug 6
In Stock
Order now and your part arrives by Aug 6
$81.17
If your LG fridge isn?t dispensing ice like it should, this motor might be the fix. It opens and closes the ice chute door so ice can come out while keeping warm air out of the freezer. Made for selec...
In Stock
Order now and your part arrives by Aug 6
Common Problems and Symptoms for LSSC243ST
Viewing 4 of 4Leaking
Fixed by these parts

How to fix it
Door won’t open or close
Fixed by these parts
How to fix it
Not dispensing water
Fixed by these parts
How to fix it
Ice maker not making ice
Fixed by these parts
How to fix it

Keep searches simple. Use keywords, e.g. "leaking", "pump", "broken" or "fit".
- Customer:
- Linda from VALE, OR
- Parts Used:
- 6600JB3007K
- Difficulty Level:
- Really Easy
- Total Repair Time:
- 15 - 30 mins
- Tools:
- Pliers, Screw drivers
The lights wouldn't always come on.
I actually watched a YouTube video for LG refrigerators. The hardest part was taking the wire harness out. Mine was really stuck in there. But got it, put the new switch in and viola it worked. Yay!
Was this instruction helpful to you?
Thank you for voting!
- Customer:
- Brannon from SAN ANTONIO, TX
- Parts Used:
- MJU62070603
- Difficulty Level:
- Easy
- Total Repair Time:
- 1- 2 hours
- Tools:
- Screw drivers, Wrench (Adjustable)
Water Line from filter to water valve leaking.
1. Remove the filter - 1 screw at top of filter and pull-out. 2. Use crescent wrench to push down at tube inlet and pull tube out. 3. Remove bottom screen from refrigerator. 4. Use crescent wrench to push down on water inlet and pull out tube. 5. Route new line on back of refrigerator. 6. Install is the reverse of removal. Thanks.
Was this instruction helpful to you?
Thank you for voting!
- Customer:
- Albert from NORTHRIDGE, CA
- Parts Used:
- 5221JA2006D
- Difficulty Level:
- Really Easy
- Total Repair Time:
- 30 - 60 mins
- Tools:
- Screw drivers, Socket set, Wrench set
whater valve whith a defected selenoid and water leaks.
First ,I unplug the refrigerator .
2nd i remove the back cover, clean the dust.
3th disconnect the water line, remove the all valve..
4th unplug all the wires and code ea with a No,remove the water lines
5th replace the valve reconnect the wires and water lines.replace the
back cover at last screw back the w ... Read more ater line.check for water leaks .
i found ease the valve replacement installation.
.Thanks for the video.
2nd i remove the back cover, clean the dust.
3th disconnect the water line, remove the all valve..
4th unplug all the wires and code ea with a No,remove the water lines
5th replace the valve reconnect the wires and water lines.replace the
back cover at last screw back the w ... Read more ater line.check for water leaks .
i found ease the valve replacement installation.
.Thanks for the video.
Read less
Was this instruction helpful to you?
Thank you for voting!