



Models
>
GR-J318LSJM
GR-J318LSJM (ASBCNA2) LG Refrigerator
Jump to:
Find Part by Name
Keep searches simple, eg. "belt" or "pump".
Diagrams for GR-J318LSJM
Viewing 7 of 7


Keep searches simple, eg. "belt" or "pump".
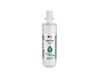
This refrigerator water filter replacement is for 2010 LG refrigerators that have either forward French doors or are the four-door dispensing models. This filter is designed to minimize impurities tha...
In Stock
Order now and your part arrives by Aug 8
$15.26
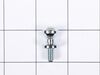
This part includes a single mounting bolt needed to secure the door handle to your refrigerator. This part is commonly replaced because the handle has started to loosen. Try tightening the screw first...
In Stock
Order now and your part arrives by Aug 8
$66.86
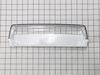
Need more space in your fridge door? This clear, gallon-sized bin is a great way to organize drinks, sauces, and jars. It fits on the right-side door of certain refrigerators and installs easily—no to...
In Stock
Order now and your part arrives by Aug 8
In Stock
Order now and your part arrives by Aug 8
In Stock
Order now and your part arrives by Aug 8
In Stock
Order now and your part arrives by Aug 8
$103.17
Keep your LG refrigerator running efficiently with this replacement door gasket, also known as a door seal. It helps block warm air from entering the fridge, preserving the cool temperature inside. If...
In Stock
Order now and your part arrives by Aug 8
$103.17
Keep your fridge cool and efficient with this replacement door gasket. Made from flexible rubber, it lines the edge of the refrigerator door to seal in cold air and keep warm air out. If your current ...
In Stock
Order now and your part arrives by Aug 8
In Stock
Order now and your part arrives by Aug 8
$24.00
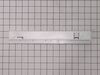
This rail connector is a replacement structural component designed to join and stabilize sliding or support rails. It ensures smooth movement and alignment and is commonly replaced when worn or broken.
In Stock
Order now and your part arrives by Aug 8
In Stock
Order now and your part arrives by Aug 8
Special Order
Common Problems and Symptoms for GR-J318LSJM
Viewing 8 of 8Door won’t open or close
Fixed by these parts
How to fix it
Leaking
Fixed by these parts

How to fix it
Not dispensing water
Fixed by these parts
How to fix it
Door Sweating
Fixed by these parts
How to fix it
Noisy
Fixed by these parts
How to fix it
Frost buildup
Fixed by these parts
How to fix it
Freezer section too warm
Fixed by these parts
How to fix it
Ice maker not making ice
Fixed by these parts
How to fix it
Keep searches simple. Use keywords, e.g. "leaking", "pump", "broken" or "fit".
- Customer:
- Megan from Elk Grove, CA
- Parts Used:
- ADX72930461, ADX72930460
- Difficulty Level:
- Very Easy
- Total Repair Time:
- Less than 15 mins
- Tools:
- Screw drivers
Replaced Old Molded Gasket with new one
For the right side of the refrigerator door, just pulled off the old gasket and replaced it with the new one. Old gasket came off easily. Just had to pull it off. No screws on the right side. Just pushed the new one in place in the groove on the door.
For the left side, needed a Phillip’s screwdriver to remove the flap first. H ... Read more elps to have a second person hold the door from moving. Once flap was off, pulled the old gasket off and installed the new one just like the right side. Then screwed the flap back on once the gasket was in the groove properly.
Initially after install, it seemed like the magnet on the door was not strong enough but after a couple of days, the magnet seems a lot stronger, sealing the air out. Very happy I replaced it. It was a lot simpler to replace than I thought it would be.
For the left side, needed a Phillip’s screwdriver to remove the flap first. H ... Read more elps to have a second person hold the door from moving. Once flap was off, pulled the old gasket off and installed the new one just like the right side. Then screwed the flap back on once the gasket was in the groove properly.
Initially after install, it seemed like the magnet on the door was not strong enough but after a couple of days, the magnet seems a lot stronger, sealing the air out. Very happy I replaced it. It was a lot simpler to replace than I thought it would be.
Read less
Was this instruction helpful to you?
Thank you for voting!
- Customer:
- Konnie from SALEM, OR
- Parts Used:
- ADX72930461, ADX72930460
- Difficulty Level:
- Easy
- Total Repair Time:
- Less than 15 mins
- Tools:
- Screw drivers
Moldy and torn gaskets
Once I U tubed the the removal and replacement of the gaskets it was super easy. The right gasket change was easy without tools. The left gasket required me to remove the mullion first, which is why I used Utube.
Was this instruction helpful to you?
Thank you for voting!
- Customer:
- ROGER from SCHELLSBURG, PA
- Parts Used:
- MJB62830601
- Difficulty Level:
- Really Easy
- Total Repair Time:
- Less than 15 mins
- Tools:
- Screw drivers
Door stopper broke
Installed new door stopper with screw driver on bottom of french door
Was this instruction helpful to you?
Thank you for voting!