



Models
>
LK45C
LK45C (NONE) LG Refrigerator
Jump to:
Find Part by Name
Keep searches simple, eg. "belt" or "pump".
Keep searches simple, eg. "belt" or "pump".
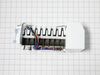
In Stock
Order now and your part arrives by Aug 6

In Stock
Order now and your part arrives by Aug 6
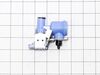
$178.35
This water inlet valve is a genuine replacement part that controls the flow of water to your refrigerator’s ice maker and dispenser, helping ensure steady ice production and proper dispensing. It feat...
In Stock
Order now and your part arrives by Aug 6
In Stock
Order now and your part arrives by Aug 6
Special Order
Special Order
Special Order
Special Order

Common Problems and Symptoms for LK45C
Viewing 2 of 2Leaking
Fixed by these parts

How to fix it
Ice maker not making ice
Fixed by these parts
How to fix it
Keep searches simple. Use keywords, e.g. "leaking", "pump", "broken" or "fit".
- Customer:
- Norris from Telford, PA
- Parts Used:
- 5989JA0002N
- Difficulty Level:
- A Bit Difficult
- Total Repair Time:
- 30 - 60 mins
- Tools:
- Screw drivers
icemaker stopped working
This is bottom drawer type frige. Icemaker is inside (not in the door) and hard to reach. I first tested the solenoids by disconnecting them and using a test cord, energized them independent of the frige wiring. They worked ok. Note: this frige has (2) solenoids going to the icemaker. And it has (3) solenoids serving the water disp
... Read more
enser. The icemaker solenoids are wired in parallel. I removed the icemaker by removing (1) screw from the bottom and loosening (2) on the top. Then removed icemaker as a complete unit disconnecting the wire connector at the same time. On the bench I tested the icemaker to verify it was defective. The wire harness has a 10 amp fuse in the black wire (hot wire). `The fuse was blown. This was sufficient to indicate the icemaker is shot. I did however, do some other tests. Cold resistance of the mold heater was 72 ohms. The timer motor was 4000 ohms. These measurements should be ok. I then activated the icemaker with a test cord, bypassing the blown fuse. The unit cycled one complete rotation then stopped. The mold heater worked. I tested the amp draw on the mold heater and it was only .1 amps. I should be a about .8 amps. I then cycled it again and then the timer motor began to sizzle and smell. Then it smoked and stopped mid-rotation. I then purchased a new icemaker. I believe the mold heater was going bad over time as this unit made ice but very slowly. This put extra strain on the motor as the mold was not releasing quickly. This damaged the motor causing it to fail.
Read less
Was this instruction helpful to you?
Thank you for voting!
- Customer:
- William from NEWPORT NEWS, VA
- Parts Used:
- 5220JB2010T
- Difficulty Level:
- Really Easy
- Total Repair Time:
- 1- 2 hours
- Tools:
- Screw drivers, Wrench (Adjustable), Wrench set
The ice maker fill valve died.
Went on line to see how difficult it would be to replace the valve. Through Google there was a video which showed in exact detail how to remove and replace the valve. Then went on line to find the replacement part which was readily available. The only problem was that the connection on the valve where the fill water enters the valve was l
... Read more
arger than the old valve. To fix that I went to a local Ace hardware store and found a nut that would fit the valve connection. Also don't forget to use a compression ring to keep the fill line secured when replaced.
Over all it was very simple and was in my "pay grade"
Over all it was very simple and was in my "pay grade"
Read less
Was this instruction helpful to you?
Thank you for voting!
- Customer:
- Frank from Lawrenceville, GA
- Parts Used:
- 5220JB2010T
- Difficulty Level:
- Easy
- Total Repair Time:
- 30 - 60 mins
- Tools:
- Pliers, Screw drivers, Wrench (Adjustable)
My ice-maker was making almost no cubes
Pulled the fridge out of its space. Removed a metal shield which covered the bottom 12" of the fridge with a Philips head screw driver. The water valve is on your right. turned off the water to the supply line. Removed the supply line using an adjustable wrench. Removed the water line gong from the pump into the fridge. It is held on with
... Read more
a "C" clip which can be pulled off with needle-nose pliers. Removed the old pump, held with one Philips head screw. Then installed the new pump, reconnected the lines, replaced the metal shield and turned the water back on. Vacuumed the fridge and its space before cleaning up. The ice-maker now works perfectly.
Read less
Was this instruction helpful to you?
Thank you for voting!