



Models
>
71302
71302 (ASW1SER) LG Refrigerator
Jump to:
Find Part by Name
Keep searches simple, eg. "belt" or "pump".
Diagrams for 71302
Viewing 6 of 6


Keep searches simple, eg. "belt" or "pump".
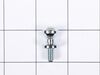
$15.26
This part includes a single mounting bolt needed to secure the door handle to your refrigerator. This part is commonly replaced because the handle has started to loosen. Try tightening the screw first...
In Stock
Order now and your part arrives by Aug 6
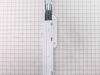
This guide rail, also known as a drawer slide rail, is a genuine OEM replacement part for the freezer section of your refrigerator. This slide rail supports the storage basket in your freezer, allowin...
No Longer Available
$15.26
This refrigerator door hinge bushing is a durable white plastic component that provides a smooth pivot point for the hinge pin, helping keep the door properly aligned and sealed. It is commonly used t...
In Stock
Order now and your part arrives by Aug 6
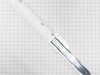
If your freezer drawer isn’t sliding like it used to, this left-side drawer slide might be the fix. It’s made of white plastic, about 15 inches long, and built to support the drawer so it moves smooth...
No Longer Available
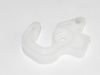
$15.26
This door stopper helps limit door movement to prevent overextension. Designed for durability and precise positioning, it supports controlled operation and long-term reliability.
In Stock
Order now and your part arrives by Aug 6
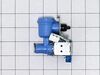
$86.45
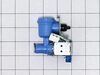
This water inlet valve controls the flow of water to your refrigerator?s ice maker and dispenser, ensuring proper operation and preventing leaks. It helps maintain efficiency by delivering the right a...
In Stock
Order now and your part arrives by Aug 6
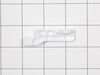
$32.12
Replacing a worn shaft cam restores smooth door movement, reduces strain on the hinge assembly, and improves sealing efficiency to keep temperatures stable and energy consumption low.
In Stock
Order now and your part arrives by Aug 6
On Order
In Stock
Order now and your part arrives by Aug 6
Special Order
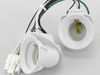
This part is a replacement light socket for your refrigerator. This model is white in color, and it has two sockets that will fit two separate light bulbs. The light socket connects to the power sourc...
No Longer Available
Common Problems and Symptoms for 71302
Viewing 10 of 10Door won’t open or close
Fixed by these parts
How to fix it
Light not working
Fixed by these parts
How to fix it
Fridge too warm
Fixed by these parts
How to fix it
Ice maker not making ice
Fixed by these parts
How to fix it
Will Not Start
Fixed by these parts
How to fix it
Leaking
Fixed by these parts
How to fix it
Clicking sound
Fixed by these parts
How to fix it
Noisy
Fixed by these parts
How to fix it
Freezer not defrosting
Fixed by these parts
How to fix it
Fridge and Freezer are too warm
Fixed by these parts
How to fix it
Keep searches simple. Use keywords, e.g. "leaking", "pump", "broken" or "fit".
- Customer:
- Ronald S. from SANTA CLARITA, CA
- Parts Used:
- 4681JB1027N
- Difficulty Level:
- A Bit Difficult
- Total Repair Time:
- 30 - 60 mins
- Tools:
- Screw drivers, Socket set
Ice was building up in the bottom floor of the freezer
This refrigerator/freezer problem had been escalating for almost a year, requiring me to frequently knock the ice buildup free with a rubber mallet. I finally decided to try to identify the problem by removing the freezer door and all of the shelves and shelf tracks (easily removed with only a phillips screwdriver). Then I removed the bac
... Read more
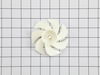
k plastic panel to expose the cooling coils, which were partially encased in ice. I deduced that the evaporator fan motor was failing, which blows air over the freezer cooling coils and forces the cool air up into the upper refrigerator section (which was not staying cold). I then found and ordered the fan motor from part select. Their search function and exploded drawing schematics made it easy to identify the part and part number. It seems the original part number had been superceded with a new number, which I ordered. Once it arrived after about a week, I transferred the fan blades from the old motor to the new fan motor, and after completely drying out the freezer compartment, I reinstalled all of the parts and plugged in the unit and waited. By the next day, the refrigerator was operating at peak efficiency, and the ice buildup in the freezer has not returned. I was very close to scrapping the entire refrigerator as junk, but with a little diagnostic effort and about $110 for the new motor, I have a fully functioning refrigerator again. Thanks to Part Select for a great experience.
Read less
Was this instruction helpful to you?
Thank you for voting!
- Customer:
- Jerry from CORSICANA, TX
- Parts Used:
- 4984JJ3003A
- Difficulty Level:
- Really Easy
- Total Repair Time:
- 30 - 60 mins
- Tools:
- Screw drivers, Socket set
old bushing worn and broken
removed the upper freezer door to access screws to remove lower door.
laid bottom door on its side, removed bad bushing, put new bushing in, put bottom door back on refridge, put upper door back on fridge. Door worked easy as when new. good closure of door and story..Happy customer, and wife even happier.....thank you....
laid bottom door on its side, removed bad bushing, put new bushing in, put bottom door back on refridge, put upper door back on fridge. Door worked easy as when new. good closure of door and story..Happy customer, and wife even happier.....thank you....
Was this instruction helpful to you?
Thank you for voting!
- Customer:
- HARRY from SILVER SPRING, MD
- Parts Used:
- 4975JJ2028D, 4975JJ2028C
- Difficulty Level:
- Very Easy
- Total Repair Time:
- Less than 15 mins
- Tools:
- Screw drivers
plastic on rail guides broke
removed three screws from each guide and removed. Replaced with new guides using the same screws.
Was this instruction helpful to you?
Thank you for voting!