



Models
>
LSC27935SW
LSC27935SW LG Refrigerator
Jump to:
Find Part by Name
Keep searches simple, eg. "belt" or "pump".
Keep searches simple, eg. "belt" or "pump".
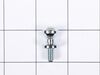
$15.26
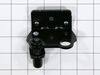
This part includes a single mounting bolt needed to secure the door handle to your refrigerator. This part is commonly replaced because the handle has started to loosen. Try tightening the screw first...
In Stock
Order now and your part arrives by Aug 6
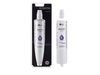
Enjoy cleaner, better-tasting water and ice with this refrigerator water filter. It uses activated carbon to reduce things like chlorine, lead, and other impurities—though it doesn’t remove fluoride. ...
In Stock
Order now and your part arrives by Aug 6
In Stock
Order now and your part arrives by Aug 6
$136.67
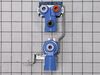
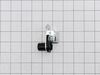
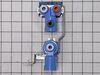
This water inlet valve has three solenoid valves and push in fittings. When energized this part releases water from the supply line into the ice mold.
In Stock
Order now and your part arrives by Aug 6
In Stock
Order now and your part arrives by Aug 6
In Stock
Order now and your part arrives by Aug 6
In Stock
Order now and your part arrives by Aug 6
In Stock
Order now and your part arrives by Aug 6
In Stock
Order now and your part arrives by Aug 6
In Stock
Order now and your part arrives by Aug 6
In Stock
Order now and your part arrives by Aug 6
Common Problems and Symptoms for LSC27935SW
Viewing 6 of 6Door won’t open or close
Fixed by these parts
How to fix it
Leaking
Fixed by these parts
How to fix it
Not dispensing water
Fixed by these parts
How to fix it
Ice maker won’t dispense ice
Fixed by these parts
How to fix it
Ice maker not making ice
Fixed by these parts
How to fix it
Ice maker dispenses too much ice
Fixed by these parts
How to fix it

Keep searches simple. Use keywords, e.g. "leaking", "pump", "broken" or "fit".
- Customer:
- Jim from SCOTTSDALE, AZ
- Parts Used:
- AEQ36756912
- Difficulty Level:
- Very Easy
- Total Repair Time:
- 15 - 30 mins
- Tools:
- Screw drivers
My LG Ice Maker stopped making ice
Once I determined the problem to be the ice maker I got on line and came across "Part Select" website, I simply put in the make & model # and I quickly found the part I needed and placed my order, much to my surprise I received the replacement part the next day. The removal and installation was extremely easy, I simply removed two "Allen"
... Read more
head screws holding the ice maker in place and removed the unit, next I un-plugged the electrical coupling and removed the ground wire. I installed the new part in the same manner the entire process took me less the 15 minutes, and most importantly we had ice in less then 2 hours.
Read less
Was this instruction helpful to you?
Thank you for voting!
- Customer:
- Chris from MURFREESBORO, TN
- Parts Used:
- AJC34211602, 4775JA2113A
- Difficulty Level:
- Easy
- Total Repair Time:
- 30 - 60 mins
- Tools:
- Screw drivers, Wrench (Adjustable)
Right side door creaky squeaky annoying
Took off door per normal instructions.
Removed the old stopper and hinge assembly (the hard rubbery parts had worn enough against each other to cause the annoying sound when opening and closing the door).
Inserted the new stopper and hinge assembly.
There was no locking nut on the newer part, so just had to level the fridge ... Read more door without that part of the instructions (from normal LG instructions)
Overall easy for a non-handy person and the annoying sound is gone.
Wife is happier now.
Removed the old stopper and hinge assembly (the hard rubbery parts had worn enough against each other to cause the annoying sound when opening and closing the door).
Inserted the new stopper and hinge assembly.
There was no locking nut on the newer part, so just had to level the fridge ... Read more door without that part of the instructions (from normal LG instructions)
Overall easy for a non-handy person and the annoying sound is gone.
Wife is happier now.
Read less
Was this instruction helpful to you?
Thank you for voting!
- Customer:
- Albert from NORTHRIDGE, CA
- Parts Used:
- 5221JA2006D
- Difficulty Level:
- Really Easy
- Total Repair Time:
- 30 - 60 mins
- Tools:
- Screw drivers, Socket set, Wrench set
whater valve whith a defected selenoid and water leaks.
First ,I unplug the refrigerator .
2nd i remove the back cover, clean the dust.
3th disconnect the water line, remove the all valve..
4th unplug all the wires and code ea with a No,remove the water lines
5th replace the valve reconnect the wires and water lines.replace the
back cover at last screw back the w ... Read more ater line.check for water leaks .
i found ease the valve replacement installation.
.Thanks for the video.
2nd i remove the back cover, clean the dust.
3th disconnect the water line, remove the all valve..
4th unplug all the wires and code ea with a No,remove the water lines
5th replace the valve reconnect the wires and water lines.replace the
back cover at last screw back the w ... Read more ater line.check for water leaks .
i found ease the valve replacement installation.
.Thanks for the video.
Read less
Was this instruction helpful to you?
Thank you for voting!