This is a mulching blade for your lawn mower. It is located underneath the lawn mower deck, and cuts the grass by rotating. This blade has a curved style shell, and includes extra cutting surfaces alo...
This is an authentic manufacturer-sourced replacement part which is specially designed for use with Craftsman lawn mowers. The grass bag frame supports and hold the grass bag in place, while it is col...
The hex bolt attaches to the washer and the square key. This part is an OEM from Craftsman for use in snowblowers and lawn mowers. It is available as an individual replacement part and is made of meta...
This replacement trail shield is specially designed for use on walk-behind lawn mowers. It is an authentic item that is sourced from original equipment manufacturer and it is sold individually. This p...
This is a replacement v-belt is a genuine high quality OEM sourced part, it is not an aftermarket imitation. It is utilized on both riding lawn mowers and snow blowers. To ensure correct application o...
This drive cable is an original part from the MTD manufacturer. This part is constructed of metal and wiring encased in plastic. The drive cable is compatible with many lawn mower machines. This item ...
This is an authentic OEM sourced replacement part that is intended to be used with lawnmowers from Troy-Bilt, Yard-Man, and MTD. The blade adapter is used to link the motor pulley, blade, and the belt...
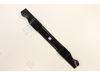
This is a Troy-Bilt, MTD, Yard Machines, and Yard Man replacement part directly sourced from the manufacturer for use in lawn mowers. The extreme blade fits between the engine baffle and the bell blad...
This spark plug is designed to provide reliable ignition and efficient fuel combustion in small engine applications. Built for consistent performance and durability, it helps maintain smooth operation...
This is an authentic filter cartridge for an engine. Its purpose is to filter out dirt and debris from the air that flows through the machine and could be harmful to the engine. This part is commonly ...
In Stock
Order now and your part arrives by Jul 19
Questions and Answers
Ask our experts a question about this part and we'll get back to you as soon as possible!
1 question answered by our experts.
< Prev
1
Next >
Sort by:
Search filter:
Clear Filter
Your search term must have 3 or more characters.
Keep searches simple. Use keywords, e.g. "leaking", "pump", "broken" or "fit".
Sorry, we couldn't find any existing answers that matched. Try using some different or simpler keywords, or submit your new question by using the "Ask a Question" button above!
Jeffrey
July 3, 2023
I can not get the black adapter and pulley off of the drive shaft to replace. Is there something I'm missing? Or is it just stuck?
For model number 12AVB2R3793
Hello Jeffrey, thank you for contacting us. We are providing you with the instructions that will help you to replace the pulley and black adapter.
1- Remove the belt cover by removing the screws.
2- Remove the screws holding the pulley in place.
3- Remove the belt from the pulley and unthread the nut securing the pulley.
4- Now flip the mower on one side and remove the bolt that holds the blade.
5- Remove the screws securing the black cover.
6- Pull it out after removing the screws.
We hope this helps!
Was this helpful?
Thank you for voting!
Ask a Question
Ask our experts a question on this part and we'll respond as soon as we can.
This was an OHV motor so in order to get to the head, you must remove the valve cover and remove the push rods. Remove all four head bolts in an even star pattern. Remove the old gasket and scrape all remaining gasket gunk. Put new gasket on and tighten head back on with an even star pattern. Slide push rods back in and adjust valves to .
... Read more004 of an inch and put valve cover back on and start it up!
Remove the top cover and pull cord assembly. Remove the muffler cover. Lift off the gas tank and disconnect from the air filter box. Remove the air filter box and carb from the head cover as a single unit. Remove the head cover. You can leave the valve cover in place. Remove old gasket material. Clean surfaces. Replace gasket. Reassemble
... Read more. *if the valve stems come loose from their seats or rockers, remove the valve cover and reseat. Reassembly is the opposite of disassembly. Happy mowing.


 – Part Number: 710-1044")